 Cannabis Grow Guide by Royal Queen Seeds
- Growing cannabis step by step
- Cannabis growing basics
- Choosing your seeds
- How to germinate seeds
- The cannabis vegetative stage
- The cannabis flowering stage
- Harvesting cannabis
- Trimming, drying, and curing
- Choosing pots and soil
-
Growing indoors
- A Complete Overview Of Growing Cannabis Indoors
- Cannabis Cultivation Tips: How To Set Up Indoor Grow Lights
- How Many Cannabis Plants Can You Grow Per Square Metre?
- Indoor Cannabis Growing: Relative Humidity and Temperatures
- Hydroponics Cannabis Growing Guide (with diagrams)
- Cannabis Micro Growing: Growing Great Weed in Tiny Spaces
- Growing outdoors
- How to grow autoflowering cannabis
- Cannabis nutrients and pH
- Cannabis troubleshooting: Nutrients
-
Cannabis troubleshooting: Growing
- Cannabis Seed Germination — Troubleshooting Guide
- How to Deal With Pythium (Root Rot) in Cannabis Plants
- Slow Cannabis Plant Growth And What You Can Do About It
- How to Prevent and Fix Stretching in Cannabis Seedlings
- Watering Your Cannabis: How to Fix Overwatering and Underwatering
- Understanding Male, Female, And Hermaphrodite Cannabis
- Identifying and Treating Common Cannabis Ailments
- How To Revive a Sick Cannabis Plant
- How to Avoid Mouldy Weed During Drying and Curing
- How to Prevent and Treat Dry and Crispy Cannabis Leaves
- What Cannabis Leaves Can Tell You
- Causes and Solutions for Yellow Cannabis Leaves
-
Cannabis Strains Grow Report
- HulkBerry Automatic Grow Report
- Blue Cheese Auto Grow Report
- Purple Punch Automatic Grow Report
- Triple G Automatic Grow Report
- Do-Si-Dos Automatic Grow Report
- Green Gelato Automatic Grow Report
- Haze Berry Automatic Grow Report
- Purple Queen Automatic Grow Report
- Cookies Gelato Automatic Grow Report
- Sherbet Queen Automatic Grow Report
- Sweet Skunk Automatic Grow Report
- Medusa F1 Grow Report
- Cannabis plant training
-
Weed growing tips
- The Cannabis Plant Anatomy
- How to preserve seeds
- How Much Sunlight Do Outdoor Cannabis Plants Need To Grow?
- How to Control and Prevent Stretching in Cannabis Plants
- My Cannabis Plants Are Growing Too Tall: What Should I Do?
- Should You Worry About Purple Or Red Cannabis Stems?
- What To Do When Your Indoor Cannabis Won’t Flower
- How To Protect Your Cannabis Plants From Heat Stress
- How To Tell If Your Female Cannabis Plant Has Been Pollinated
- Growing Medical Marijuana
- Bud Washing: How to Clean Your Weed
- Understanding Cannabis Yield per Plant

How to Avoid Mouldy Weed During Drying and Curing
Contents:
- What makes cannabis bud mouldy?
- Types of mould that affect cannabis
- How to spot mould on weed
- The risks of smoking mouldy weed
- How to prevent mould on weed
- How to test for mould on weed
- Keeping mold at bay—bottom line
- Humidity packs protect against mould
- What to do if you find mouldy buds
- Protect your weed from mould
Key Points
- Various species of mould grow on weed buds in humid conditions.
- Mouldy weed poses health hazards and must be discarded.
- Learn how to identify mouldy buds to ensure a safe smoke.
- Learn how to prevent mould in the future to protect your flowering plants and stash of processed buds.
When growing cannabis, the work doesn’t stop at harvest time—you have to take steps to prevent mould from infecting your buds during drying, curing, and storage.
Fail to take these measures, and you risk mould spoiling your entire harvest. Not only does mould on weed degrade bud quality, but it makes cannabis dangerous to use.
Continue reading to find out how to safeguard your stash against these fungal foes, ensuring freshness, smoothness, and safety along the way.
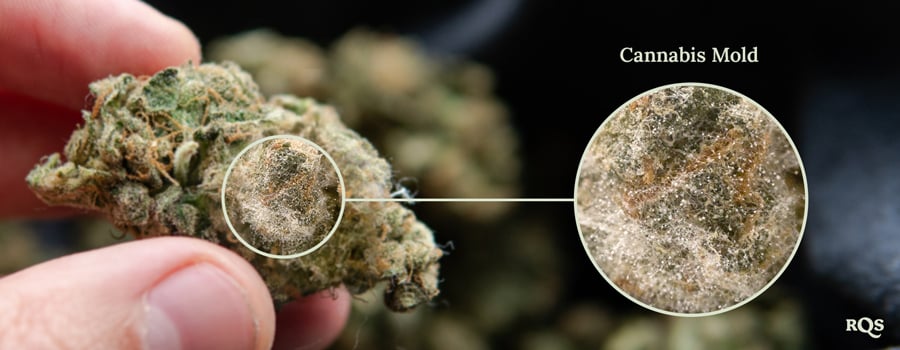
What Makes Cannabis Bud Mouldy?
Can weed get mouldy? It certainly can. Weed flowers have the potential to become mouldy during two distinct times: before harvest, when they’re still on the plant, and after harvest, during drying, curing, and storing.
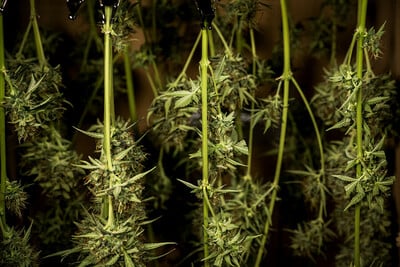
During the flowering phase of the growing cycle, when buds are still attached to the branches of living plants, excess humidity and lack of airflow can cause mould to proliferate.
Cannabis buds also become mouldy when they are incorrectly dried, cured, and stored. Errors during these steps fail to remove excess moisture from flowers, leaving them prone to mould that develops after the growing cycle has come to a close.
As a cannabis grower, you’ll drastically improve your knowledge and skill set by learning how to identify, prevent, and treat mould on your buds.
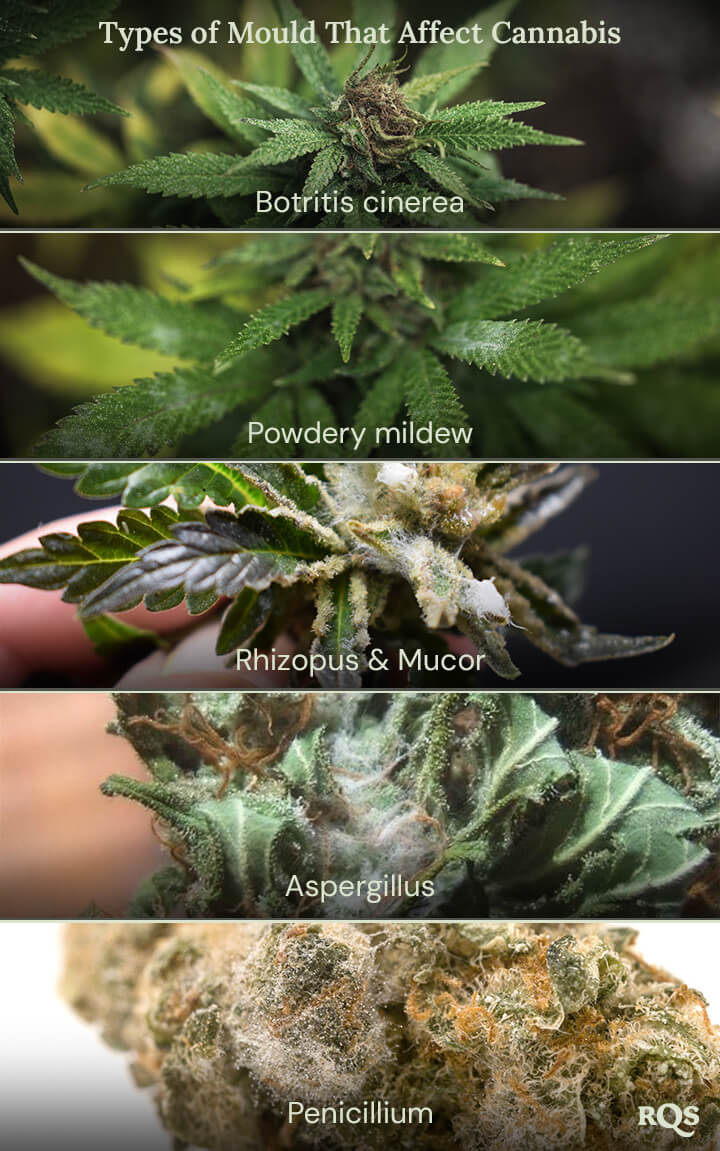
Types of Mould That Affect Cannabis
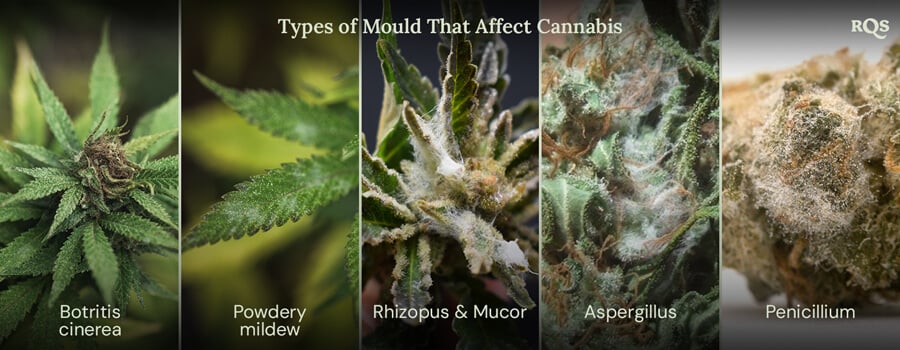
Several types of fungi have an appetite for cannabis buds. Check out the main culprits below and when they tend to strike:
- Botrytis cinerea: This pathogen causes symptoms commonly known as “bud rot”. It affects buds during their development, arising in overly humid conditions and causing internal decay.
- Powdery mildew: This fungus develops on the leaves and buds of plants during growth, especially in conditions of high humidity and poor ventilation.
- Rhizopus & Mucor: These moulds also affect plants during growth and thrive in moist environments. They often strike after bouts of heavy rain.
- Aspergillus: As one of the primary pathogens that infects flowers during storage, this mould frequently contaminates poorly dried and cured buds.
- Penicillium: Another mould that commonly impacts buds during storage, Penicillium often infects buds when humidity is too high, or those not stored in airtight containers.
How to Spot Mould on Weed
It’s important to keep an eye out for mould on weed during flowering and post-harvest. While disappointing, you must discard infected buds, as they pose a health hazard when smoked.
Check out the following sections to learn the different signs of mould and how to differentiate infected buds from healthy ones.
-
Signs of Mould: Fresh vs Dried Bud
The typical visual and physical signs of mould on weed include:
| Powdery spots | Weed flowers infected with powdery mildew exhibit white, grey, or light yellow powdery spots. |
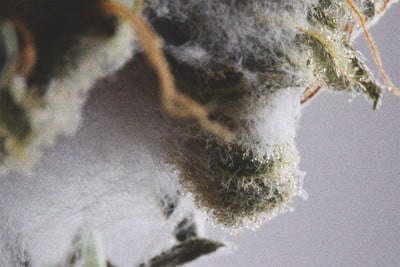
| Fuzzy or web-like texture | Both Botrytis and Aspergillus create fluffy or cobweb-like structures on or between buds. |
| Unusual colours | nusual shades of greyish-brown indicate Botrytis; hues of blue, green, and black are indicative of Penicillium and Aspergillus infections; yellow patches are the result of powdery mildew infections. |
| Glossy or slimy appearance | Some moulds cause an unnaturally shiny or wet appearance on buds. |
| Brittle and crumbly | Advanced mould infections can change the texture of buds, sometimes causing them to dry out and become brittle. |
| Slimy touch | Moulds can also cause infected buds to feel excessively moist and sticky, in a way different to the typical stickiness of resin. |
| Powdery spots | Weed flowers infected with powdery mildew exhibit white, grey, or light yellow powdery spots. |
| Fuzzy or web-like texture | Both Botrytis and Aspergillus create fluffy or cobweb-like structures on or between buds. |
| Unusual colours | Unusual shades of greyish-brown indicate Botrytis; hues of blue, green, and black are indicative of Penicillium and Aspergillus infections; yellow patches are the result of powdery mildew infections. |
| Glossy or slimy appearance | Some moulds cause an unnaturally shiny or wet appearance on buds. |
| Brittle and crumbly | Advanced mould infections can change the texture of buds, sometimes causing them to dry out and become brittle. |
| Slimy touch | Moulds can also cause infected buds to feel excessively moist and sticky, in a way different to the typical stickiness of resin. |
-
The Difference Between Mould on Weed and Trichomes
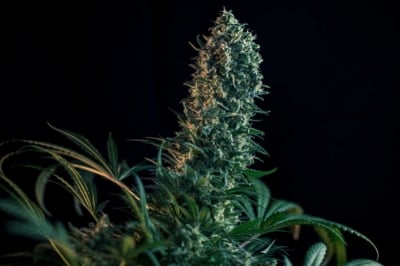
Healthy cannabis buds have a frosty, sugary appearance, owing to the layer of trichomes on their surfaces. These glandular structures are responsible for manufacturing cannabinoids and terpenes and excreting them in the form of a viscous resin.
To the untrained eye, a thick coating of trichomes could easily be mistaken for mould. However, there are a few key giveaways that help growers tell the two apart.
First, pay attention to colour. Trichomes vary from translucent to milky and amber, based on their maturity. You can use simple magnification tools, such as a handheld microscope, to get a closer look at them. In contrast, mould can exhibit all of the unusual colours listed above, including yellow and grey.
Second, take shape and texture into consideration. Trichomes are structurally distinct and have an upright, ordered, and almost “crisp” appearance. Conversely, mould either occurs as spots or a homogeneous web, often sprawling out chaotically.
-
The Importance of Smell Tests
Aside from its unique psychoactive effect, cannabis has gained recognition because of its standout aroma. Apart from colour and texture, smell also helps to differentiate healthy buds from mouldy ones.
The smell of healthy cannabis flowers varies because of the difference in aromatic molecules between strains. However, all healthy buds should smell pleasant, herbal, and somewhat skunky. You’ll detect fruity, earthy, floral, and gassy notes depending on the strain.
Mouldy weed, in contrast, smells unpleasant. You’ll pick up on musty notes alongside hints of stale hay.
The Risks of Smoking Mouldy Weed
You should never smoke mouldy weed. As a health hazard, buds infected with mould pose the following dangers:
| Respiratory issues | Mould spores can cause coughing, wheezing, and chest pain. |
| Allergic reaction | Some people may experience allergic reactions following mould exposure, including sinus pain and upper respiratory inflammation. |
| Lung infections | In severe cases, smoking mouldy cannabis can trigger serious lung infections caused by mould spores. |
How to Prevent Mould on Weed
Finding mould on the buds you worked hard to grow is nothing short of devastating. Therefore, all cannabis growers should educate themselves on how to keep weed from moulding. Keep these tips in mind when raising your plants:
| Monitor | Place a hygrometer in your growing space to get real-time feedback on humidity and temperature |
| Promote airflow | Use inline and clip-on fans indoors and in greenhouses to prevent stagnant air. |
| Manage humidity | Use a dehumidifier indoors when humidity climbs over 40% indoors during flowering. |
| Shelter & shaking | Protect outdoor plants from excess rainfall by erecting tarps or moving potted plants into greenhouses or polytunnels. Shake off excess moisture from the canopy. |
| Dry & cure properly | Employ optimal drying and curing practices. Dry your plants until the stems break when bent. Burp your curing jars and use Moisture Fighters to keep humidity within an optimal range. |
How to Test for Mould on Weed
You should consistently test your weed flowers for mould during bloom and after harvest. Use these techniques to ensure a safe smoke:
| Visual inspection | Look for unusual colours, textures, and spots, making sure to rule out trichomes. Use handheld magnification to get a closer look. |
| Touch test | Your buds should feel sticky but not slimy or overly brittle. |
| Smell test | Healthy buds should smell fresh, skunky, and floral, herbal, earthy, or sweet. Notes of mustiness and hay are signs of mould. |
| Use a blacklight | Some moulds glow under ultraviolet light, including Botrytis, Penicillium, and Aspergillus. Use a blacklight if you’re unsure. |
Keeping Mold at Bay—Bottom Line
It’s vital that you don’t rush your way through the final stages of the growing process. While we know you’ll be anxious to sample your home-grown buds, taking the time to properly trim, dry, and cure your flowers will take them to the next level in terms of flavour, aroma, and potency, all the while keeping them safe from mould.
And if you do find buds that are affected by the dreaded fungus, make sure you remove them and closely inspect the rest, as smoking mouldy weed is dangerous for your body!
Humidity Packs Protect Against Mould
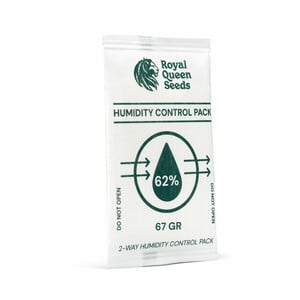
Humidity packs are small and simple tools that pull in moisture from the surrounding environment. When the moisture level starts to climb, they’ll absorb water particles that would otherwise serve as a breeding ground for mould.
-
Moisture Fighters Offer Two-Way Control
At Royal Queen Seeds, we engineered our own humidity packs specifically for curing cannabis buds. Our Moisture Fighters possess a two-way control mechanism that allows them to both trap and release moisture. This enables them to take in excess moisture while also preventing your flowers from becoming too dry and losing their flavour.
-
A Plant-Based Product With No Preservatives
Our Moisture Fighters are crafted with the health of the environment and your buds in mind. Each packet derives entirely from plant-based materials and contains absolutely zero preservatives. You don’t have to worry about any unwanted chemicals leaching out and contaminating your pristine organic flowers.
-
Humidity Indicators Keep You Informed
Moisture Fighters remove any guesswork from the curing process. Each pack features a card that houses a humidity indicator. This reusable piece of kit will let you know when you need to swap out your Moisture Fighters. Knowing exactly when to do this means you’ll keep the curing environment perfect during the entire process.
-
How to Use Moisture Fighters
Moisture Fighters are extremely easy to use. Keep your flowers juicy and terpene-rich using the steps below.
- Remove Moisture Fighters from their packaging, making sure not to open the Fighter itself.
- Place a Moisture Fighter and the humidity indicator alongside your buds in their curing jar.
- Let the Fighter do its thing. When the dot on the humidity card turns from pink to blue, swap out the Humidity Fighter for a fresh one.
- Reset the reusable indicator back to the pink setting to keep track of the new Fighter.
What to Do if You Find Mouldy Buds
If you find mouldy buds during flowering, immediately remove affected plants and discard them. Monitor your other plants closely both pre- and post-harvest, as early infections are very difficult to detect.
Post-harvest, discard all buds with any signs of mould. Do not try to salvage any jar that contains mouldy buds, even if other buds seem unaffected.
Make an effort to sanitise your growing space, curing jars, and equipment. All of these are potential vectors of transmission.
Protect Your Weed From Mould
You now know what causes bud rot, you’ve learned how weed gets mouldy, and you’re aware of how to keep fungal foes at bay.
Use the information above to minimise the chances of mould wrecking your harvests. Dial in your temperature and humidity, and closely examine your flowers both before and after harvest.
If you ever encounter mould, don’t get discouraged! Discard your buds and start afresh. View it as a learning experience, and don’t risk your health trying to remediate contaminated buds.
 Grow Guide Topic Finder
- Growing cannabis step by step
- Cannabis growing basics
- Choosing your seeds
- How to germinate seeds
- The cannabis vegetative stage
- The cannabis flowering stage
- Harvesting cannabis
- Trimming, drying, and curing
- Choosing pots and soil
-
Growing indoors
- A Complete Overview Of Growing Cannabis Indoors
- Cannabis Cultivation Tips: How To Set Up Indoor Grow Lights
- How Many Cannabis Plants Can You Grow Per Square Metre?
- Indoor Cannabis Growing: Relative Humidity and Temperatures
- Hydroponics Cannabis Growing Guide (with diagrams)
- Cannabis Micro Growing: Growing Great Weed in Tiny Spaces
- Growing outdoors
- How to grow autoflowering cannabis
- Cannabis nutrients and pH
- Cannabis troubleshooting: Nutrients
-
Cannabis troubleshooting: Growing
- Cannabis Seed Germination — Troubleshooting Guide
- How to Deal With Pythium (Root Rot) in Cannabis Plants
- Slow Cannabis Plant Growth And What You Can Do About It
- How to Prevent and Fix Stretching in Cannabis Seedlings
- Watering Your Cannabis: How to Fix Overwatering and Underwatering
- Understanding Male, Female, And Hermaphrodite Cannabis
- Identifying and Treating Common Cannabis Ailments
- How To Revive a Sick Cannabis Plant
- How to Avoid Mouldy Weed During Drying and Curing
- How to Prevent and Treat Dry and Crispy Cannabis Leaves
- What Cannabis Leaves Can Tell You
- Causes and Solutions for Yellow Cannabis Leaves
-
Cannabis Strains Grow Report
- HulkBerry Automatic Grow Report
- Blue Cheese Auto Grow Report
- Purple Punch Automatic Grow Report
- Triple G Automatic Grow Report
- Do-Si-Dos Automatic Grow Report
- Green Gelato Automatic Grow Report
- Haze Berry Automatic Grow Report
- Purple Queen Automatic Grow Report
- Cookies Gelato Automatic Grow Report
- Sherbet Queen Automatic Grow Report
- Sweet Skunk Automatic Grow Report
- Medusa F1 Grow Report
- Cannabis plant training
-
Weed growing tips
- The Cannabis Plant Anatomy
- How to preserve seeds
- How Much Sunlight Do Outdoor Cannabis Plants Need To Grow?
- How to Control and Prevent Stretching in Cannabis Plants
- My Cannabis Plants Are Growing Too Tall: What Should I Do?
- Should You Worry About Purple Or Red Cannabis Stems?
- What To Do When Your Indoor Cannabis Won’t Flower
- How To Protect Your Cannabis Plants From Heat Stress
- How To Tell If Your Female Cannabis Plant Has Been Pollinated
- Growing Medical Marijuana
- Bud Washing: How to Clean Your Weed
- Understanding Cannabis Yield per Plant


