 Cannabis Grow Guide by Royal Queen Seeds
- Growing cannabis step by step
- Cannabis growing basics
- Choosing your seeds
- How to germinate seeds
- The cannabis vegetative stage
- The cannabis flowering stage
- Harvesting cannabis
- Trimming, drying, and curing
- Choosing pots and soil
-
Growing indoors
- A Complete Overview Of Growing Cannabis Indoors
- Cannabis Cultivation Tips: How To Set Up Indoor Grow Lights
- How Many Cannabis Plants Can You Grow Per Square Metre?
- Indoor Cannabis Growing: Relative Humidity and Temperatures
- Hydroponics Cannabis Growing Guide (with diagrams)
- Cannabis Micro Growing: Growing Great Weed in Tiny Spaces
- Growing outdoors
- How to grow autoflowering cannabis
- Cannabis nutrients and pH
- Cannabis troubleshooting: Nutrients
-
Cannabis troubleshooting: Growing
- Cannabis Seed Germination — Troubleshooting Guide
- How to Deal With Pythium (Root Rot) in Cannabis Plants
- Slow Cannabis Plant Growth And What You Can Do About It
- How to Prevent and Fix Stretching in Cannabis Seedlings
- Watering Your Cannabis: How to Fix Overwatering and Underwatering
- Understanding Male, Female, And Hermaphrodite Cannabis
- Identifying and Treating Common Cannabis Ailments
- How To Revive a Sick Cannabis Plant
- How to Avoid Mouldy Weed During Drying and Curing
- How to Prevent and Treat Dry and Crispy Cannabis Leaves
- What Cannabis Leaves Can Tell You
- Causes and Solutions for Yellow Cannabis Leaves
-
Cannabis Strains Grow Report
- HulkBerry Automatic Grow Report
- Blue Cheese Auto Grow Report
- Purple Punch Automatic Grow Report
- Triple G Automatic Grow Report
- Do-Si-Dos Automatic Grow Report
- Green Gelato Automatic Grow Report
- Haze Berry Automatic Grow Report
- Purple Queen Automatic Grow Report
- Cookies Gelato Automatic Grow Report
- Sherbet Queen Automatic Grow Report
- Sweet Skunk Automatic Grow Report
- Medusa F1 Grow Report
- Cannabis plant training
-
Weed growing tips
- The Cannabis Plant Anatomy
- How to preserve seeds
- How Much Sunlight Do Outdoor Cannabis Plants Need To Grow?
- How to Control and Prevent Stretching in Cannabis Plants
- My Cannabis Plants Are Growing Too Tall: What Should I Do?
- Should You Worry About Purple Or Red Cannabis Stems?
- What To Do When Your Indoor Cannabis Won’t Flower
- How To Protect Your Cannabis Plants From Heat Stress
- How To Tell If Your Female Cannabis Plant Has Been Pollinated
- Growing Medical Marijuana
- Bud Washing: How to Clean Your Weed
- Understanding Cannabis Yield per Plant

Cannabis Seed Germination — Troubleshooting Guide
Unless you are using cuttings, growing weed starts with germinating your seeds. If your seeds don’t sprout, for whatever reason, your grow will be over before it even has a chance to start. But If you know the reasons behind germination problems, your chances of getting your grow off to a great start will greatly increase!
Contents:
-
Why your cannabis seeds aren’t germinating
- Your germination method is off
- You're lacking the right equipment
- Bad seeds
- Improper storage
- Handling seeds with bare hands
- Seeds buried too shallow or too deep
- Not using new or sterilised soil and pots
- Too much moisture
- Not enough moisture
- Drowning seeds
- Allowing seeds to germinate for too long
- Poor water quality
- Temperature too high
- Temperature too low
- Too much light
- Pests, birds, insects…
- Soil too firm
- Soil too loose
- Soil too "hot"
- Crowded pots
Why Your Cannabis Seeds Aren’t Germinating
There are a whole lot of things that can prevent cannabis seeds from germinating. Here are some of the most common reasons why your seeds may not “pop”:
Struggling to get your seeds to sprout? Download our grow guide for expert tips to set your grow up for success!
Free RQS
Grow Guide!
1. Your Germination Method Is Off
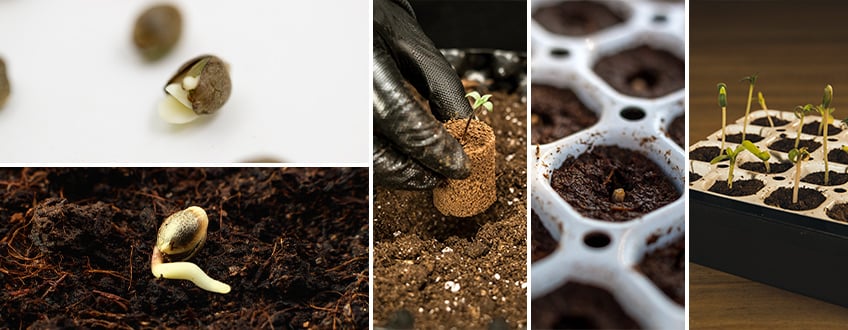
There are many different ways to germinate cannabis seeds, and different growers have their favourites. In general, we do not recommend changing your germination method if it's one that you've been using successfully for some time, as the germination and seedling stages are very touch-and-go.
If, however, you're having trouble germinating your cannabis seeds, revising your technique might be in order. At RQS, we recommend germinating your seeds in one of two ways:
- Between moist paper towels in a dark place or room
- Directly in sterilised, moist soil—the way nature intended
Other germination methods (such as soaking seeds in water) might be popular, but, at least in our experience, they do not provide the best germination rates.
2. You're Lacking the Right Equipment
Sometimes the right equipment can make all the difference. Since the germination stage can be so challenging for beginner growers, we've created a line of products specially designed to simplify the process as much as possible. So if you're struggling to germinate your seeds, consider checking out:
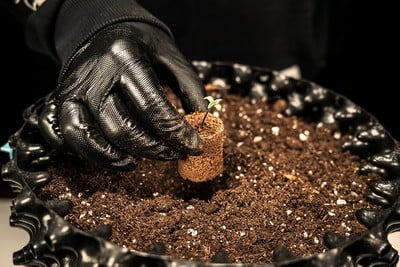
- Soil Plugs: Made from top-quality peat moss and coco coir, RQS soil plugs are designed to retain moisture while providing your seeds with the room and air they need in order to germinate properly. Plus, they make transplanting super easy, and they're suitable for autoflowering seeds as you can plant them directly in your final pots.
- Easy Start: Containing sterilised soil enriched with beneficial bacteria, our Easy Start pods create the perfect home for your seeds, maximising germination rates in turn. Simply dissolve the included Bacto packet (loaded with beneficial bacteria) in water, soak your Easy Start pods in the mixture for 10 seconds, and sow your seeds!
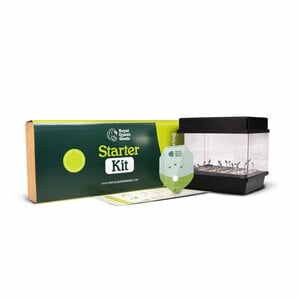
- Starter Kit: Our Starter Kit comes complete with Easy Start pods, automatic or feminized seeds, and a Propagator Pro complete with perlite and cool, low-watt LED lights. While the Easy Start pods provide the perfect starter soil for your seeds, the Propagator Pro helps to create the perfect environment for your seeds to germinate and grow.
3. Bad Seeds
Got a bag of “mystery seeds” from your local source or “bargain seeds” from an unknown vendor off the internet? If so, chances are they won’t germinate. Reputable seed banks like Royal Queen Seeds will always test their seeds for quality and germination rate.
To get your grow off to a great start, sourcing quality cannabis seeds is the best thing you can do. Not only will your germination rates be better, but your plants will also grow healthier with better yields at harvest time.
4. Improper Storage
Just like food, seeds are living organisms that need to be stored properly, otherwise they'll degrade, die, or won’t germinate. When storing your seeds, keep them away from light, extreme temperatures, and humidity. A dark cupboard with stable temperatures is fine. For long-term storage, place seeds in a sealed container and store them in the fridge.
For more information on storing your cannabis seeds properly, see our blog on How To Preserve Seeds.
5. Handling Seeds With Bare Hands
Handling your cannabis seeds with bare hands can contaminate them with all kinds of nasties like bacteria and fungus. Unfortunately, seeds and seedlings are especially vulnerable to these types of harmful pathogens.
To prevent spoiling your seeds, avoid unnecessary handling. Use clean gloves and some disinfected tweezers or something similar. This will greatly minimise the risk of your seeds being contaminated.

6. Seeds Buried Too Shallow or Too Deep
When planting directly into the soil, don’t bury your seeds too deep. If they’re too far down, they won’t have access to enough oxygen, and moisture in the soil can overpower them and cause them to rot.
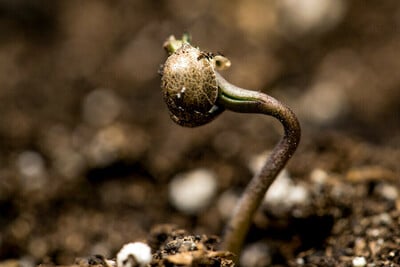
Likewise, if your seeds are too close to the surface, there is a risk they’ll dry out before sprouting, or the seed will emerge but can’t shed off its cap. The happy medium is to place your seeds about 0.5–1.0cm deep and just lightly cover them with soil.

7. Not Using New or Sterilised Soil and Pots
One of the biggest factors inhibiting seeds from sprouting is fungus. Old, reused soil that isn’t sterilised is likely to contain mould and other harmful organisms like bacteria and insects.
Your seeds may not sprout at all, or they may emerge from the soil but die days later. Seedlings may suddenly bend and turn brown from a disease known as “damping off”. Overwatering, poor drainage, and lack of aeration will also increase the likelihood of this.
Solution: Only plant your seeds in a sterilised (i.e. new) potting mix as this won't contain these harmful organisms. But your substrate isn’t the only thing you need to keep an eye on. You’ll also need to make sure your containers are clean, as these can also carry mould and other harmful pathogens. If you encounter fungus problems when you’re germinating, it is best to get rid of the seed and the contaminated growing medium and start over.
8. Too Much Moisture
If your substrate drains poorly, excess water in the soil will prevent your seed from accessing oxygen, and it will encourage fungal growth. You can improve the water drainage of your soil by adding some perlite. Also, always make sure your planting containers have holes in the bottom for water to drain out.
If you’re using a hood to keep moisture in, make sure there are holes in this too. Lift the hood frequently to allow for fresh air exchange. Remove the hood as soon as your seedling has shed its shell.
9. Not Enough Moisture
Keeping the above in mind, seeds do need moisture to germinate. Keep your soil moist but not damp. The best approach is to use a hand sprayer with a fine mist setting. Use a transparent germination hood or cling film to keep the soil from drying out.
10. Drowning Seeds
Some growers like to germinate their seeds in a glass of water. While this method technically is viable, there is also a risk that the seeds will drown if allowed to sit for too long. After all, seeds need a good supply of oxygen to grow.
Instead, germinate your seeds directly in soil, or even better, use the Royal Queen Seeds Starter Kit.
11. Allowing Seeds to Germinate for Too Long
If you allow your seeds to germinate for too long, transplanting them safely will become difficult. The reason for this is that the longer the roots are exposed to air and light, the more likely they are to become damaged. Moreover, the longer the taproot, the higher the risk for accidental damage when transplanting.
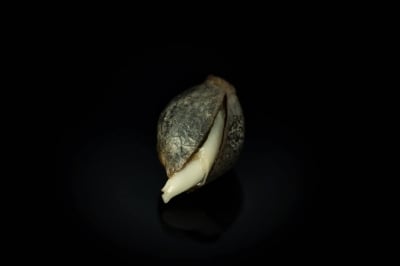
Keep an eye on your seeds and transplant when the taproot measures 1–2cm at most.
12. Poor Water Quality
While tap water may be okay for more mature cannabis plants, it can be a problem for seeds and seedlings. Tap water contains chlorine, fluoride, and salts that can be detrimental to healthy growth and may even prevent seeds from sprouting altogether.
Use bottled water for germination. If you need to use tap water, fill a bucket with hot water and let it sit outside for a day. This allows the chlorine to evaporate so the water is safer to use for germinating.
13. Temperature Too High
Excessively high temperatures in your germination environment can lead to slow and stunted growth, and it can cause your soil to dry out. The optimal temperature for seed germination is a moderate 20–25°C.
If you’re germinating indoors and temperatures are too high, see whether you can get it cooler with some fans or by opening windows. If that doesn’t work, consider an air conditioner for your grow room to keep temperatures at bay.
| -15 °C | 17 °C | 23 °C | +25 °C |
| ⚠️ Danger Zone | Ideal Night Temperature | Ideal Day Temperature | ⚠️ Danger Zone |
| -15 °C | ⚠️ Danger Zone |
| 17 °C | Ideal Night Temperature |
| 23 °C | Ideal Day Temperature |
| +25 °C | ⚠️ Danger Zone |
14. Temperature Too Low
Likewise, when temperatures are too low, this can introduce a whole host of its own problems, including inhibiting seeds from sprouting. Colder temperatures also increase the risk of other plant diseases. What to do about it? If you want to grow outdoors, don’t set plants outside too early. Instead, germinate indoors and allow your seedlings to grow for a few weeks.
Do your due diligence and verify when local temperatures are high enough to set your plants outside. Usually, waiting a couple weeks for higher spring temperatures is worth it!

15. Too Much Light
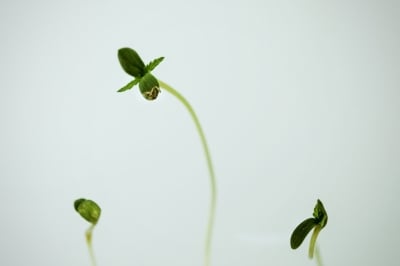
Seeds don’t need light to germinate. In fact, too much light can decrease their likelihood of popping. You only need to worry about providing light once your seedlings actually emerge from the soil. But make sure to start with low light intensity before gradually increasing over time.
16. Pests, Birds, Insects…
Believe it or not, hemp seeds are a major component of many types of birdseed! That’s right; birds love them just as much as you do. But birds aren’t the only critters that would love nothing more than to chow down on your seeds.
Among other critters, ants are particularly keen on eating the taproots from sprouted seeds. To keep your seeds safe, use bird netting, ant traps, and other preventative measures like neem oil or slug traps. Check on your seeds often so you can spot infestations and act before they become a problem.
17. Soil Too Firm
If your soil is packed too firm, this can prevent your seed from popping. Compact soil deprives seeds of oxygen, and poor drainage will increase the risk of disease and mould. Using your (clean) hands, cover your seeds with just a light layer of soil.
18. Soil Too Loose
When soil is too loose, too much air surrounds the seed, and thus it can’t absorb moisture properly. After you’ve placed your seeds, lightly pat down the soil with your fingers. When adding perlite to make your soil airier, around 10–20% is plenty.

19. Soil Too "Hot"
Soil being “too hot” means it contains too much nutrients. This is especially important for seeds and seedlings, as these don't really need nutrients at all. For that reason, it is best not to feed them during the first few weeks of growth.
Many commercial soils are “too hot” for germination as they contain levels of nutrients better suited for mature cannabis. Use “light” or unfertilised seedling soils when germinating.
20. Crowded Pots
After germinating your seeds, the roots of your cannabis plants will want ample space to grow, so make sure you’re using adequately sized pots. On the other hand, only grow one seed in each pot so they aren’t competing for available light or nutrients in the soil.
If your space or resources are limited, it’s better to grow fewer plants that can flourish than to grow too many in a crowded area.
 Grow Guide Topic Finder
- Growing cannabis step by step
- Cannabis growing basics
- Choosing your seeds
- How to germinate seeds
- The cannabis vegetative stage
- The cannabis flowering stage
- Harvesting cannabis
- Trimming, drying, and curing
- Choosing pots and soil
-
Growing indoors
- A Complete Overview Of Growing Cannabis Indoors
- Cannabis Cultivation Tips: How To Set Up Indoor Grow Lights
- How Many Cannabis Plants Can You Grow Per Square Metre?
- Indoor Cannabis Growing: Relative Humidity and Temperatures
- Hydroponics Cannabis Growing Guide (with diagrams)
- Cannabis Micro Growing: Growing Great Weed in Tiny Spaces
- Growing outdoors
- How to grow autoflowering cannabis
- Cannabis nutrients and pH
- Cannabis troubleshooting: Nutrients
-
Cannabis troubleshooting: Growing
- Cannabis Seed Germination — Troubleshooting Guide
- How to Deal With Pythium (Root Rot) in Cannabis Plants
- Slow Cannabis Plant Growth And What You Can Do About It
- How to Prevent and Fix Stretching in Cannabis Seedlings
- Watering Your Cannabis: How to Fix Overwatering and Underwatering
- Understanding Male, Female, And Hermaphrodite Cannabis
- Identifying and Treating Common Cannabis Ailments
- How To Revive a Sick Cannabis Plant
- How to Avoid Mouldy Weed During Drying and Curing
- How to Prevent and Treat Dry and Crispy Cannabis Leaves
- What Cannabis Leaves Can Tell You
- Causes and Solutions for Yellow Cannabis Leaves
-
Cannabis Strains Grow Report
- HulkBerry Automatic Grow Report
- Blue Cheese Auto Grow Report
- Purple Punch Automatic Grow Report
- Triple G Automatic Grow Report
- Do-Si-Dos Automatic Grow Report
- Green Gelato Automatic Grow Report
- Haze Berry Automatic Grow Report
- Purple Queen Automatic Grow Report
- Cookies Gelato Automatic Grow Report
- Sherbet Queen Automatic Grow Report
- Sweet Skunk Automatic Grow Report
- Medusa F1 Grow Report
- Cannabis plant training
-
Weed growing tips
- The Cannabis Plant Anatomy
- How to preserve seeds
- How Much Sunlight Do Outdoor Cannabis Plants Need To Grow?
- How to Control and Prevent Stretching in Cannabis Plants
- My Cannabis Plants Are Growing Too Tall: What Should I Do?
- Should You Worry About Purple Or Red Cannabis Stems?
- What To Do When Your Indoor Cannabis Won’t Flower
- How To Protect Your Cannabis Plants From Heat Stress
- How To Tell If Your Female Cannabis Plant Has Been Pollinated
- Growing Medical Marijuana
- Bud Washing: How to Clean Your Weed
- Understanding Cannabis Yield per Plant


