 Cannabis Grow Guide by Royal Queen Seeds
- Growing cannabis step by step
- Cannabis growing basics
- Choosing your seeds
- How to germinate seeds
- The cannabis vegetative stage
- The cannabis flowering stage
- Harvesting cannabis
- Trimming, drying, and curing
- Choosing pots and soil
-
Growing indoors
- A Complete Overview Of Growing Cannabis Indoors
- Cannabis Cultivation Tips: How To Set Up Indoor Grow Lights
- How Many Cannabis Plants Can You Grow Per Square Metre?
- Indoor Cannabis Growing: Relative Humidity and Temperatures
- Hydroponics Cannabis Growing Guide (with diagrams)
- Cannabis Micro Growing: Growing Great Weed in Tiny Spaces
- Growing outdoors
- How to grow autoflowering cannabis
- Cannabis nutrients and pH
- Cannabis troubleshooting: Nutrients
-
Cannabis troubleshooting: Growing
- Cannabis Seed Germination — Troubleshooting Guide
- How to Deal With Pythium (Root Rot) in Cannabis Plants
- Slow Cannabis Plant Growth And What You Can Do About It
- How to Prevent and Fix Stretching in Cannabis Seedlings
- Watering Your Cannabis: How to Fix Overwatering and Underwatering
- Understanding Male, Female, And Hermaphrodite Cannabis
- Identifying and Treating Common Cannabis Ailments
- How To Revive a Sick Cannabis Plant
- How to Avoid Mouldy Weed During Drying and Curing
- How to Prevent and Treat Dry and Crispy Cannabis Leaves
- What Cannabis Leaves Can Tell You
- Causes and Solutions for Yellow Cannabis Leaves
-
Cannabis Strains Grow Report
- HulkBerry Automatic Grow Report
- Blue Cheese Auto Grow Report
- Purple Punch Automatic Grow Report
- Triple G Automatic Grow Report
- Do-Si-Dos Automatic Grow Report
- Green Gelato Automatic Grow Report
- Haze Berry Automatic Grow Report
- Purple Queen Automatic Grow Report
- Cookies Gelato Automatic Grow Report
- Sherbet Queen Automatic Grow Report
- Sweet Skunk Automatic Grow Report
- Medusa F1 Grow Report
- Cannabis plant training
-
Weed growing tips
- The Cannabis Plant Anatomy
- How to preserve seeds
- How Much Sunlight Do Outdoor Cannabis Plants Need To Grow?
- How to Control and Prevent Stretching in Cannabis Plants
- My Cannabis Plants Are Growing Too Tall: What Should I Do?
- Should You Worry About Purple Or Red Cannabis Stems?
- What To Do When Your Indoor Cannabis Won’t Flower
- How To Protect Your Cannabis Plants From Heat Stress
- How To Tell If Your Female Cannabis Plant Has Been Pollinated
- Growing Medical Marijuana
- Bud Washing: How to Clean Your Weed
- Understanding Cannabis Yield per Plant
Purple Queen Automatic Grow Report
Contents:
- Purple queen automatic grow guide: equipment list
- Purple queen automatic grow report: seedling stage (week 1)
- Purple queen automatic grow report: vegetative stage (weeks 2–4)
- Purple queen automatic grow report: flowering stage (weeks 5–10)
- Harvest (week 11)
- Genetic attributes of purple queen automatic
- Growing characteristics of purple queen automatic
- Effects and flavour of purple queen automatic
Purple Queen Automatic offers a laid-back body high perfect for any time of the day. If you’re interested in growing this strain, you’ll find inspiration in the week-by-week grow guide below. Discover how I fed, watered, and took care of this variety to produce an aromatic and heavy harvest!
Purple Queen Automatic Grow Guide: Equipment List
- Box: Secret Jardin DS120W 120 × 60 × 178
- Lights: MIGRO 200+
- Ventilation: Blauberg Turbo - E 100
- Filter: Prima Klima Filter PK 100/125
- Fan: Oscillating Koala Fan
- Humidifier: Beurer LB 45
- Soil: Biobizz Light Mix
- Pot: 11l Air-Pot
- Seed: Royal Queen Seeds
- Nutrition: RQS Organic Nutrition and Biobizz
Purple Queen Automatic Grow Report: Seedling Stage (Week 1)
Check out the strategy I used to transform my Purple Queen Automatic seed into a healthy and vibrant seedling.
- Growing medium: First things first, I stripped the equipment from inside my grow box and gave it a thorough clean to minimise the threat of pests and disease. Then, I reinstalled my ventilation and filter, clipped on my fan, and positioned my humidifier. Next, I started to create my growing medium by placing 5l of Biobizz Light Mix into my 11l Air-Pot before adding the following:
- 50g RQS Easy Boost Organic Nutrition
- 80g RQS Bat Guano
- 10g RQS Easy Roots Rhizobacter
- 5g RQS Easy Roots Mycorrhiza Mix
I thoroughly mixed all of my inputs into the soil before topping up with another 5l of Biobizz Light Mix. Then, I watered the soil to the saturation point.
- Germination: I decided to simplify the process and germinate my seed directly into the 11l Air-Pot to avoid any transplant stress later down the line. I made a hole of about 5cm in the centre of the growing medium, inserted my Purple Queen Automatic seed, lightly covered it with soil, and misted the spot with a spray bottle.
- Lighting: I suspended my Migro 200+ lights from the top of the grow box using hanging wires. I positioned both lights 30cm horizontally from the centre of the tent to ensure an even spread, and 35cm vertically from the rim of my pot. I ran my lights for 24 hours each day as soon as the shoot emerged.
- Environment: I measured an average temperature of 26°C and relative humidity of 40%.
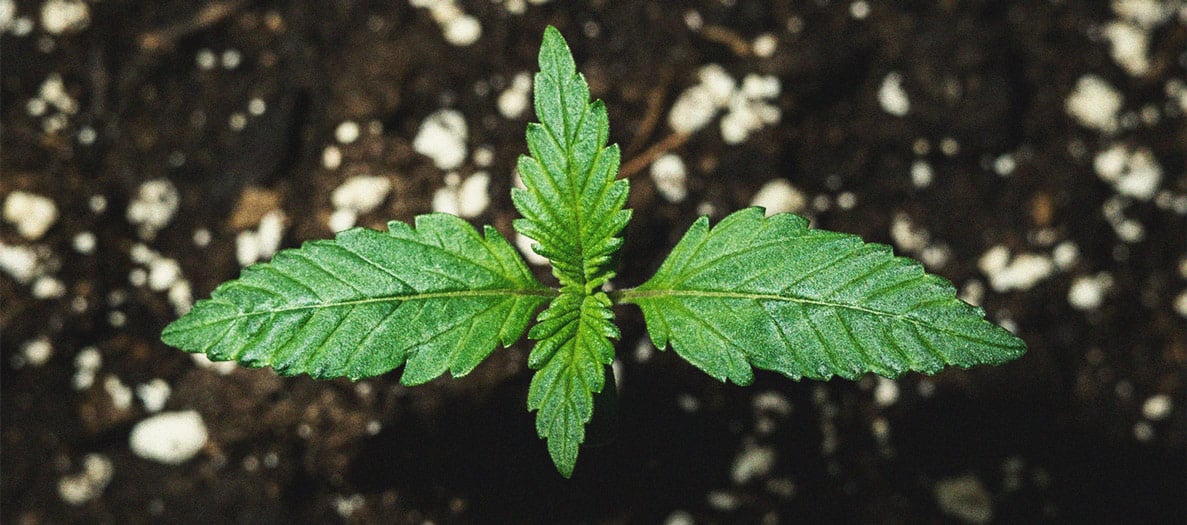
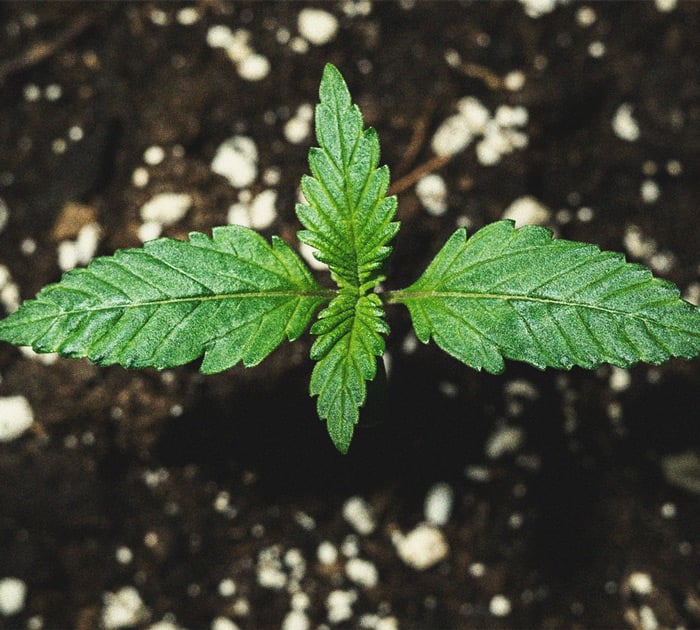
- Plant status: By the end of the first week, my seedling stood at around 4cm in height. Due to the seed hull sticking to the tip of the plant, the cotyledon leaves failed to fully unfold during this time, leading to some unfortunate stretching.
Purple Queen Automatic Grow Report: Vegetative Stage (Weeks 2–4)
My seedling finally managed to shed the seed hull, and the stretching ceased. By the end of the vegetative phase, my plant looked healthy, vigorous, and turgid. Find out what I did to achieve this in the next section of my Purple Queen Automatic grow guide.
Week 2
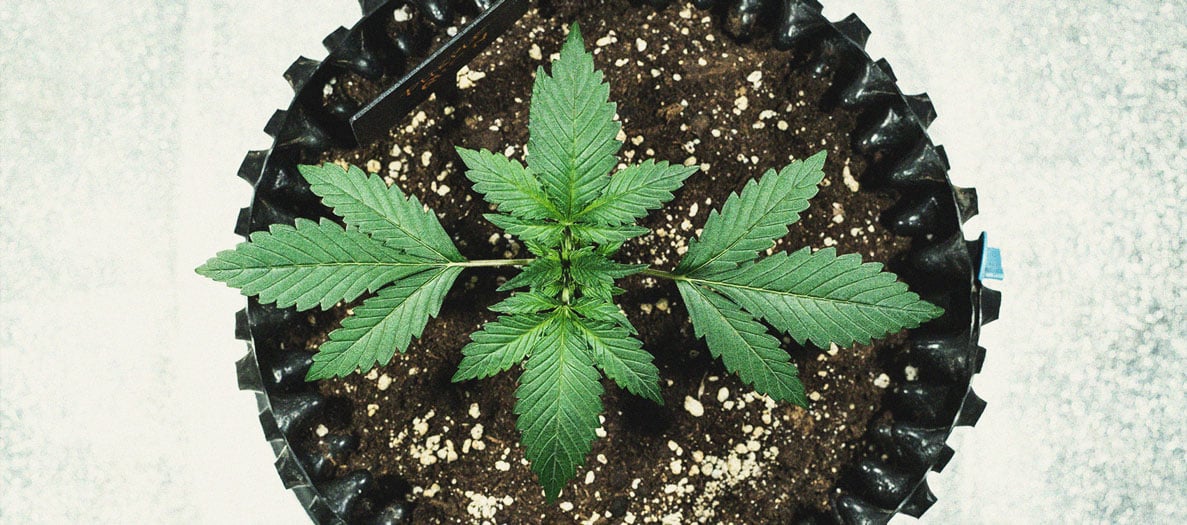
Despite the long stem from the initial stretching, my seedling started to develop its first set of true leaves, and looked great overall. My fan helped to encourage a strong stem and root system to counteract the legginess.
- Lighting: I repositioned my lights to hang 35cm above the top of my plant and continued to run them for 24 hours each day.
- Nutrients: I hydrated my plant on day 4 of the week with water regulated to a pH of 6.5. I went extremely light on the feeding at first due to the nutrients already present in the growing medium. On day 7 of the week, I added 3.5ml of liquid humic acid and seaweed to 1.5l of water and applied the solution to the growing medium.
- Environment: Using my hygrometer, I measured an average temperature of 27°C and relative humidity of 40%.
- Plant status: By the end of the first week of veg, my plant stood at 11cm. It had developed several new sets of true leaves and seemed healthy overall.

Week 3
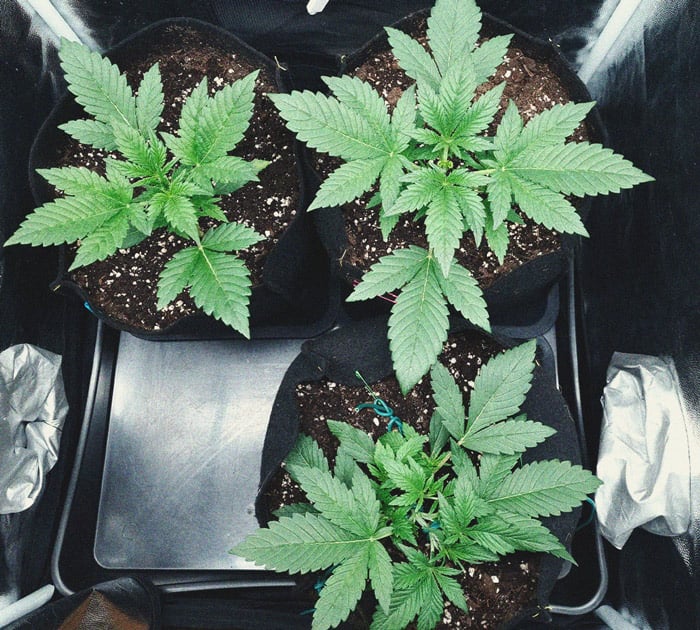
During the second week of veg (week 3 overall), my plant surged in height and put out plenty of new true leaves.
- Lighting: I continued to run my lights for 24 hours each day, maintaining a distance of 35cm from the top of the plant.
- Nutrients: I hydrated my plant with 1.5l of pH-regulated water on day 3 of the week. On day 7, I added 2ml of liquid fish extract to 1.5l of water to provide my Purple Queen Auto plant with additional nitrogen as it started to pack on size.
- Environment: Temperature increased slightly to 28°C and humidity to 42%.
- Plant status: At the end of week 3, my plant stood at 26cm, had developed more luscious fan leaves, and exhibited no signs of deficiency or disease.

Week 4
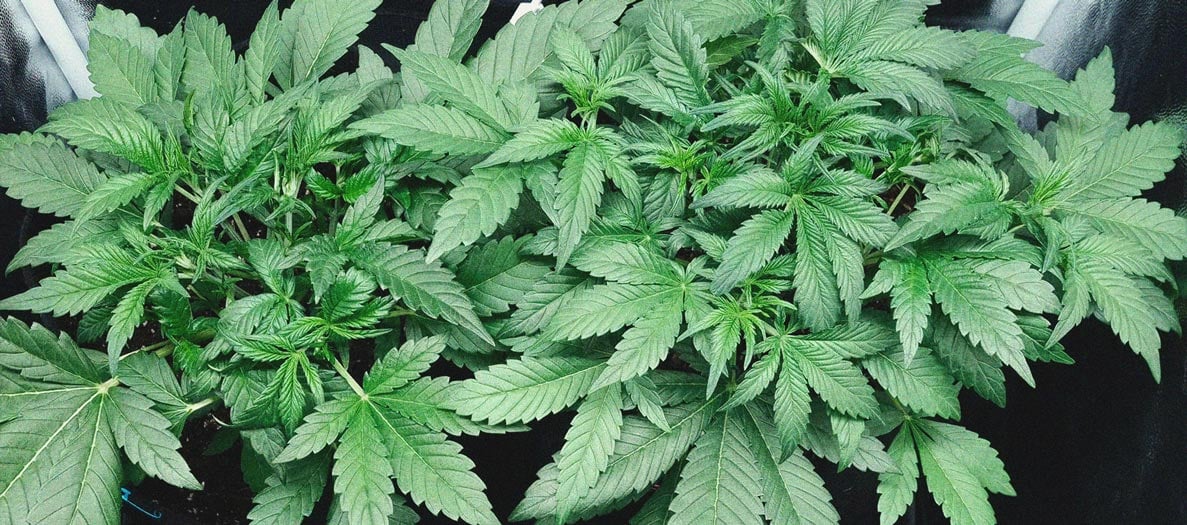
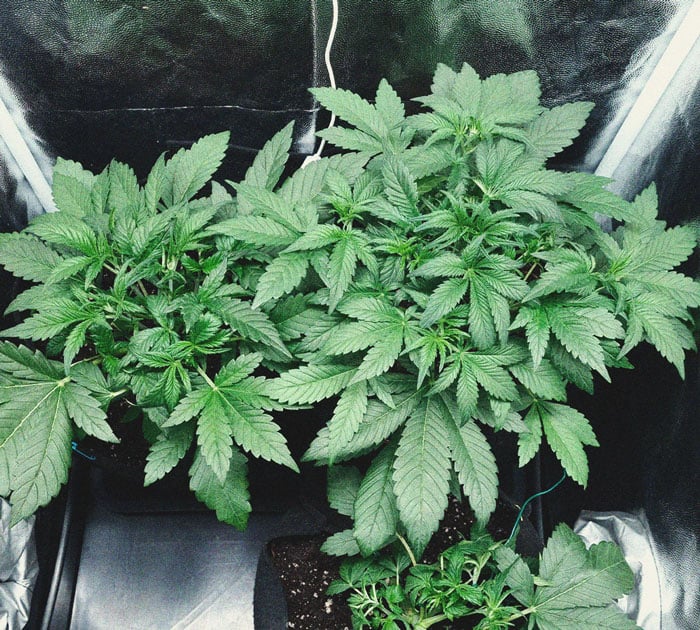
The final week of veg. During this time, my plant developed an extremely sturdy and thick main stem and started to form preflowers.
- Lighting: The lighting schedule remained the same; 24 hours per day, at a distance of 35cm from the plant.
- Nutrients: I added ½ a tablet of RQS Easy Grow Booster Tablets to 1.5l of water and applied on day 3 of the week. On day 6 of the week, I applied 1.5l of water containing 2.25ml of CaMg+ to buffer against potential deficiencies down the line.
- Environment: Average temperature and humidity hovered around 26°C and 45%, respectively.
- Plant status: My plant displayed preflowers and stood at 63cm at the end of the vegetative phase.
Purple Queen Automatic Grow Report: Flowering Stage (Weeks 5–10)
Things started to get exciting at the start of the flowering stage! The buds quickly increased in size, and the strong smell of terpenes started to permeate the air in the final weeks. Here are the steps I took to keep my plant healthy and productive.
Weeks 5 & 6
My plant surged in height during these two weeks. I switched up my nutrient regimen to support flower formation.
- Lighting: I reduced the light schedule to 18 hours on and 6 hours off. I positioned my lamp to hang slightly closer to the canopy, at a distance of 30cm.
- Nutrients: I watered with 1.5l of pH-regulated water on day 2 of both weeks. On day 5 of each week, I added the following to 1.5l of water:
- 1.5ml sugar beet extract
- 1.5ml organic liquid seaweed
- 1.5ml organic flowering fertiliser
- 1.5ml humic and fulvic acid formula
- Environment: Temperature hovered around 25°C and relative humidity at 45%.
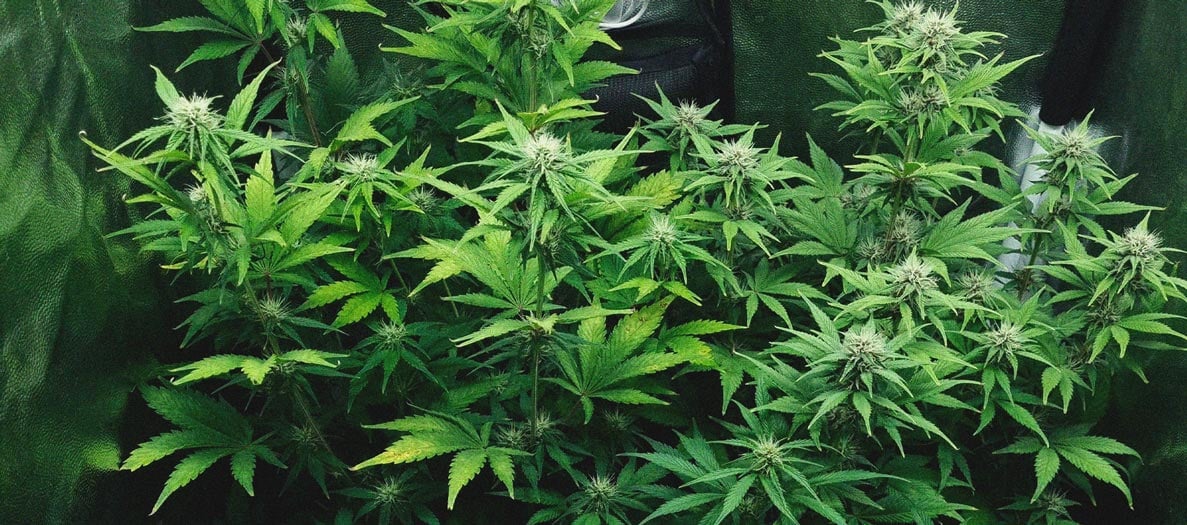
- Plant status: By the end of the first two weeks of flowering, my plant had reached a height of 96cm. Her flowers started to develop a subtle aroma and a layer of trichomes.


Week 7
Overall, week 7 went smoothly. However, signs of deficiency started to rear their head, so I changed my nutrient strategy to meet these needs.
- Lighting: I continued to run my lamp for 18 hours each day and maintained a distance of 30cm from the top of the canopy.
- Nutrients: I once again applied 1.5l of pH-regulated water on day 2 of the week. I started to notice a slight yellowing on the tips of some of the fan leaves. To attempt to rectify this, I added 1.5ml of CaMg+ and ½ of an Easy Bloom Booster Tablet to 1.5l of water and applied on day 5 of the week.
- Environment: I measured an average temperature of 25°C and humidity of 40%.
- Plant status: The yellowing of the leaves caused little concern, as I knew the plant was starting to divert energy to the flowers. My plant stood at 98cm, and the aroma of the buds became slightly stronger by the day. I defoliated some of the lower fan leaves to enhance airflow and minimise the risk of mould.

Week 8
Week 8 marked the final week of feeding. I administered one last application of broad-spectrum flowering nutrients to see my Purple Queen Automatic plant through the flushing stage ahead.
- Lighting: I increased my light schedule to 20 hours per day. The lamp remained 30cm from the tip of the canopy.
- Nutrients: I applied the regular 1.5l of pH-adjusted water on day 2 of the week, and administered the following in 1.5l of water on day 5:
- 1.5ml CaMg+
- 3ml sugar beet extract
- 3ml organic liquid seaweed
- 3ml organic flowering fertiliser
- 1.5ml humic and fulvic acid formula
- Environment: Average temperature clocked in at 25°C and relative humidity at 40%.
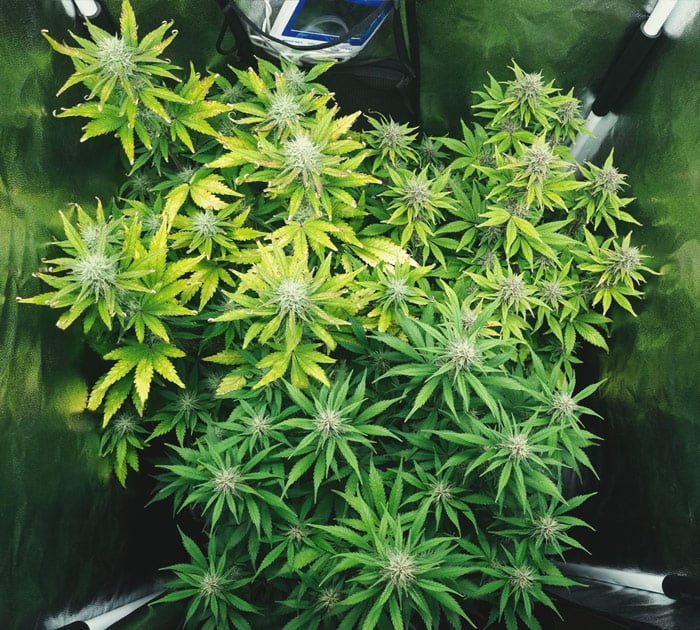
- Plant status: My plant looked productive at this stage, and the smell of terpenes became extremely strong. Due to some of the lower branches sagging with the weight of their flowers, I tied them to the main stem with soft gardening ties to keep them supported.

Weeks 9 & 10
I decided to flush my Purple Queen Automatic plant during the final two weeks of flowering in hopes of achieving a smoother smoke.
- Lighting: I maintained a lighting schedule of 20 hours per day, and kept my lamp at a distance of 30cm from the top of the canopy.
- Nutrients: I applied 1.5l of pH-regulated water on days 2 and 6 of both weeks.
- Environment: Temperature remained at 25°C and humidity at 40%.
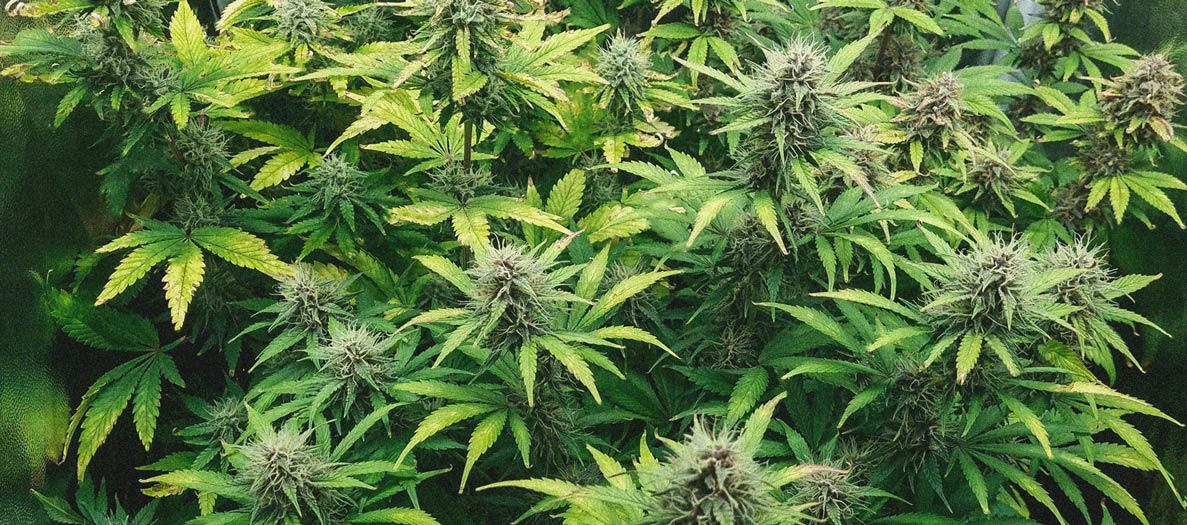
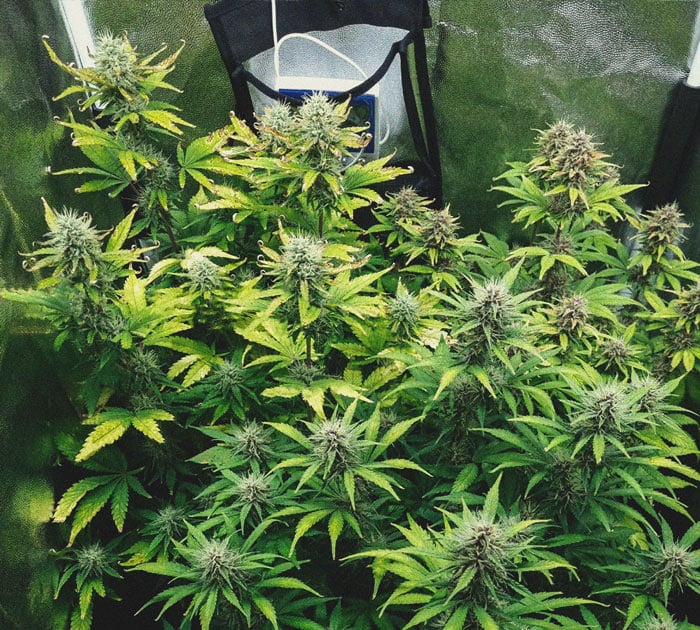
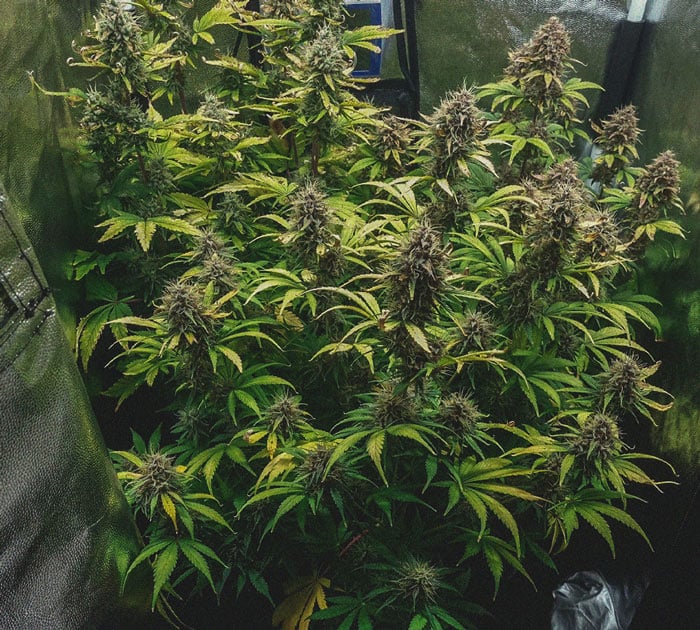
- Plant status: The buds started to ripen at this stage; their pistils transitioned from white to orange and the trichomes became increasingly milky. The fan leaves also became increasingly yellow as my plant utilised its stored nutrients.
Harvest (Week 11)
Harvest time! I removed the flowers from their branches, hung a Herb Dryer from the top of my grow box, and placed the wet buds inside. I let them dry in the dark with a fan running for a total of twelve days. Then, I used RQS Curved Trimming Scissors to dry-trim the flowers, and kept the sugar leaves for hash making. Finally, I placed the manicured flowers into Weed Jars to cure for 6 weeks. Overall, my Purple Queen Automatic plant provided me with 65g of frosty and aromatic dried flowers.

Genetic Attributes of Purple Queen Automatic
The skilled breeders at Royal Queen Seeds created Purple Queen Automatic by crossing parent strains Purple Queen with Critical Auto. Known for her high anthocyanin content and large quantities of THC, Purple Queen passed down her good looks and the tendency to produce boatloads of secondary metabolites. Using this variety as a foundation, breeders then brought Critical Auto into the equation to provide delightful terpenes and the much-sought-after autoflowering trait. This pairing created a progeny featuring a genetic profile consisting of 80% indica, 15% sativa, and 5% ruderalis.
Purple Queen Auto
|
|
Purple Queen x Critical Auto |
|
|
350 - 400 gr/m2 |
|
|
90 - 130 cm |
|
|
6 - 7 weeks |
|
|
THC: 16% |
|
|
Sativa 15% Indica 80% Ruderalis 5% |
|
|
100 - 150 gr/plant |
|
|
90 - 140 cm |
|
|
8 - 9 weeks after sprouting |
|
|
Calming, Euphoric |
Growing Characteristics of Purple Queen Automatic
Thanks to her indica nature, Purple Queen Automatic maintains a medium size both indoors and outdoors, making her ideal for growers dealing with space restrictions. She’ll get along just fine in a small grow tent or mini greenhouse or polytunnel. Indoors, this cultivar grows to a height of 90–130cm and produces 350–400g/m² of gorgeous purple buds. Apply some LST in the vegetative phase to keep her nice and compact if you’re low on space. Outdoors, she peaks at 130cm when left untrained, and offers a return of up to 150g/plant. To achieve a maximum yield, treat this lady to high-quality compost, and provide her with a living mulch in warm climates to shelter the soil from the sun. You can expect to start harvesting buds in as little as 8 weeks after sprouts emerge from the soil.
Effects and Flavour of Purple Queen Automatic
With a moderate THC content of 16%, Purple Queen Automatic exerts a sensible high that won’t render you too stoned to get on with your day. Although a stoning variety in higher quantities, you can still enjoy this cultivar during the day to experience some laid-back vibes. She also makes a perfect selection before settling down to watch a film or read a book thanks to her relaxing yet uplifting effects. After every toke or bong hit, you’ll experience flavours of citrus and earth roll across your tongue.
 Grow Guide Topic Finder
- Growing cannabis step by step
- Cannabis growing basics
- Choosing your seeds
- How to germinate seeds
- The cannabis vegetative stage
- The cannabis flowering stage
- Harvesting cannabis
- Trimming, drying, and curing
- Choosing pots and soil
-
Growing indoors
- A Complete Overview Of Growing Cannabis Indoors
- Cannabis Cultivation Tips: How To Set Up Indoor Grow Lights
- How Many Cannabis Plants Can You Grow Per Square Metre?
- Indoor Cannabis Growing: Relative Humidity and Temperatures
- Hydroponics Cannabis Growing Guide (with diagrams)
- Cannabis Micro Growing: Growing Great Weed in Tiny Spaces
- Growing outdoors
- How to grow autoflowering cannabis
- Cannabis nutrients and pH
- Cannabis troubleshooting: Nutrients
-
Cannabis troubleshooting: Growing
- Cannabis Seed Germination — Troubleshooting Guide
- How to Deal With Pythium (Root Rot) in Cannabis Plants
- Slow Cannabis Plant Growth And What You Can Do About It
- How to Prevent and Fix Stretching in Cannabis Seedlings
- Watering Your Cannabis: How to Fix Overwatering and Underwatering
- Understanding Male, Female, And Hermaphrodite Cannabis
- Identifying and Treating Common Cannabis Ailments
- How To Revive a Sick Cannabis Plant
- How to Avoid Mouldy Weed During Drying and Curing
- How to Prevent and Treat Dry and Crispy Cannabis Leaves
- What Cannabis Leaves Can Tell You
- Causes and Solutions for Yellow Cannabis Leaves
-
Cannabis Strains Grow Report
- HulkBerry Automatic Grow Report
- Blue Cheese Auto Grow Report
- Purple Punch Automatic Grow Report
- Triple G Automatic Grow Report
- Do-Si-Dos Automatic Grow Report
- Green Gelato Automatic Grow Report
- Haze Berry Automatic Grow Report
- Purple Queen Automatic Grow Report
- Cookies Gelato Automatic Grow Report
- Sherbet Queen Automatic Grow Report
- Sweet Skunk Automatic Grow Report
- Medusa F1 Grow Report
- Cannabis plant training
-
Weed growing tips
- The Cannabis Plant Anatomy
- How to preserve seeds
- How Much Sunlight Do Outdoor Cannabis Plants Need To Grow?
- How to Control and Prevent Stretching in Cannabis Plants
- My Cannabis Plants Are Growing Too Tall: What Should I Do?
- Should You Worry About Purple Or Red Cannabis Stems?
- What To Do When Your Indoor Cannabis Won’t Flower
- How To Protect Your Cannabis Plants From Heat Stress
- How To Tell If Your Female Cannabis Plant Has Been Pollinated
- Growing Medical Marijuana
- Bud Washing: How to Clean Your Weed
- Understanding Cannabis Yield per Plant


