White Widow Auto Grow Report
Contents:
- White widow auto grow report: equipment list
- White widow auto grow report: seedling stage (week 1)
- White widow grow report: vegetative stage (weeks 2–4)
- White widow auto grow report: flowering stage (week 5–10)
- White widow auto grow journal: harvest
- Genetic attributes of white widow auto
- Growing characteristics of white widow auto
- Effects, aroma, and flavour of white widow auto
White Widow is one of the most well-known cannabis strains in the world. And with Royal Queen Seeds’ White Widow Auto, growing this classic hybrid couldn't be easier. By crossing an original White Widow clone with a sturdy cut of ruderalis, RQS' breeding team condensed this strain's epic, pungent aroma and potent stone into a fast-growing, stable, and hardy seed. But don't just take our word for it—check out our detailed White Widow Auto grow report below to see exactly what it's like to cultivate this classic at home.
White Widow Auto
|
|
White Widow x ruderalis |
|
|
400 - 450 gr/m2 |
|
|
40 - 80 cm |
|
|
7 - 8 weeks |
|
|
THC: 14% |
|
|
Sativa 40% Indica 40% Ruderalis 20% |
|
|
190 - 240 gr/plant |
|
|
50 - 110 cm |
|
|
10 - 12 weeks after sprouting |
|
|
Physically Relaxing, Stoned |
White Widow Auto Grow Report: Equipment List
- Box: Secret Jardin DS120W 120 × 60 × 178
- Lights: MIGRO ARAY 4 - 240W
- Ventilation: TT Silent-M100
- Filter: Prima Klima Filter PK 100/125
- Fan: Oscillating Koala Fan (×2)
- Humidifier: Beurer LB 45
- Soil: Biobizz Light·Mix
- Pot: 11 l Air-Pot
- Seed: Royal Queen Seeds
- Nutrition: RQS Organic Nutrition
White Widow Auto Grow Report: Seedling Stage (Week 1)
Step one of every new grow is, of course, germinating your seeds. Here's how I went about germinating my White Widow Auto seed:
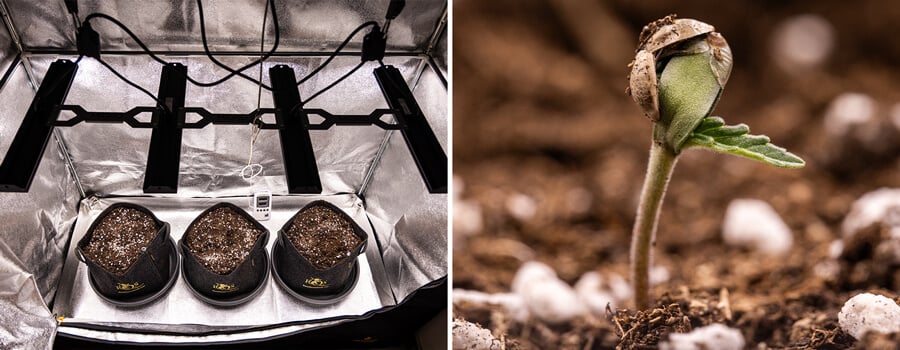
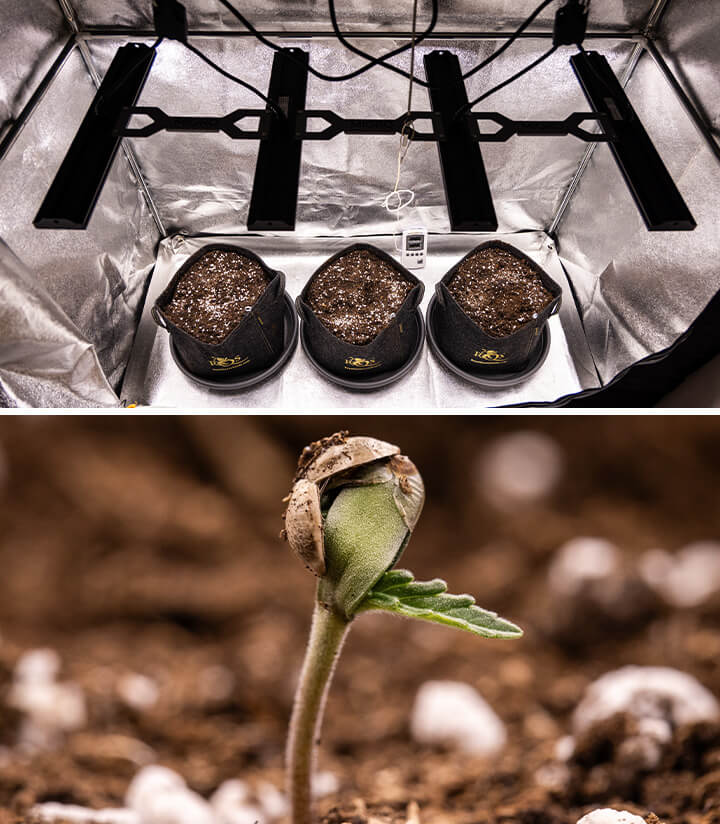
- Soil preparation: First and foremost, I created a healthy growing medium designed to house and naturally feed my plant from its seedling phase right up to its final days of flowering. To make this soil, I mixed together 10 l of Biobizz Light·Mix, 50 g of RQS Easy Boost Organic Nutrition, 11 g of RQS Seaweed, and 55 g of RQS Mycorrhiza Mix. I made sure to mix everything together very well, then used 2 l of water enriched with RQS' new Seed Booster supplement to soak the pot.
- Germination: I am a big fan of letting nature take care of as much of the growing process as possible. That's why I decided to germinate my seed directly in its final pot. To do so, I made a 1 cm-deep hole in the centre of the pot and placed my seed in it. There are many germination methods out there, and this is the one that tends to work best for me.
- Lighting: I used two MIGRO ARAY 4 lamps, which are by far my favourite piece of growing equipment. I hung my lights from the support bars of my Secret Jardin tent, one on each side roughly 35 cm from the middle and 35 cm from the tops of my Air-Pots. I find this allows for maximum light spread across my entire tent floor while keeping my seedlings from burning. As soon as my White Widow Auto seed sprouted from the soil, I ran my lights on a 20/4 light/dark cycle to maximise its growth while minimising its stretch.
I misted the soil above my White Widow Auto seed once on the morning of the fourth day after planting it. As soon as the seedling popped out of the soil that same night, I switched on my lights. On day five (one day after the seed sprouted), I watered the seedling with 1 l of water that I'd enriched with RQS Seed Booster. I repeated this two days later (exactly seven days after planting my seed).
White Widow Grow Report: Vegetative Stage (Weeks 2–4)
My White Widow Auto plant grew very vigorously from the day it first stuck its cotyledons out of the soil. Exactly nine days after sprouting, the seedling had developed its first set of true leaves and, in my books, officially began its vegetative phase.
Week 2
My White Widow plant looked small yet sturdy at the beginning of its vegetative phase. The plant measured 2.5 cm, and after a full week under lights reached a height of 6 cm. As you'll see below, the conditions in my tent during this first crucial week weren't perfect due to the hot summer we were having in my area. Nonetheless, the plant seemed to have no problems dealing with the subpar environmental conditions.
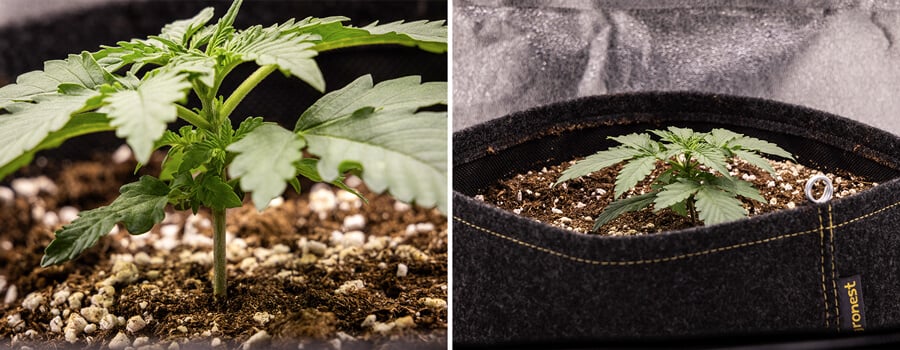
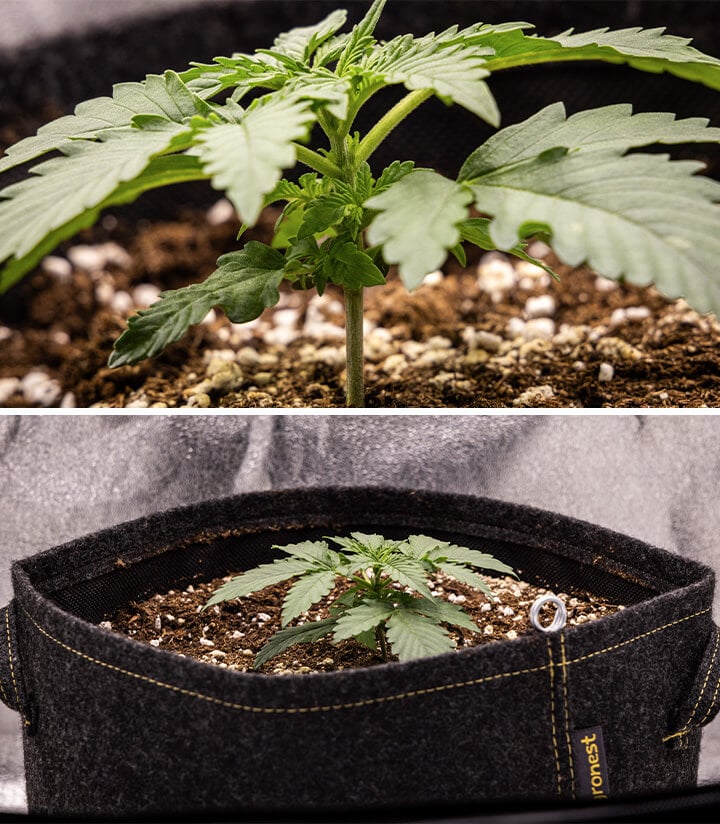
- Lighting: During this first week of veg, I dropped the light hours in my tent to 18 and dimmed their power to 40%. This seemed to draw a nice mid-way point for my plant, maximising photosynthesis while still giving it time to respire at night.
- Nutrients and water: As usual, I kept things very simple here. I watered my plant three times this week, on days one, four, and seven. On day one, I enriched my plant's water with RQS Seed Booster just for good measure. Then, on day four I used a total of 4 l of water enriched with 4 ml of calcium, 4 ml of magnesium, and RQS Bio-Grow fertiliser to feed my White Widow Auto plant as well as two other autos growing beside it. I made sure to adjust the pH of my feed to 6 before feeding my plants. On day seven, I watered my plants only with pH-regulated water.
- Environment: As I mentioned earlier, the environmental conditions on my farm were far from perfect due to the high heat in my area. With the heat of the summer and my grow lights, the temperatures in my grow tent can reach 32°C. Meanwhile, the average RH in my tent stayed at 60%.
- Plant health: Despite the subpar conditions in my grow tent, my White Widow Auto plant looked happy and healthy. It measured 6 cm at the end of the week and showed no signs of slowing!
Week 3
This was a super productive week of veg for my White Widow Auto plant. In total, it grew 8 cm and already started developing bud sites. Due to the heat, I still struggled to bring the temperatures in my tent down to an ideal range. Luckily, the plant didn't seem to mind and continued to grow very vigorously.
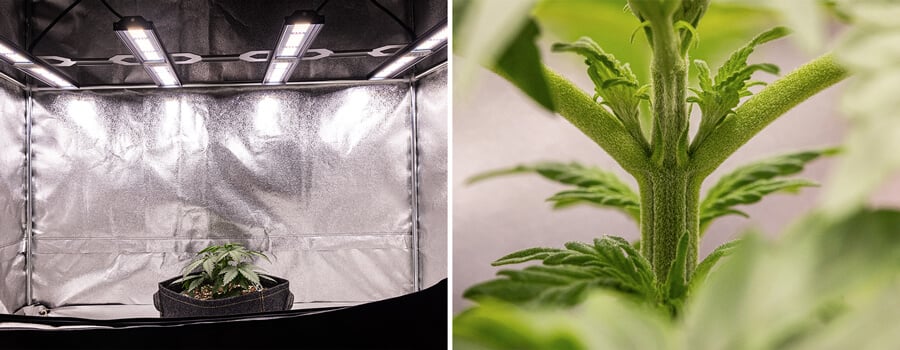
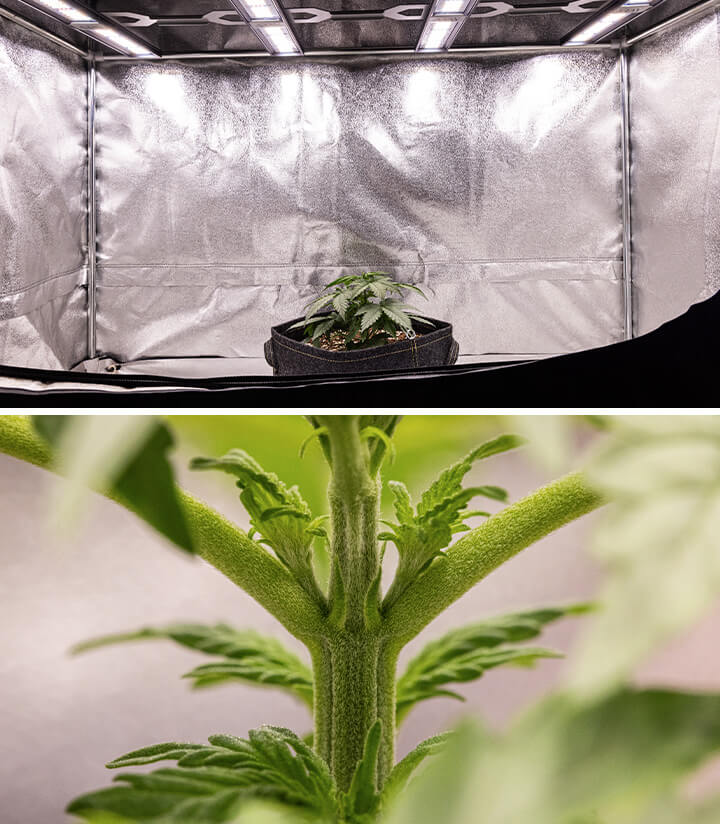
- Lighting: I kept my lights running for 18 hours at 40% potency for the entire week. On the last day, however, I bumped the lights up to 60% power to maximise the short vegetative cycle of this auto cultivar.
- Nutrients and water: Given the heat in my tent, I had to water my plant twice this week to keep its soil from drying out. On day 11 of White Widow Auto's life cycle, I used a total of 6 l of water to nourish the three autos growing in my tent. Like last week, I dropped the pH of the water to 6 then enriched it with 6 ml of calcium, 6 ml of magnesium, and RQS Bio-Grow fertiliser. On day 14, I gave all my plants only pH-regulated water without any nutrients.
- Environment: Max temps in my tent were still high, sometimes climbing above 31°C. To compensate for this, I dropped the RH slightly to 55%.
- Plant health: My White Widow Auto plant continued to shine, despite the heat it was exposed to! On the final day of this second week of veg, my plant measured 14 cm and boasted large, lush, deep-green leaves.
Week 4 (Final Week of Veg)
I am super impressed by the speedy growth of my White Widow Auto plant, as well as its resilience and beautiful looks. During this last week of veg, my plant grew 15 cm and developed a bunch of new foliage. By the end of the week, she even showed early signs of flowering. Unfortunately, there wasn't a lot I could do to address the heat in my tent, but White Widow Auto seemed to be coping well regardless.
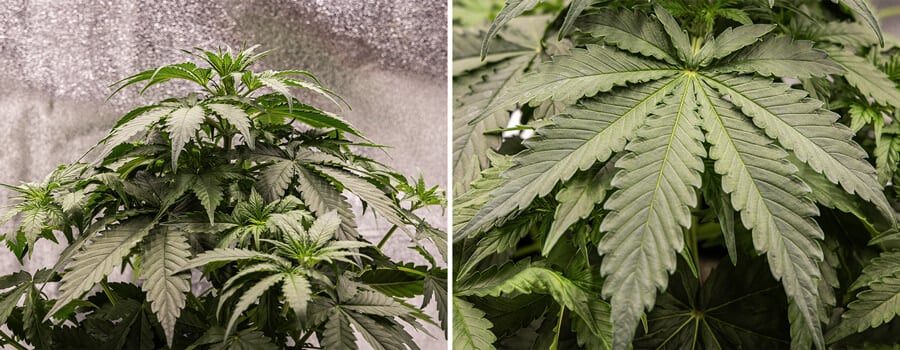
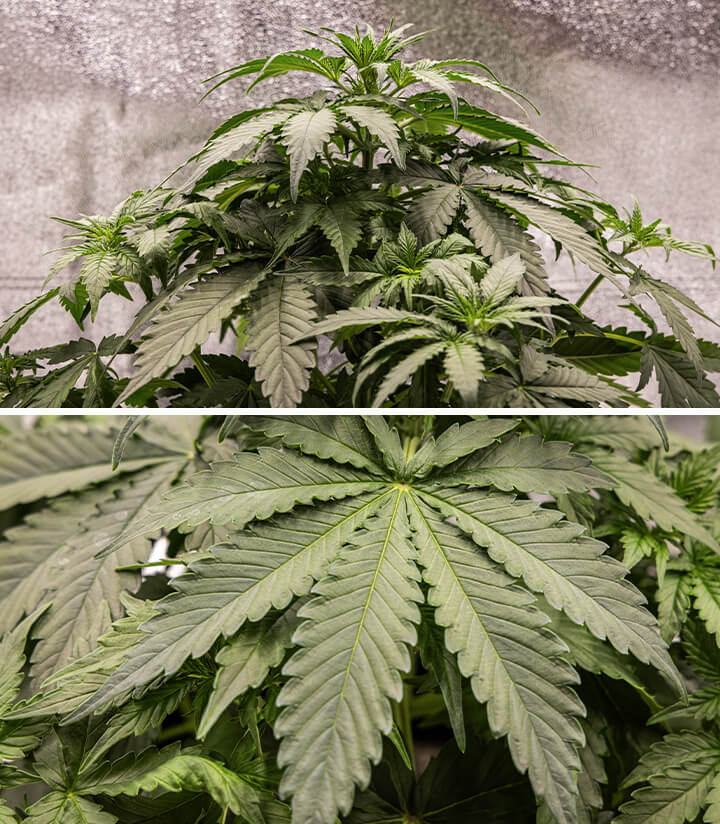
- Lighting: I ran my lights for 18 hours at 60% potency this week. I kept my lights 35 cm from the top of my canopy, and White Widow Auto seemed to love it, growing vigorously all throughout the week.
- Nutrients and water: I watered my plants twice this week. On day 17, I watered all three plants in my tent with 8 l of pH-regulated water enriched with Bio-Grow fertiliser and 8 ml each of calcium and magnesium. On day 20, I watered them again, this time only with pH-adjusted water.
- Environment: Like last week, the max temperatures in my tent occasionally crept above 31°C, while relative humidity stayed at 55%.
- Plant health: My White Widow Auto plant was really a pleasure to look at. Over this week, it developed plenty of large, deep green leaves. Its central stem and branches also began to thicken, and it grew considerably taller, measuring 29 cm in total.
White Widow Auto Grow Report: Flowering Stage (Week 5–10)
After three solid weeks in veg, my White Widow Auto plants seamlessly transitioned into their bloom phase. Thanks to its strong genetics, my plant stretched considerably before focusing its energy on developing elongated and dense flowers covered with aromatic resin. Though they may reach heights of only 40–80 cm indoors and 50–110 cm outdoors, White Widow Auto plants can still produce impressive yields of top-shelf bud loaded with great effects, aromas, and flavours—just see for yourself below!
Weeks 5 & 6
During the first two weeks of bloom, my White Widow Auto plant stretched considerably and grew over 30 cm. Its central stem shot up considerably, while its side branches stayed more compact. At its bud sites, the plant started developing small flower clusters with creamy white pistils and a weak aroma. Its leaves, on the other hand, intensified in colour, turning a deep forest green.
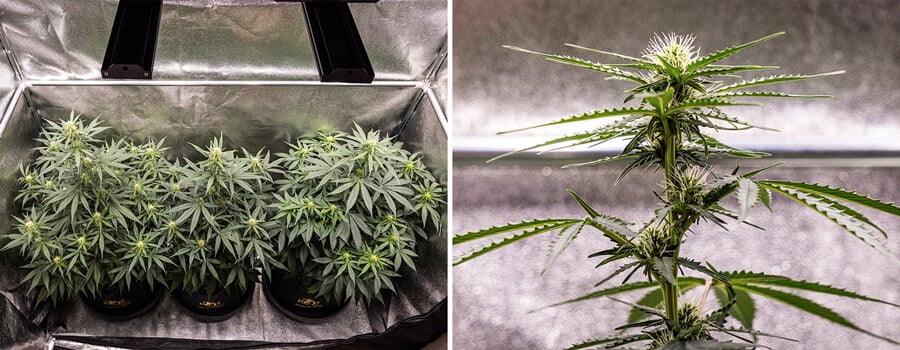
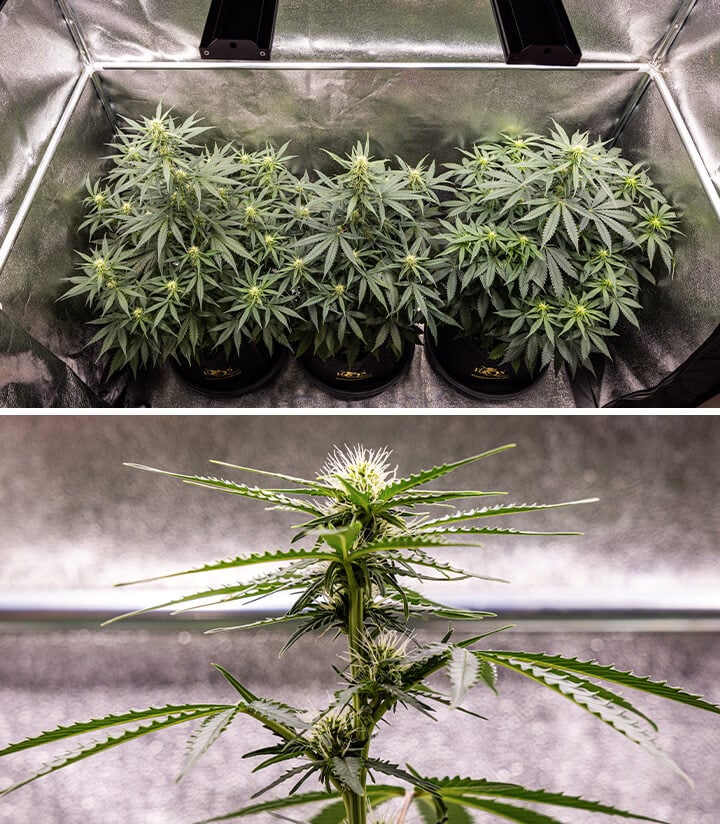
- Lighting: I increased the power of my grow light to 80% right at the beginning of the bloom phase. As my plant stretched, I made sure to adjust my lights and keep them 35 cm from the top of my canopy to avoid light or heat stress.
- Nutrients and water: My White Widow Auto plant seemed noticeably more thirsty than other strains I've grown. During the first two weeks of bloom, I watered my plant three times a week and sometimes even every second day. Every time, I fed the three plants in my tent with 9 l of water enriched with 9 ml of calcium, 9 ml of magnesium, and RQS' Bio-Bloom fertiliser.
- Environment: Summer was in full swing where I live, and temperatures outside and in my home were still very high. Luckily, I was able to keep the temps in my tent at around 28°C and RH at just under 50%.
- Plant health: I am really happy with the look of my plant at this stage. Its foliage is lush and green and its stems are strong. I defoliated the lower 15% of my White Widow Auto plant at the end of its first week in bloom to promote better airflow through the tent and help it focus its energy on the upper bud sites that'll undoubtedly produce a higher-quality smoke. By the end of the second week in bloom, the growth of my plant naturally stagnated as she began focusing all her energy on developing flowers. My White Widow Auto measured 63 cm at this time, and I didn't expect it to grow much taller.
Weeks 7 & 8
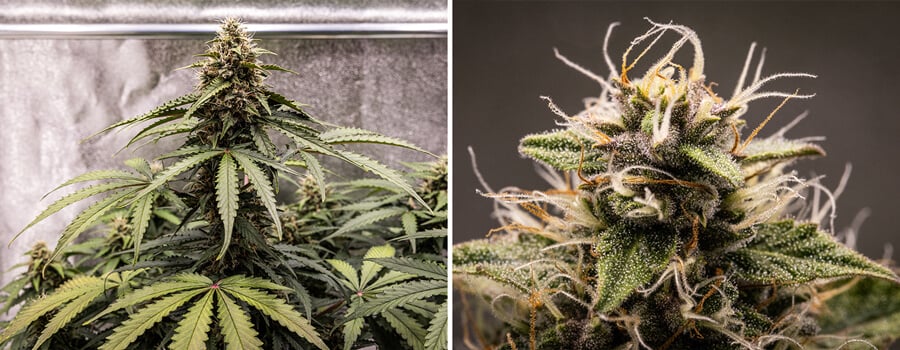
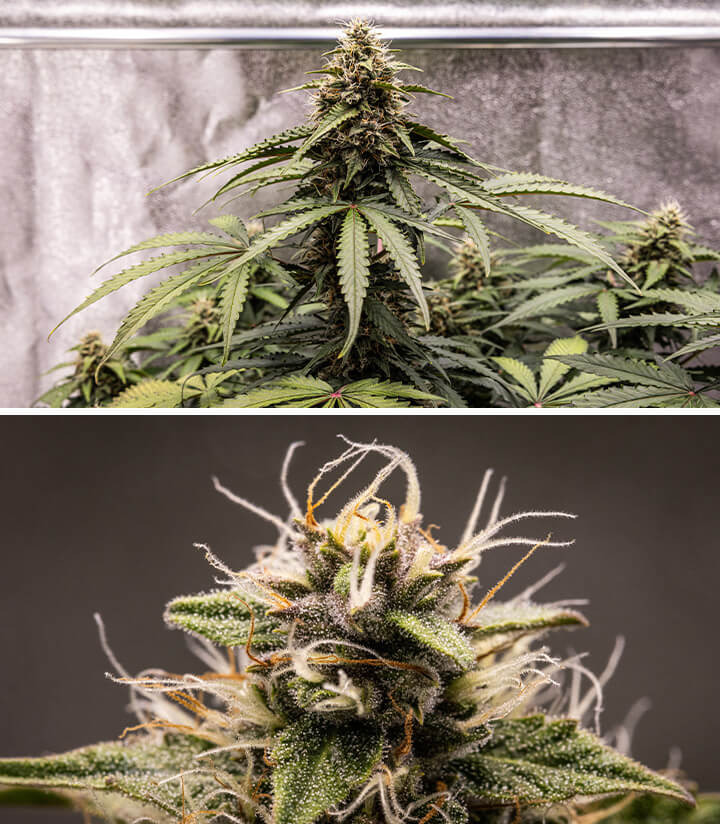
By this stage, my White Widow Auto plant was well into her bloom phase. She reached a final height of 67 cm with a stocky, bushy structure that didn’t develop any further. Her central cola continued to sit high above her lower branches, and her leaves remained a deep green. As she continued to mature, my White Widow Auto plant also became notably more fragrant.
- Lighting: I continued to run my grow lights at 80% capacity for 18 hours per day. They remained at a distance of 35 cm from the canopy of my plants, which seemed optimal for this strain.
- Nutrients and water: I watered the three plants in my tent three times per week. Each time, the plants received a total of 9 l of water with calcium, magnesium, and Bio-Bloom fertiliser (just like in weeks 5 & 6) shared among all three specimens.
- Environment: The average temperature in my grow tent sat at 28°C and I lowered the RH to 40% to accommodate my plants as their flowers fattened up.
- Plant health: By the end of week 8, my White Widow Auto plant had already developed rock-hard flowers with plenty of aromatic resin. Every time I opened my tent, I was greeted by the pungent, earthy scent of this Dutch classic.
Weeks 9 & 10 (Final Weeks of Flowering)
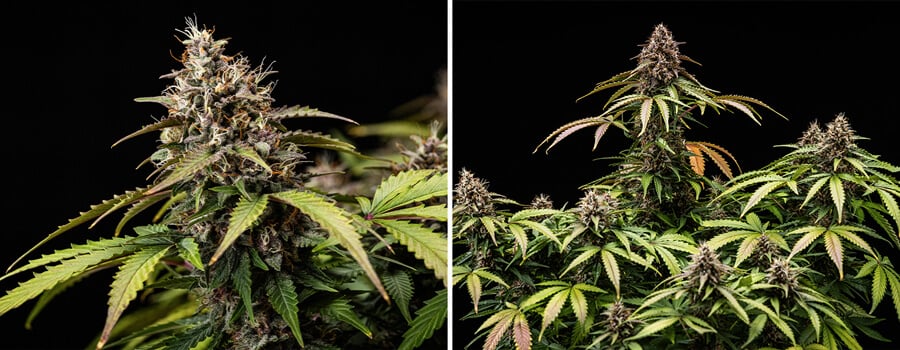
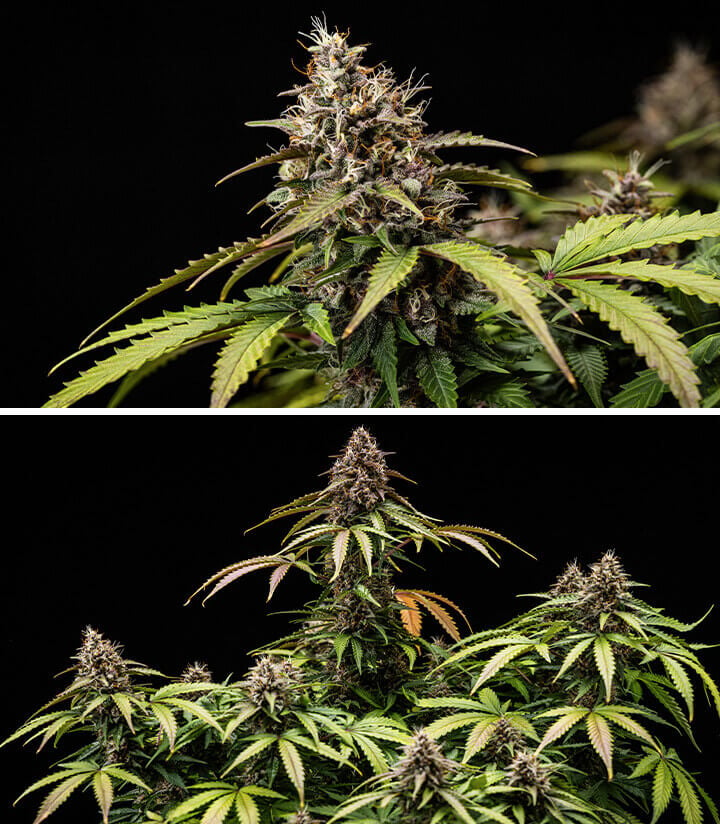
The final weeks of flowering are always highly anticipated when you're growing cannabis. And with her strong aroma, my White Widow Auto plant had me dying to get to harvest. Luckily, this late flowering stage was extra breezy yet worth the wait as her buds fattened up nicely and developed ever more complex aromas, as well as eye-catching purple hues.
- Lighting: Same as weeks 7 & 8.
- Nutrients and water: During these final weeks, I continued watering my plant every 2–3 days. However, I stopped feeding and instead gave them only 9 l of pH-adjusted water.
- Environment: Same as weeks 7 & 8.
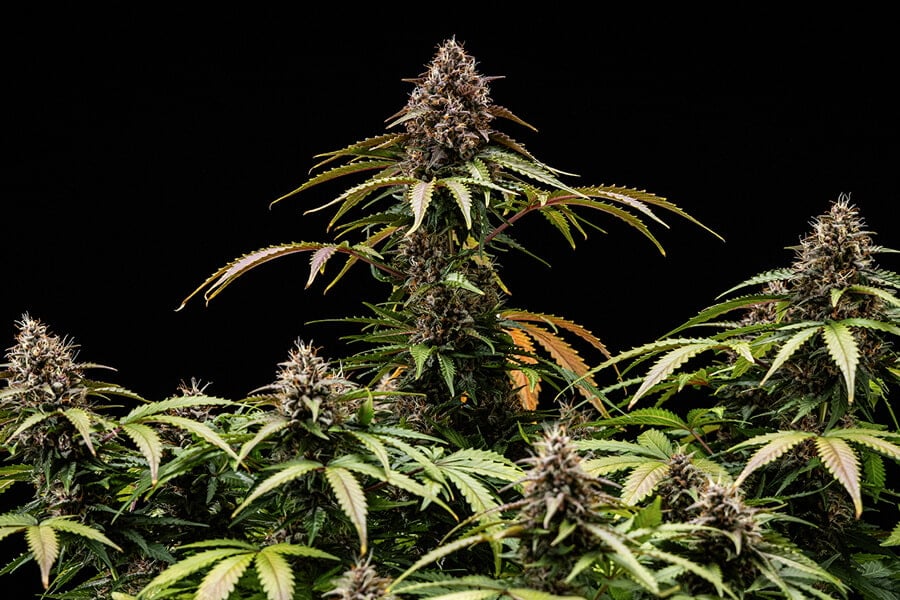
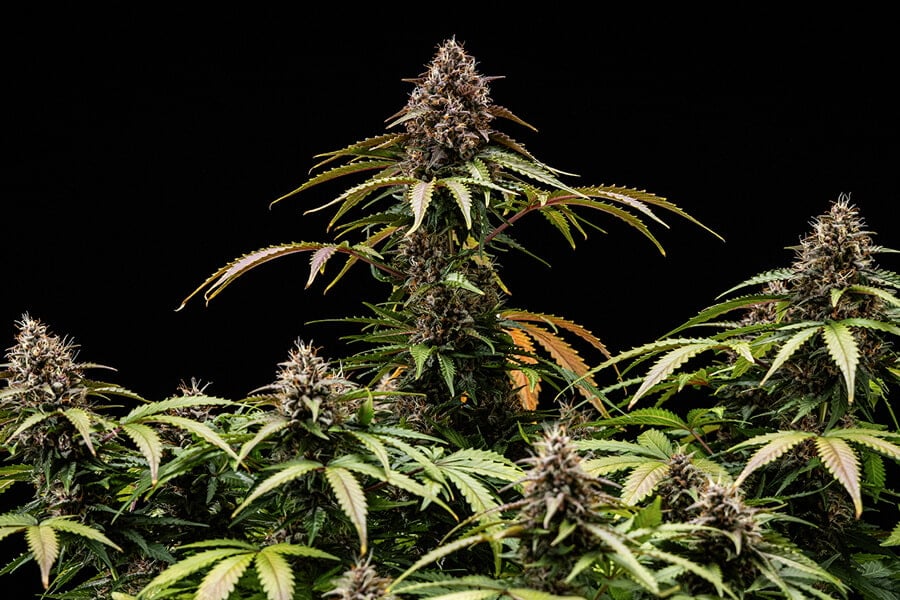
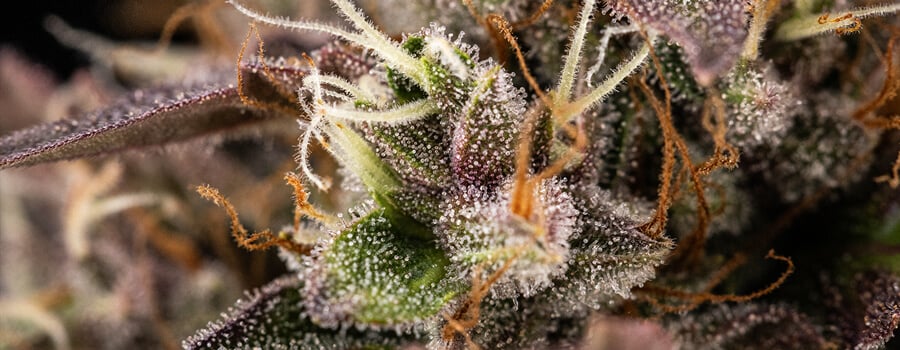
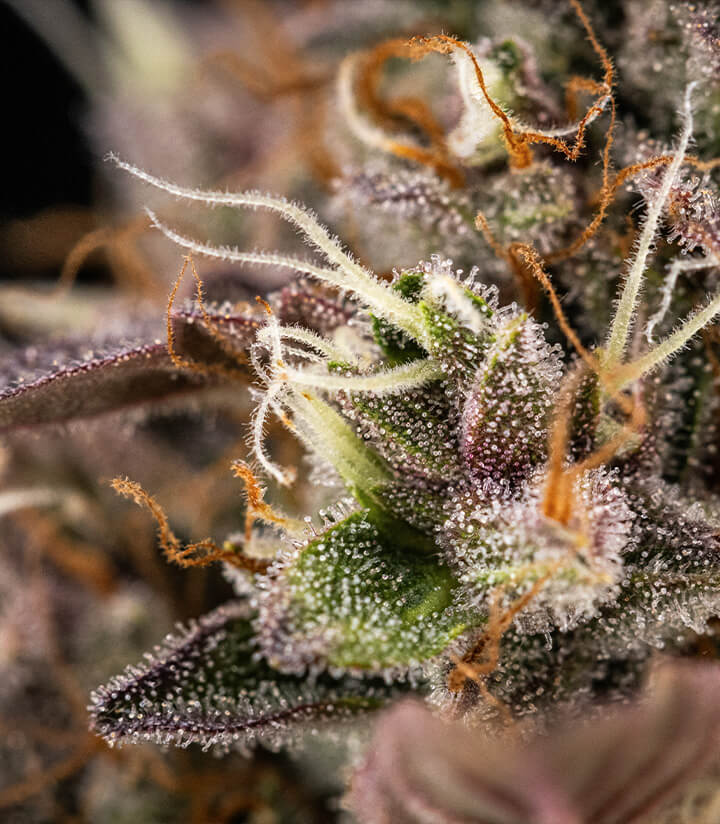
- Plant health: I was really blown away by the health of White Widow Auto, as my plant showed not a single sign of stress from germination right through to its final day in bloom. I was also impressed by the beautiful colours of this pheno. Come harvest time, my plant had developed deep purple hues, which contrasted beautifully against its bright orange pistils and shades of dark green. By this stage of the grow, my tent stank of earth and pine.
White Widow Auto Grow Journal: Harvest
Harvest-time! Because White Widow Auto plants stay nice and compact, I cut mine down and hung the whole thing upside down after wet-trimming its flowers. This ensures that the plant dries more slowly and can promote a better-tasting, smoother smoke. The entire drying process took about 18 days, after which I separated the individual buds from their branches and stored them in curing jars with humidity packs and waited for them to cure.
Overall, I harvested 86 g of dry bud from a single White Widow Auto plant—very impressive!
Genetic Attributes of White Widow Auto
White Widow is a true celebrity strain that's beloved all across the world. And RQS' White Widow Auto is bound to be just as popular, as she preserves the genetics that made the original photoperiod strain so popular. Descending from a select clone of White Widow S1 and one of our prime ruderalis cuts, White Widow Auto packs all the aromas, flavours, and potent effects of the original White Widow into a seed that's super easy to grow and ready for harvest just 10 weeks after germination!
Growing Characteristics of White Widow Auto
White Widow Auto is a compact strain that vegetates for roughly three weeks before flowering for seven weeks. Mature plants reach max heights of 40–80 cm indoors or 50–110 cm outside and preserve a bushy, stocky structure. As shown in the photos I took of my plant, White Widow Auto develops several short side branches, as well as a towering main cola that packs long, dense flowers. Capable of handling even subpar conditions, this strain is ideal for growers of all skill levels as well as outdoor cultivators living in areas with harsher climates.
Effects, Aroma, and Flavour of White Widow Auto
White Widow Auto preserves the classic aromas of our White Widow S1. Expect to be greeted by pungent earthy-pine aromas every time you crack the lid of your curing jars. Her flavours are similar, with notable hints of incense and pepper, while her effects are deeply soothing. Light up this Dutch classic on your own or with close friends whenever you want to kick up your feet and unwind before eventually dozing off into a deep sleep.


