.

A Beginner's Guide To Growing Cannabis In A Space Bucket
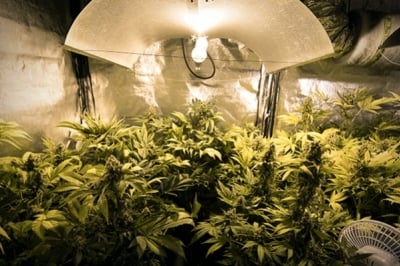
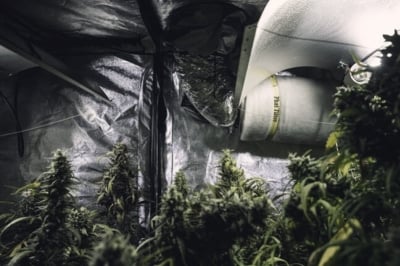
If you don't have much room or money but still want to grow a little weed, a space bucket might be the way to go. You can build one yourself from cheap materials you can find at most hardware shops. Let's take a look at what's involved in this increasingly popular micro-grow technique.
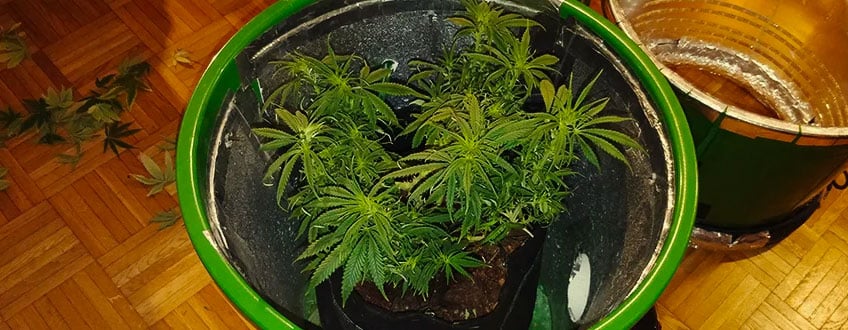
A space bucket combines all the key elements of a grow room into a small, self-contained environment. It contains room for at least one small cannabis plant as well as lighting, fans for ventilation, and a power supply. The typical space bucket is made from a standard 5-gallon (19-litre) bucket, but the final design is only limited by your imagination and available space. Think storage totes and waste bins if you want to expand your options.
WHY GROW WEED IN A SPACE BUCKET?
Growing weed in a space bucket has three primary advantages: low cost, small footprint, and total control.
LOW COST
Space buckets are cheap to make. You could easily spend €1,000 or more to build out a grow room, but this micro-environment will only set you back by a tenth of that. Most of the items you'll need can be found around the house or purchased at any shop that sells household items.
SMALL FOOTPRINT
Space buckets take up very little space, making them perfect for apartments, dorm rooms, or crowded houses. If you have an empty corner in your closet, a little space in the garage, or even a small spot under the kitchen sink, you can grow weed in a space bucket. Camouflage your bucket by surrounding it with other storage containers and hiding the wires if you keep it in an area where other people frequent. No one should be able to see the lights once the bucket is sealed, but they might be able to hear a low hum from the fans.
TOTAL CONTROL
Most space bucket growers do so because they like to challenge the limits of what they can do in a small space. Sealed micro-environments give you total control over the grow, and that comes with both advantages and disadvantages.
A little mistake that could be easily corrected in a large grow room could be enough to kill your plants in a space bucket. But, if you can maintain consistency in lighting, feed, and pH levels, you could experiment and see what a small change to one aspect of the grow will do.
To do this, set up at least two space buckets to grow the same strain under different conditions. You could train differently, flip one to bloom early, or try different nutrients. Soon, you'll know which method was better. Keep what works best for your next space bucket project or integrate your newfound knowledge into a bigger grow.
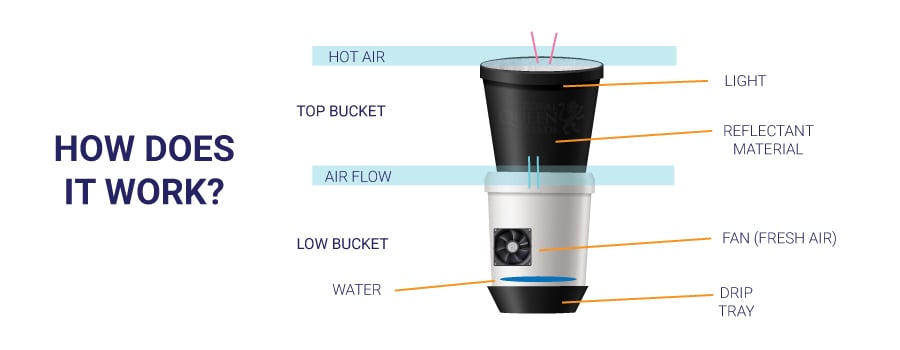
HOW TO MAKE YOUR OWN SPACE BUCKET
You can purchase a pre-made space bucket, but the whole idea behind this concept is to do it yourself. Here's how you make a basic, starter space bucket.
MATERIALS AND TOOLS
A) 2 x 5-gallon plastic buckets
B) 1 x 5-gallon plastic bucket lid
C) 180W full-spectrum LED grow light
D) 2 small fans
E) Power strip
F) Timer
G) 4 x 6mm bolts with nuts and washers
H) 1m of thin rope
I) Spray glue
J) 1 tube silicone sealant
K) Permanent marker
L) Measuring tape
M) Mylar film
N) Duct tape
O) Rotary tool
P) Drill
Q) Screwdriver
R) Razor blade
S) Safety glasses
INSTRUCTIONS:
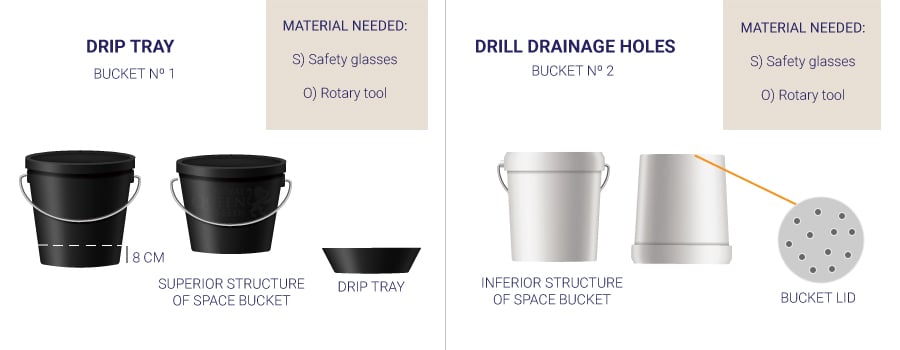
MAKE THE DRIP TRAY
1. Measure 8cm up from the bottom of one bucket and draw a horizontal line.
2. Put on the safety glasses.
3. Use the rotary tool to cut along the line.
4. Set the bottom of the bucket to the side for now.
5. The bottom of the bucket is your drip tray. The top part will be the top of the space bucket.
DRILL DRAINAGE HOLES
1. Turn the other bucket upside down.
2. Drill 12 holes evenly distributed across the bottom for drainage.
3. Remove the handle.
4. This is the bottom of the space bucket. It sits on top of the drip tray.
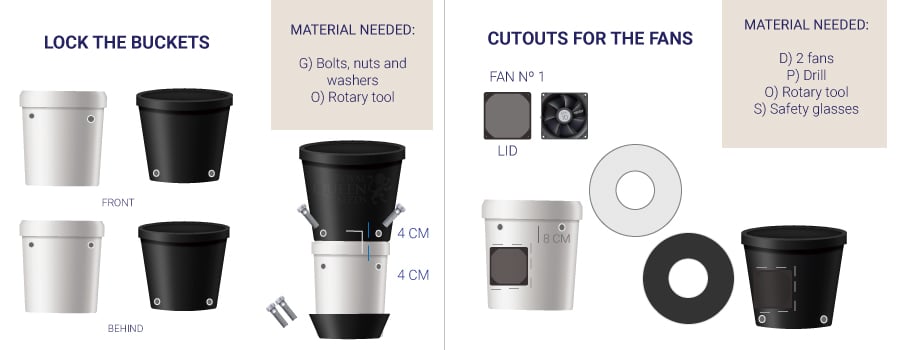
ADD BOLTS AND SLOTS TO LOCK THE TWO BUCKETS TOGETHER
1. Drill 4 holes in the bottom section of the space bucket. They should be 4cm from the top rim and spaced evenly apart.
2. Insert a bolt in each hole and tighten using the nuts and washers.
3. Put the top section on the bottom section, allowing it to rest on the bolts.
4. Mark where the bolts are, then draw up 4cm and over 4cm to form an L-shape. They should all point in the same direction.
5. Use the rotary tool to cut on the L-shaped mark to form a 6mm channel.
6. Put the top section on the bottom.
7. Line up the bolts with the channels so that the top drops down over the bottom.
8. Twist to lock. Pick up using the handle to make sure you have a secure fit.
MAKE CUTOUTS FOR THE FANS
1. Separate the top and bottom sections.
2. Remove the cover from one of the fans.
3. Use the fan cover to mark the cutout and mounting holes on the bottom section. This should be about 8cm from the top rim.
4. Put on safety glasses.
5. Use the drill to make the mounting holes.
6. Use the rotary tool to make a cutout for the fan's output.
7. Repeat for the top section.
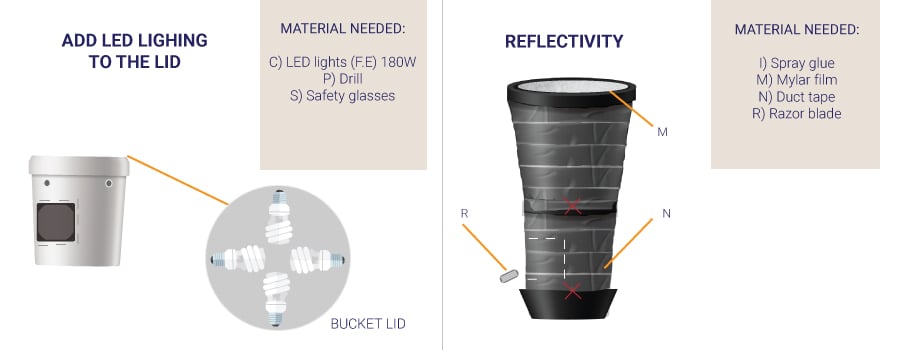
ADD LED LIGHTING TO THE LID
1. Find the mounting holes on top of the LED light.
2. Cover the top of the LED light with a piece of paper. Trace the positions for the mounting holes, power cord, and fan intake.
3. Use the paper as a template to transfer the positions to the bucket lid.
4. Put on safety glasses.
5. Use a drill to create openings for the mounts and electrical cord. Use the dremel tool to create a larger hole for the fan intake.
6. Remove the top lid from the LED light. It should screw off or pop off.
7. Remove the screws intended to hold mounting cables.
8. Insert each screw through a washer, then through the bucket lid, through the top of the LED light. Tighten with a nut.
9. If possible, flip the fan around so it blows out of the bucket.
10. Reconnect the LED light to its lid, now attached to the bucket lid.
INCREASE REFLECTIVITY, ELIMINATE LIGHT LEAKS
1. Using the spray glue, line the inside of the buckets with Mylar film to increase reflectivity.
2. Cover the outside of the buckets and drip tray with duct tape to prevent light leaks.
3. Do not cover the bottom of the bucket with the drain holes.
4. Once everything is covered, cut through the tape and Mylar with a razor blade to re-open the fan cutouts.
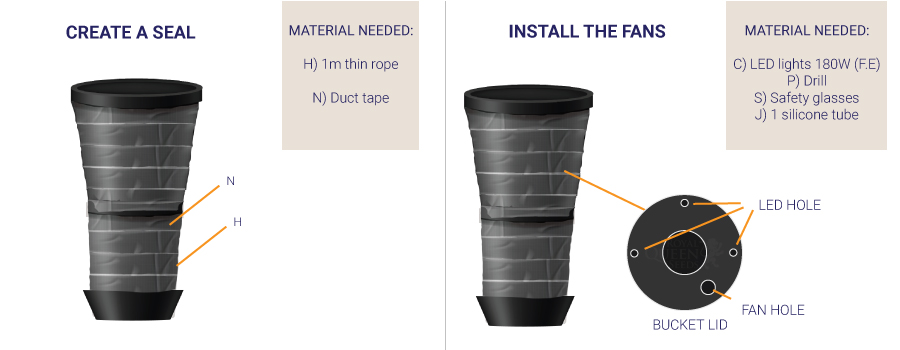
CREATE A SEAL BETWEEN THE TOP AND BOTTOM BUCKETS
1. Use duct tape and rope to create a seal that runs between the bottom bucket's rim and the 4 bolts.
2. Lock the top to the bottom and check the fit.
3. Continue adding duct tape over the rope one layer at a time until the gap is closed and no light will be able to leak out.
INSTALL THE FANS
1. The intake fan should be mounted on the bottom bucket.
2. Insert the fan body so that the grill is on the inside of the bucket.
3. Insert the screws and tighten as much as possible to prevent air leaks.
4. Repeat to install the exhaust fan to the bottom bucket, making sure that the grill points outside the bucket.
5. Use the tube of silicone to seal any gaps between the bucket and fan housing.
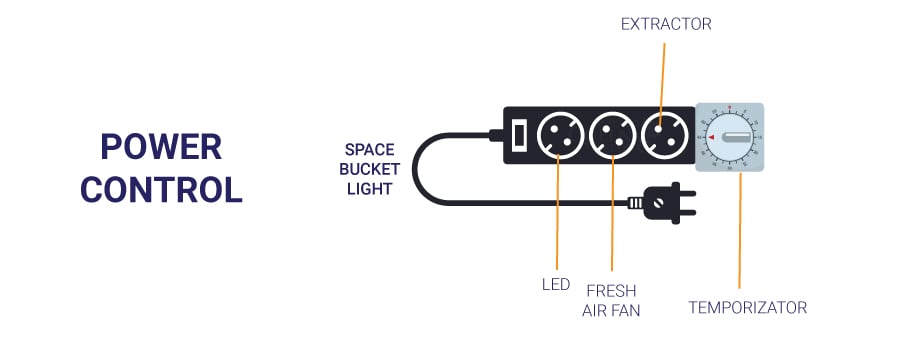
PLUG IN AND TEST
1. Assemble the bucket.
2. Plug the fans directly into the power strip.
3. Plug the LED light into the timer. Plug the timer into the power strip.
4. Plug in the power outlet and make sure everything is operating as expected.
ADD CANNABIS PLANTS AND GROW HERB
1. Add a pot with a small seedling.
2. Set the timer.
3. Feed and water as needed until harvest. On average, you can harvest about an ounce (28g) per grow from this type of setup.
SPACE BUCKET MODS AND HACKS
The steps above explain how you can make a simple space bucket. It'll only take you a few hours, you don't need a lot of fancy equipment or materials, and it works.
But this isn't the only way to do it. That's the beauty of space buckets. You take the idea, then customise it to make it your own. There are virtually no limits.
Here are some things that other space bucket masters have done:
• Use storage bins for enough width to grow multiple plants.
• Stack more buckets or use trash cans for more height.
• Use a drip system to convert it to hydro.
• Add a stronger exhaust system to the top with a carbon filter.
• Add supplementary lighting below the canopy with CFLs or LED strips.
POINTERS FOR GROWING WEED IN A SPACE BUCKET
Growing cannabis plants in a space bucket isn't too different from a traditional grow, but there are some things to consider.
It's better to go from veg to bloom a little too early than waiting too long. That's because you need to keep your plants on the smaller side if you want them to survive until they're fully mature. Cannabis can stretch by up to 200% once the light schedule is switched to 12/12 to force bloom. You should also choose indica strains over sativas and use a variety of training techniques to keep your plant's size in check.
Instead of planting directly into the bottom of the space bucket, use a separate pot so you can easily lift it out if you need to for any reason. It'll also keep your space bucket cleaner so you can start a new grow immediately after you finish a harvest.
Don't be disappointed if your yield is smaller than expected. Most first-timers get somewhere between ½ and ¾ of an ounce. Regular space bucket growers generally get about an ounce per grow, but the all-time record is a little more than 3oz (85g).
Remember that increasing the size of your space bucket will almost always mean adding more lights. Don't go too tall. If you do, you can obviously grow a taller plant, but the light won't reach far enough into the canopy to increase the yield. Instead, you could end up with a lot of fluffy popcorn buds instead of big, heavy nuggets.
SPACE BUCKET SUMMARY
Space buckets are an interesting DIY project that challenges growers and allows them to push the boundaries of what's possible on a smaller scale. They can produce a small amount of dank buds using minimal resources, but final yield is not what growing in space buckets is all about. It's more about learning how to completely control every aspect of a micro-environment to learn what maximises potency, flavour, resin content, or any other desirable trait. Whether you use that knowledge to improve your next space bucket project or carry it over to a full-sized grow is up to you.


