Amount exceeded

4.8 out of 5 based on 43040 reviews


Contents:
Drying and curing cannabis properly is the key to unlocking your weed's full potential—flavour, potency, and shelf-life all depend on these crucial post-harvest steps. Rush them, and your weed risks losing terpenes and cannabinoids, or worse—you could end up with mouldy buds!
For optimal results, cannabis should be dried in a controlled environment at temperatures between 15–21°C and relative humidity of 45–55%. Then, you should cure your buds in quality containers at RH levels of 58–62% to enhance their flavour, aroma, and potency even further. Keep reading to learn the ins and outs of how to dry and cure your weed to ensure a top-shelf smoke, every time.


Drying and curing weed is crucial. Proper drying and curing transform your carefully grown plants into the potent, flavorful buds you envisioned when you first planted those seeds.
First and foremost, the drying process removes moisture from freshly harvested flowers, ensuring they heat properly during smoking/vaping and can be stored for prolonged periods without getting mouldy. It also kickstarts the chemical processes needed to ensure your weed delivers the effects you’re after, such as decarboxylation.
The curing process, on the other hand, involves storing your weed in the right containers and at the right conditions to ensure their aromas, flavours, and potency develop further. While your weed will technically be smokable after the drying process, it’s curing that makes or breaks the final quality of a harvest.
All in all, the drying and curing of cannabis helps to:
| Proper Drying & Curing | |
|---|---|
| Flavour & Aroma | Rich, fragrant, and full-bodied |
| Smoke Quality | High |
| Risk of Mould | Low |
| Potency | High |
| Flavour & Aroma | Smoke Quality | Risk of Mould | Potency | |
| Proper Drying & Curing |
Rich, fragrant, and full-bodied | High | Low | High |
| Improper Drying & Curing |
Poor flavour, harsh taste | Harsh | High | Low |
| Improper Drying & Curing | |
|---|---|
| Flavour & Aroma | Poor flavour, harsh taste |
| Smoke Quality | Harsh |
| Risk of Mould | High |
| Potency | Low |
Drying cannabis typically takes 7–14 days, depending on factors like:
| Hang Drying | |
|---|---|
| 7-14 days | Traditional, slow drying |
| Rack Drying | |
|
5-10 days |
Faster drying of smaller buds. Good for large harvests |
| Tent Drying | |
| 7-14 days | Allows for more control. Ideal for advanced growers |
| Hang drying | 7–14 days | Traditional, slow drying |
| Rack drying | 5–10 days | Faster drying of smaller buds. Good for large harvests |
| Tent drying | 7–14 days | Allows for more control. Ideal for advanced growers |
Drying and curing are two separate post-harvest procedures that are both vital to the production of high-quality cannabis. Here's how they differ:


Cannabis flowers contain about 80% water at the time of harvest. This high moisture content must be gradually reduced to ensure a smooth, flavourful smoke and a product with a good shelf-life. That's where drying comes in—it allows excess moisture to escape from the flowers, making them less prone to mould while improving their combustion properties.
As cannabis dries, it slowly starts to undergo decarboxylation—a chemical reaction in which cannabinoid acids like THCA and CBDA lose a carboxyl group, transforming into their active forms, THC and CBD. The latter are the compounds most users seek out in dry cannabis flower, as they contribute to weed’s psychoactive and holistic effects. The final bout of decarboxylation happens when you heat cannabis, either by smoking it, vaping it, or heating it in the oven prior to making edibles.
After cannabis flowers are dried, the curing phase helps further refine their quality. During this process, decarboxylation continues but at a slower rate, allowing terpenes—the aromatic compounds responsible for cannabis’ unique flavours and scents—to mature and develop. This slow maturation process prevents the rapid degradation of cannabinoids and terpenes, preserving the plant’s potency and enhancing the overall smoking experience.
Additionally, curing helps to break down chlorophyll, the pigment responsible for cannabis’ green colour. When chlorophyll degrades, it removes the harsh, grassy taste of fresh or uncured flower. The result is a smoother, more enjoyable smoke with more complex flavours and aromas.
At harvest time, it's easy to get antsy as you see your plants heavy with flowers. However, remaining patient and taking your time to properly dry and cure your weed is essential to producing buds that are potent, flavourful, aromatic, and, most importantly, suitable for long-term storage.
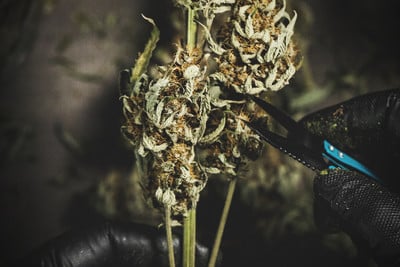
There are two main methods for trimming your buds at harvest time: wet trimming (which involves trimming your flowers right after you harvest them) and dry trimming (which involves trimming flowers after they've dried).
The trimming method you choose can affect everything from the smoothness of your smoke to the final visual appeal of your buds. Picking one over the other will depend on your preferences, as both techniques have their advantages and disadvantages.
| Wet trimming | |
|---|---|
| Easier, faster drying | Can dry too fast, losing terpenes. Higher risk for inexperienced trimmers to "over-trim" their buds |
| Dry trimming | |
|
Promotes slower drying that can enhance flavours and aromas |
Longer drying time requires patience. In poor conditions, dry trimming may increase the risk of buds developing mould |
| Wet trimming | Easier, faster drying | Can dry too fast, losing terpenes. Higher risk for inexperienced trimmers to "over-trim" their buds |
| Dry trimming | Promotes slower drying that can enhance flavours and aromas | Longer drying time requires patience. In poor conditions, dry trimming may increase the risk of buds developing mould |
Unsure which trimming method to use? Check out our comprehensive cannabis trimming guide here.


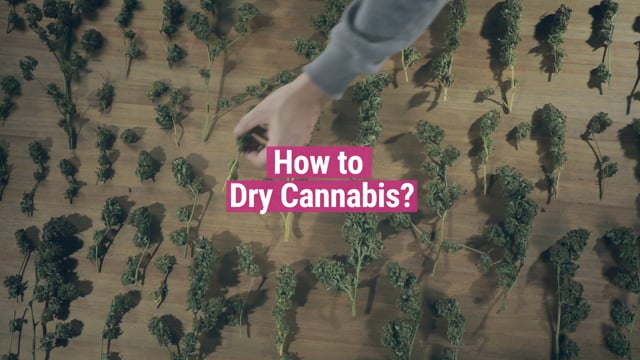
The best way to dry cannabis buds is to hang them in a well-ventilated space. Allowing air to freely move around all sides of your flowers will ensure that they dry evenly and gradually.
We recommend three main ways of drying cannabis:
| Pros | Cons | |
| Hang drying | Ideal for hanging entire plants or large branches. Ensures a gradual, slow dry and minimises the degradation of terpenes/cannabinoids. | Slower than rack drying. Not suitable for tight spaces or growers who need to rapidly dry large amounts of weed. |
| Rack drying | Uses drying racks designed to hold individual buds. Much faster than hang drying and great for drying large harvests in smaller spaces. | Increased risk of over-drying. |
| Tent drying | Perfect for creating an isolated drying environment. Can work with racks or by hang drying large plants/branches. | Requires a dedicated drying tent and complete environmental control—things that not every grower has access to. |
| Hang Drying | |
|---|---|
| Pros | Ideal for hanging entire plants or large branches. Ensures a gradual, slow dry and minimises the degradation of terpenes/cannabinoids. |
| Cons | Ideal for hanging entire plants or large branches. Ensures a gradual, slow dry and minimises the degradation of terpenes/cannabinoids. |
| Rack Drying | |
|
Pros |
Uses drying racks designed to hold individual buds. Much faster than hang drying and great for drying large harvests in smaller spaces. |
| Cons | Ideal for hanging entire plants or large branches. Ensures a gradual, slow dry and minimises the degradation of terpenes/cannabinoids. |
| Tent Drying | |
| Pros | Perfect for creating an isolated drying environment. Can work with racks or by hang drying large plants/branches. |
| Cons | Ideal for hanging entire plants or large branches. Ensures a gradual, slow dry and minimises the degradation of terpenes/cannabinoids. |
The biggest environmental factors that affect the drying of your weed are temperature, humidity, and airflow.
The best tools for maintaining the right environment for drying cannabis are:
Growers can be very innovative when coming up with ways to dry their buds. However, whenever possible, we recommend sticking to tried-and-tested drying techniques like hang drying, rack drying, or tent drying. These techniques reliably produce good results. Avoid drying cannabis in makeshift setups (such as inside cardboard boxes, for example) unless you have no other alternative.
Drying cannabis is a straightforward process. However, that doesn't mean that it doesn't go wrong occasionally. Some of the most common mistakes we see growers make when drying their weed include:
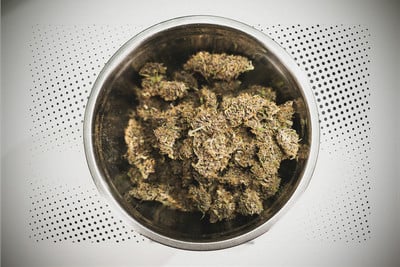
Cannabis buds are ready for curing when they contain only 10–12% internal moisture. But how can you tell how much moisture is in your weed? Some of the most popular ways include:

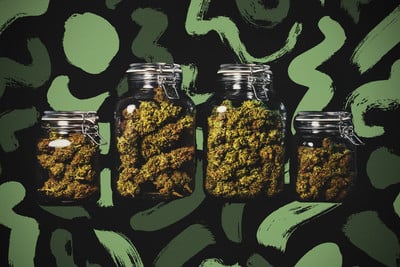
Curing is a slow, controlled process that takes place after drying. It helps enhance the quality of dry cannabis flower by promoting the development of terpenes and stabilising cannabinoids.
Cannabis that's cured properly will have rich, complex aromas and flavours as well as potent effects. While a basic cure takes just 2–4 weeks, curing cannabis for 3–6 months can greatly enhance its flavour and aroma. Top-shelf cannabis from dispensaries, for example, sets itself apart by being cured for extended periods.
Are you an experienced cannabis cultivator? Consider testing your flower at different stages of the curing process to see how it changes. In general, the benefits of extended curing could include:
Curing cannabis takes time but is straightforward. Here’s a basic overview of how to do it:


Check out our comprehensive guide on curing cannabis for a more detailed walkthrough.
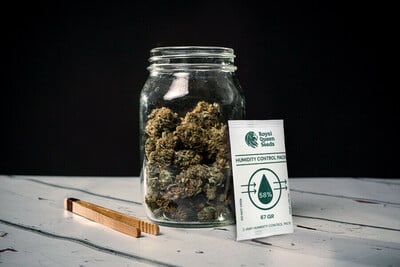
The ideal humidity level for curing cannabis is 58–62% RH. Within this range, your buds will remain fresh, aromatic, and potent without developing mould. The best way to maintain the right humidity in your curing jars is through the use of humidity control packs. Our RQS Humidity Control packs, for example, have been specially designed for curing cannabis.
Cannabis curing times can vary depending on preference and patience. A basic cure can take just two weeks, but experienced weed connoisseurs may want to cure their buds for several months (at least). Some standard industry curing times are:
Remember, curing weed is an essential process that, like drying, shouldn't be rushed. While your weed will be smokable after a two-week cure, it will only get better with time. Most top-shelf commercial cannabis, for example, is cured for multiple months before it hits the shelves. At home, you can achieve the same quality of results—all it takes is patience.
| Curing Time | Results |
| 2–4 weeks | The bare minimum. Produces buds with decent aroma and moderate smoothness. |
| 3–4 months | Richer aromas and smoother flavours. A decent mid-way mark for most serious smokers. |
| 4-6 months | Peak quality, with refined aromas and top-shelf potency. |
| Curing Time | Results |
| 2–4 weeks | The bare minimum. Produces buds with decent aroma and moderate smoothness. |
| 3–4 months | Richer aromas and smoother flavours. A decent mid-way mark for most serious smokers. |
| 4-6 months | Peak quality, with refined aromas and top-shelf potency. |
After curing, the only thing left to do to preserve your flower is store it properly. Luckily, storing weed properly is easy—all it takes is high-quality storage containers and some decent protocol.


To ensure your weed stays fresh for longer, remember:
Drying and curing cannabis is essential for maximising its aroma, flavour, potency, and shelf-life. And while it's understandable that you're eager to test your weed come harvest time, it's vital you learn to be patient and dry and cure your cannabis slowly. When you finally do get around to tasting your harvest, you'll thank us for it!