 Weed Grow Guide by Royal Queen Seeds
- Growing weed step by step
- Cannabis growing basics
- Choosing your seeds
- How to germinate seeds
- The cannabis vegetative stage
- The cannabis flowering stage
- Harvesting cannabis
- Trimming, drying, and curing
- Choosing pots and soil
-
Growing indoors
- A Complete Overview Of Growing Cannabis Indoors
- Cannabis Cultivation Tips: How To Set Up Indoor Grow Lights
- How Many Cannabis Plants Can You Grow Per Square Metre?
- Indoor Cannabis Growing: Relative Humidity and Temperatures
- Hydroponics Cannabis Growing Guide (with diagrams)
- Cannabis Micro Growing: Growing Great Weed in Tiny Spaces
- Growing outdoors
- How to grow autoflowering cannabis
- Cannabis nutrients and pH
- Cannabis troubleshooting: Nutrients
-
Cannabis troubleshooting: Growing
- Cannabis Seed Germination — Troubleshooting Guide
- How to Deal With Pythium (Root Rot) in Cannabis Plants
- Slow Cannabis Plant Growth And What You Can Do About It
- How to Deal With Leggy Cannabis Seedlings
- Watering Your Cannabis: How to Fix Overwatering and Underwatering
- Understanding Male, Female, And Hermaphrodite Cannabis
- Identifying and Treating Common Cannabis Ailments
- How To Revive a Sick Cannabis Plant
- How to Avoid Mouldy Weed During Drying and Curing
- How to Prevent and Treat Dry and Crispy Cannabis Leaves
- What Cannabis Leaves Can Tell You
- Causes and Solutions for Yellow Cannabis Leaves
-
Cannabis Strains Grow Report
- HulkBerry Automatic Grow Report
- Blue Cheese Auto Grow Report
- Purple Punch Automatic Strain Grow Report
- Triple G Automatic Grow Report
- Do-Si-Dos Automatic Grow Report
- Green Gelato Automatic Grow Report
- Haze Berry Automatic Grow Report
- Purple Queen Automatic Grow Report
- Cookies Gelato Automatic Grow Report
- Sherbet Queen Automatic Grow Report
- Sweet Skunk Automatic Grow Report
- Medusa F1 Grow Report
- Cannabis plant training
-
Weed growing tips
- The Cannabis Plant Anatomy
- How to preserve seeds - UK
- How Much Sunlight Do Outdoor Cannabis Plants Need To Grow?
- How to Control and Prevent Stretching in Cannabis Plants
- My Cannabis Plants Are Growing Too Tall: What Should I Do?
- Should You Worry About Purple Or Red Cannabis Stems?
- What To Do When Your Indoor Cannabis Won’t Flower
- How To Protect Your Cannabis Plants From Heat Stress
- How To Tell If Your Female Cannabis Plant Has Been Pollinated
- Growing Medical Marijuana
- Bud Washing: How to Clean Your Weed
- Understanding Cannabis Yield per Plant
How to start growing cannabis

Getting started with cannabis cultivation: a guide for new growers.
Contents:
So you want to grow at home, but don't know where to begin. Never fear! Our guide to cannabis cultivation will inform you on all the essentials. Learn to grow like the pros!
KNOW WHERE TO FIND GROW GUIDES AND RESOURCES
If you yearn to grow your own cannabis, you’ve already taken the first major step by reading through this grow guide. Even if there are technical terms you don’t yet understand, becoming more familiar with the overall process of growing weed at home will help you when it comes time to plan and build out your grow.
Like any exploit, this is an artform that takes practice. In addition to this guide, the Royal Queen Seeds cannabis blog is chock full of helpful information, offering tips and tricks addressing all manner of grow-related questions and concerns. You can also check out the following articles below to discover some other resources to read and watch to help you on your way:
- 7 YouTube Channels Every Stoner Needs To Watch
- 10 Apps Every Stoner Shouldn’t Be Without
- The Top 10 Books On Cannabis
- The Complete Guide: How To Germinate Weed Seeds
If you want to interact and learn from other growers, be sure to visit popular grow forums for personal accounts. Here, you can talk to novice and experienced growers alike, giving and taking advice to help each other learn. Of course, it’s important to take these accounts with a grain of salt as the information is seldom verified.
At the end of the day, though, putting theory into practice always comes with some unexpected hurdles. Get ahead of the game by familiarising yourself with these crucial factors below!
PICK THE RIGHT CANNABIS SEEDS
Obviously, cannabis plants don’t just grow from nothing, which means we need to get a hold of some seeds first. Fortunately, you can source quality cannabis seeds from the RQS catalogue, which are tested for quality and feature some of the best germination rates on the market.
Now for the more difficult portion: choosing your strains. The key is to not let the array of genetics on offer overwhelm or confuse you. To successfully navigate the different options, let’s go over the basic differences between indica and sativa.
INDICA
Indica plants are stocky, and feature broad stems and wide leaves. Their flowering period is relatively short, and they are known to produce larger, denser buds. Indicas are what some stoners call “nighttime” strains because they often provide a relaxing stoned effect.
Other effects commonly associated with indicas include:
- Couch-lock
- Sedation
- Munchies
- Body high
- Deep relaxation
Some of our most famous indica strains include: ICE, Northern Light, Blue Mystic, O.G. Kush.
-
 INDICA
 - Couch-lock
- Chilling
- Appetite
- Body High
- Deep relaxation
- Sleep Aid
- Pain + Nausea Relief
- Stress + Anxiety Relief
-
 SATIVA
 - Energy
- Stimulating
- Head High
- Uplifting
- Creativity
- Fight Depression
-
 INDICA / caratteristiche
 - Couch-lock
- Chilling
- Appetite
- Body High
- Deep relaxation
- Sleep Aid
- Pain + Nausea Relief
- Stress + Anxiety Relief
SATIVA
In contrast to indicas, sativas tend to grow quite tall, have thinner leaves and longer stems, and take much longer to flower than indicas. Moreover, their effects tend to err on the side of energetic over sedative.
Other effects commonly associated with sativas include:
- Cerebral stimulation
- Physical energy
- Creativity
- Euphoria
Some of our most famous sativa strains include: Power Flower, Amnesia Haze, Haze Berry, Royal Moby.
Today, very few cannabis strains are pure indica or sativa. Most varieties you’ll find are hybrids, a genetic mix of both sativa and indica. Hybrids can be indica-dominant or sativa-dominant, or can be split 50/50. As such, the morphology and effects of hybrids will vary greatly depending on genetic and environmental factors. That said, you can use the common traits of indica and sativa to help guide you in the right direction.
Although there is no “best” option when it comes to strain selection, beginners often choose indica or indica-dominant specimens as they are easier to control and take less time to finish.
Not sure which seeds to choose? Our beginner's guide covers everything you need to know!
Free RQS
Grow Guide!

AUTOFLOWERING
Autoflowers do away with some of the major complications of growing weed. These strains come in the form of both indica and sativa hybrids, but they also contain a third type of cannabis known as ruderalis. These genes allow autoflowers to flower based on age rather than light cycle, unlike traditional photoperiod varieties. Autoflowers also normally grow smaller than photoperiod varieties, which can be an advantage if your space is limited. If you want to learn more about growing autoflowers, you can check out our guide How To Grow Autoflowering Cannabis. For this guide, we will proceed with discussing traditional (feminised photoperiod) cannabis.
GROWING MEDIUM
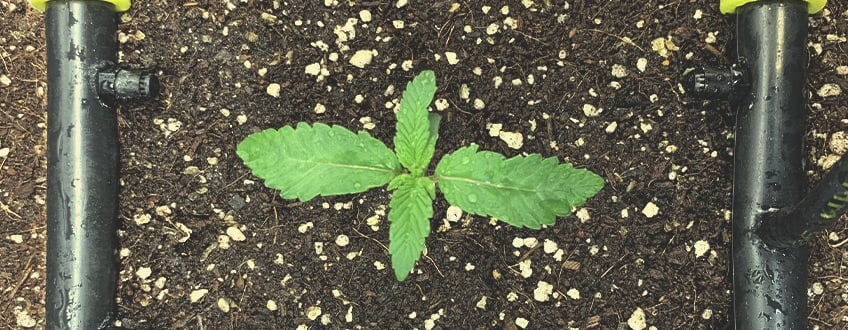
Once you have your seeds, you will need to get suitable containers to hold your soil. Usually, around 7–11-litre pots are a good place to start. Ensure the containers have holes in the bottom to allow water to drain out. Cannabis doesn’t like stagnant moisture.
What type of soil should you get? In principle, you can use most types of universal potting soil, although cheap mixes aren't always optimal for cannabis. Some soil may contain too few nutrients and/or may not be airy enough. Well-aerated soil is important for proper root development. If you have an otherwise good potting soil, you can make it even better by adding perlite, an amorphous volcanic glass that appears as small, light white stones. These help make the soil airier for improved drainage.
These days, you can also find soil mixes especially made for growing cannabis, which should be optimal out of the bag. These mixes contain enough of the right nutrients to sustain the growing (vegetative) phase of your plants, so you shouldn’t need to add any nutrients in the first few weeks. Most of the higher-quality soils will also have perlite already mixed in.
What you definitely should not do: Dig out some dirt from the garden and use it as your potting soil. Not only will this not contain the right nutrients, it will likely also be contaminated with bugs, fungus, and other impurities you definitely don’t want in your grow room.

LIGHTING
Cannabis needs light to grow, and it needs even more light for flowering. Your lighting setup will make a big difference in how your crop turns out.
TYPES OF LIGHTING
In grow shops and online, you will come across all sorts of grow lights—some for the vegetative phase, some for flowering, and some for both. To keep things as uncomplicated as possible, choose a light suitable for all growing stages. In recent years, LED grow lights have become quite affordable. These can be an energy-saving alternative to other types of lighting, such as HID grow lights. Make sure you get a “full spectrum” light, or one with a switch that allows you to easily change the spectrum from veg to bloom. If you only require a low amount of light, such as for seedlings or young vegging plants, you can also use fluorescent bulbs.
WATTAGE
The wattage of your grow light is an important factor to consider for your grow room. For reasonable yields of good quality, you should get at least a 400–600W sodium lamp or equivalent LED light. Of course, you can find more powerful lamps like 1000 and 2000W types, or less powerful ones with 150–250W, but a 400–600W grow light provides a good middle-ground so you can expect decent yields without using too much energy.
A 400W sodium bulb can deliver around 200 grams of bud per m², while a 600W light can achieve 300 grams. Obviously, these are only estimates. If you get more, count yourself lucky. Expert growers may get up to 300g/m² from a 400W light, and 400g/m² from a 600W light in optimal circumstances.
When shopping for a grow light, ensure that you read the manufacturer's specs. And know that manufacturers of super-cheap LED lights may grossly overstate the specs of their products. If you’re unsure of what light to get, you can always ask for advice on grower forums.
LIGHT SCHEDULES
Unless you’re growing autoflowers (which you can leave under 18–24 hours of light from seed to harvest), you will need to keep your plants under a specific light cycle depending on their stage.
• Vegetative stage: 18-6
The vegetative stage of your plants can, in principle, last as long as you want. Normally, however, growers leave their plants to veg for at least 3–4 weeks, or until the plant has reached the desired height. A typical light schedule for this stage is 18 hours on, 6 hours off.
• Flowering stage: 12-12
For flowering, switch your lights to an even 12-12 light cycle. Make sure the “dark cycle” isn’t interrupted as this can prevent your plants from flowering.
When you connect your light to a timer, you can easily maintain these schedules.
AIRFLOW AND VENTILATION
If you’re growing indoors, you will need to ensure adequate airflow so your plants stay healthy.

EXTRACTORS
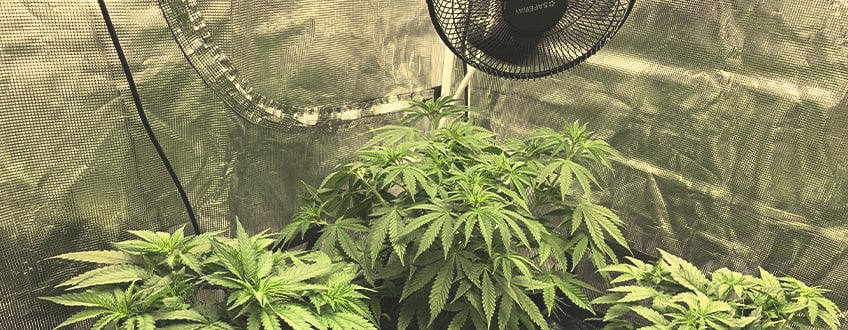
Although it may not seem as vital as, say, your grow lights, an exhaust fan and an air extractor (with activated carbon filter) can make a huge difference to your grow. Cannabis plants need carbon dioxide (CO₂) in order to develop, which they absorb from the air around them.
If you’re growing indoors and don’t have an adequate air intake and exhaust in place, your plant will sooner or later use up all the available CO₂. Once that happens, growth will slow down and your plant may even get sick. An extractor sucks the CO₂-depleted air out, automatically replacing it with fresh, CO₂-laden air.
An added bonus of using an air extractor with an activated carbon filter is that it will also neutralise the smell of your cannabis during flowering. This can help keep your grow-op clandestine. Carbon filters simply contain a tube of activated carbon that you connect to your exhaust system. Know that carbon filters won’t last forever. Most of the time, you will need to replace the filter after about 5 harvests.
AIR CIRCULATION
To ensure the fresh air sucked into your grow space is evenly dispersed, you will also need one or more ventilators. By keeping the air circulating, the ventilator ensures that CO₂, as well as heat and moisture, are evenly spread throughout the space. This can help disperse the heat from your grow lights and reduce the risk of mould.
You can also set up some fans to blow a light breeze toward your plants, causing them to develop thicker and stronger stems that better support heavy yields.
NUTRITION
Cannabis plants can’t just live off of light and love alone; we have to provide them with nutrients so they can grow.
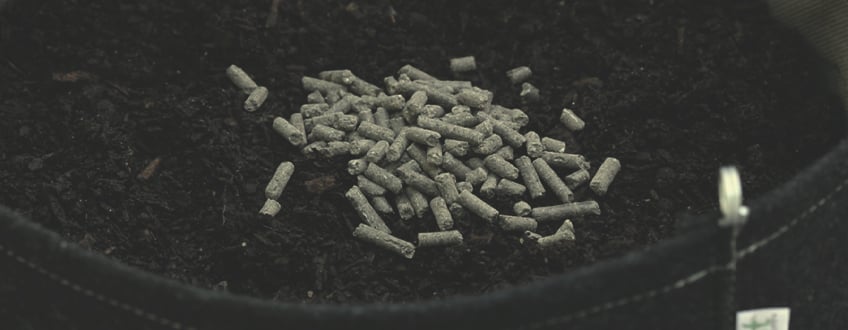
Cannabis has different nutrient requirements depending on its stage. During growth, plants need high nitrogen and potassium levels and a medium intake of phosphorus. For flowering, the nitrogen level is reduced, more phosphorus is added, and potassium levels are kept about the same. Because of that, cannabis nutrients normally come with (at least) two bottles—one for veg, and the other for flowering.
Once again, you don’t need to make things more complicated than necessary. If you’re growing indoors, letting your plants veg for four weeks, and are using soil that contains a spectrum of cannabis nutrients, you won’t need to administer any nutrients during the vegetative phase. You can simply start during flowering, when the plant’s requirements change.
NITROGEN, PHOSPHORUS, AND POTASSIUM (NPK)
Fertilisers and nutrient solutions are based on three macronutrients: nitrogen, phosphorus, and potassium. They also contain micronutrients like iron and calcium. The ratio of how much nitrogen, phosphorus, and potassium a nutrient solution contains is often displayed in the form of three numbers, such as 3-1-6 or 0-4-5. This indicates the N-P-K (nitrogen, phosphorus, and potassium) levels. As mentioned, nitrogen and potassium are crucial for vegetative growth, whereas greater amounts of phosphorus are useful during bloom.
Be aware that seedlings and young plants will have different nutrient requirements than large and vigorous plants. Seedlings, for example, will only need very little (if any) nutrients. Overfeeding cannabis plants is among the most common mistakes that new growers make. What’s worse is that the symptoms of a sick, overfed plant may just look like those of a plant that isn’t getting enough nutrients, such as yellowing leaves. If you run into trouble with your plants, it is usually best to give them a “flush” (see below) and start again with the recommended nutrient levels.

pH
The pH level of your water/nutrient solution is paramount for proper nutrient uptake. Nutrients modify the water and soil pH to some degree (some more than others). When growing in soil, the pH level should be between 6.0 and 7.0. If the pH is off, this can make it so your plant is unable to take up nutrients even if they are present, leading to so-called nutrient lockout. This can culminate in plants becoming sick or stalling, so you should always keep a close eye on the pH of your grow and adjust your water/nutrient solution accordingly with pH “up” and “down” products.
WATER
Improper watering is another common mistake made by new growers. Many times, growers tend to overwater plants, which will lead to all sorts of problems from fungus growth to pest infestation.
But proper watering is actually pretty simple: It is always better to water less frequently than too often. Allow the soil in the pots to dry out between watering. How will you know when that happens? There are a couple methods. One way is to stick a finger at least 3cm into the soil. If it’s dry, you’re probably good to go. Even better, use the weight of your growing containers to help you differentiate when the soil is saturated versus dry. If your container is noticeably light, you’ll know it’s time to water again. Again, your plants can withstand a little underwatering better than overwatering.
FLUSHING
Flushing is when you administer plain, pH-adjusted water to your cannabis plants. There are two main reasons growers choose to flush:
• Flushing because plants are sick
When you feed cannabis mineral nutrients, salts will accumulate over time in the soil. This can throw off the pH and make the soil too acidic. As a result, your plants will get sick as they cannot uptake nutrients. To flush out the salts, drench your soil with about twice the capacity of your pot in plain, pH-adjusted water. Once you have done that, wait until the soil is dry again and give your plant the recommended nutrients. Fingers crossed, your plant will recover!
• Flushing before harvest
Many growers prefer to flush their plants before harvest. Flushing removes the remaining mineral salts in the soil, causing plants to draw out nutrients stored in their leaves. The idea here is that this will benefit the taste of your cannabis. To flush before harvest, stop feeding your plants nutrients and just give pH-adjusted water for the last 1.5–2 weeks.
CONCLUSION
All of this may sound like a lot to learn if you’re still new to growing cannabis. But no worries, once you get the hang of things, everything will autumn into place! Don't forget that even pro cannabis growers started out as rookies. Mistakes can always happen, and you shouldn’t let small setbacks discourage you. In fact, every mistake is an opportunity to gain more knowledge. Rest assured, it won’t take long before you’re growing cannabis like a pro!
 Grow Guide Topic Finder
- Growing weed step by step
- Cannabis growing basics
- Choosing your seeds
- How to germinate seeds
- The cannabis vegetative stage
- The cannabis flowering stage
- Harvesting cannabis
- Trimming, drying, and curing
- Choosing pots and soil
-
Growing indoors
- A Complete Overview Of Growing Cannabis Indoors
- Cannabis Cultivation Tips: How To Set Up Indoor Grow Lights
- How Many Cannabis Plants Can You Grow Per Square Metre?
- Indoor Cannabis Growing: Relative Humidity and Temperatures
- Hydroponics Cannabis Growing Guide (with diagrams)
- Cannabis Micro Growing: Growing Great Weed in Tiny Spaces
- Growing outdoors
- How to grow autoflowering cannabis
- Cannabis nutrients and pH
- Cannabis troubleshooting: Nutrients
-
Cannabis troubleshooting: Growing
- Cannabis Seed Germination — Troubleshooting Guide
- How to Deal With Pythium (Root Rot) in Cannabis Plants
- Slow Cannabis Plant Growth And What You Can Do About It
- How to Deal With Leggy Cannabis Seedlings
- Watering Your Cannabis: How to Fix Overwatering and Underwatering
- Understanding Male, Female, And Hermaphrodite Cannabis
- Identifying and Treating Common Cannabis Ailments
- How To Revive a Sick Cannabis Plant
- How to Avoid Mouldy Weed During Drying and Curing
- How to Prevent and Treat Dry and Crispy Cannabis Leaves
- What Cannabis Leaves Can Tell You
- Causes and Solutions for Yellow Cannabis Leaves
-
Cannabis Strains Grow Report
- HulkBerry Automatic Grow Report
- Blue Cheese Auto Grow Report
- Purple Punch Automatic Strain Grow Report
- Triple G Automatic Grow Report
- Do-Si-Dos Automatic Grow Report
- Green Gelato Automatic Grow Report
- Haze Berry Automatic Grow Report
- Purple Queen Automatic Grow Report
- Cookies Gelato Automatic Grow Report
- Sherbet Queen Automatic Grow Report
- Sweet Skunk Automatic Grow Report
- Medusa F1 Grow Report
- Cannabis plant training
-
Weed growing tips
- The Cannabis Plant Anatomy
- How to preserve seeds - UK
- How Much Sunlight Do Outdoor Cannabis Plants Need To Grow?
- How to Control and Prevent Stretching in Cannabis Plants
- My Cannabis Plants Are Growing Too Tall: What Should I Do?
- Should You Worry About Purple Or Red Cannabis Stems?
- What To Do When Your Indoor Cannabis Won’t Flower
- How To Protect Your Cannabis Plants From Heat Stress
- How To Tell If Your Female Cannabis Plant Has Been Pollinated
- Growing Medical Marijuana
- Bud Washing: How to Clean Your Weed
- Understanding Cannabis Yield per Plant
Categories
Grow Cannabis With RQS


.jpg)


