.

Healthy Roots – The Key To Healthy Cannabis Plants
Without a healthy root system, your cannabis plants can never reach their full potential. For a heavy harvest full of spectacular buds, you'll want to do everything you can to support the health of your plants' roots. We’ll teach you how to do exactly that, along with showing you how to identify, fix, and prevent a variety of root health issues.
Maintaining healthy roots is the key to growing great cannabis plants.
Contents:
While they’re hard to see, roots are the heart of your cannabis plant. Responsible for taking up the water, nutrients, and oxygen a plant needs in order to grow, healthy roots[1] are the key to a healthy plant and a quality harvest.
In this article, we take an in-depth look at how to keep your cannabis plant’s roots super healthy, and prevent common root-related issues like root rot, damping-off, overwatering, and more.
What do Healthy Cannabis Roots Look Like?
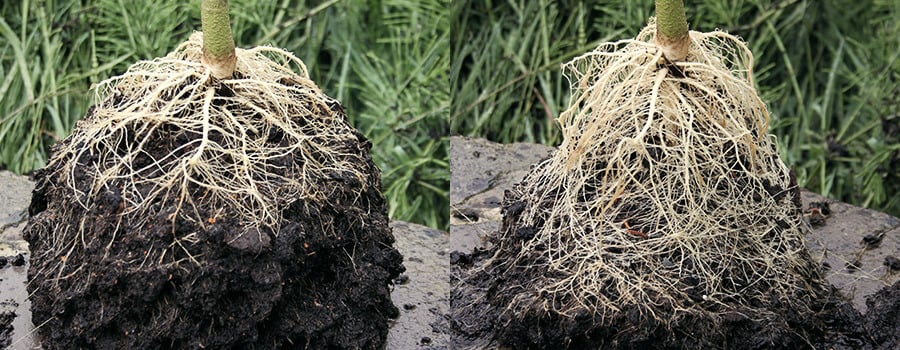
Healthy cannabis roots are a milky white color, and don’t have a particular smell. If you’re growing in pots, your roots should be growing throughout your medium but should never be wrapped completely around the sides of a pot.
If you’ve ever seen a plant with sick roots, you’ll know exactly how your roots shouldn’t look: brown discoloration, a strong smell, and slime around your plants are telltale signs of root rot or other root problems.
How to Keep Cannabis Roots Healthy
The roots of any plant, including cannabis, need 3 basic components to grow properly; oxygen, the right temperatures, and nutrients. Here’s how to give your plants everything they need to develop healthy, happy roots:
1. Oxygen
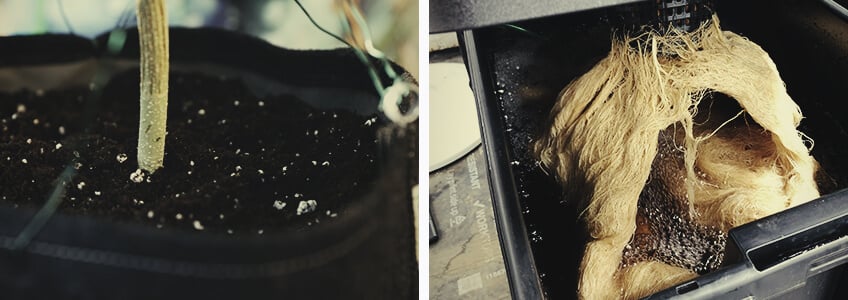
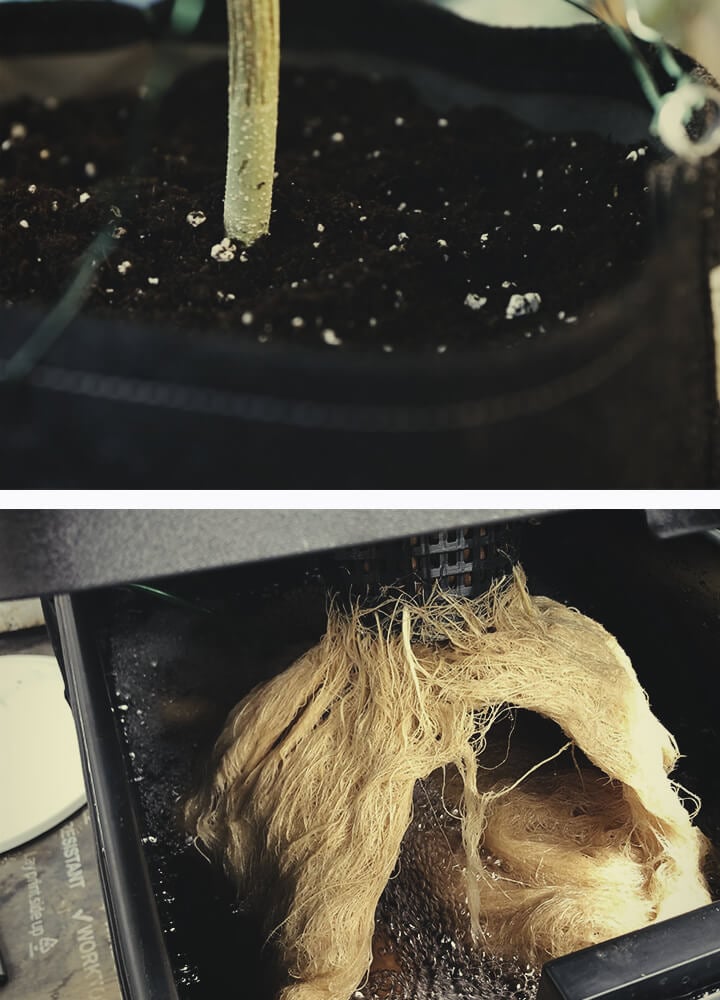
To the surprise of many rookie growers, plants actually take up oxygen by respiring through their roots. This process is essential for the creation of ATP (Adenosine triphosphate), a molecule that helps transport chemical energy throughout a plant. Without enough oxygen, plants can’t move energy throughout their organism and essentially starve.
If you’re growing in soil, a big part of providing a plant’s roots with enough oxygen is proper watering. Overwatering essentially drowns your plant’s roots, which not only starves it of energy but also creates a breeding ground for pathogens. Hence, we always recommend letting your plant’s soil dry out between waterings. Other tips to help improve oxygen flow to a plant’s roots when growing in soil include:
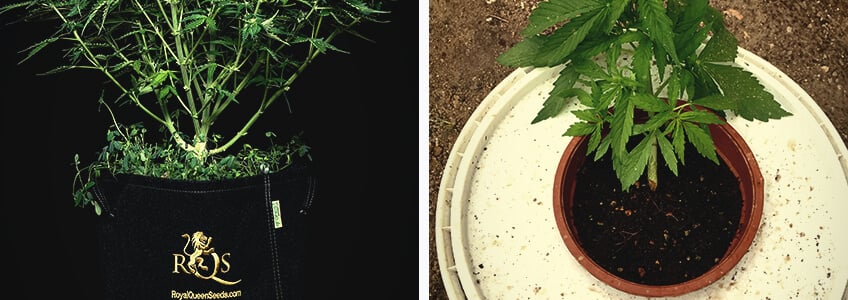
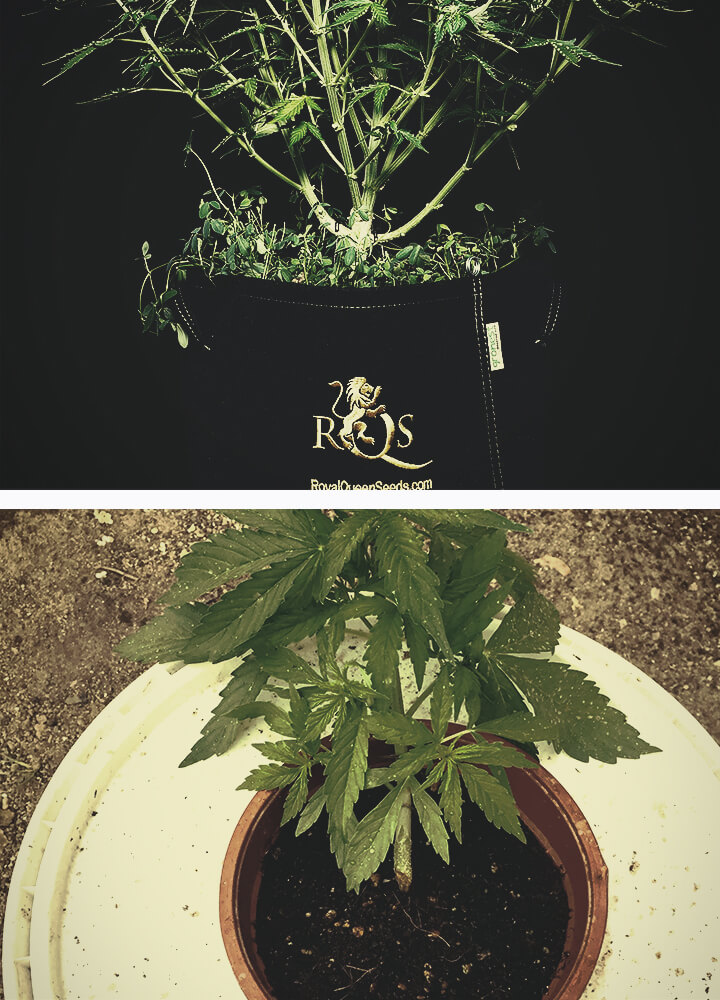
- Growing in fabric or smart pots. Unlike ceramic or plastic pots, fabric and smart pots are made out of breathable material that helps air get to all parts of a plant's roots, not just the topsoil. The RQS Fabric Pots, for example, are specifically designed to maximize oxygen flow to your plant’s roots.
- Use perlite, vermiculite, or peat moss in your soil mix. All of these materials help keep soil light and fluffy, improving airflow around a plant’s roots.
- Use compost and complete soils made with organic materials that help promote the life of beneficial fungi, bacteria, insects, and microbes to help keep your soil loose and promote the growth of big, healthy root networks.
If you’re growing in a hydroponic system, you’ll need to make sure your plant’s roots are constantly immersed in oxygen-rich water. One of the most common ways hydroponic growers increase the oxygen content of their reservoirs is by using air pumps or stones constantly aerate the water. Not only does this supercharge the growth of your plants but it also helps prevent your water from going stagnant and housing nasty pathogens.
2. Temperature
Cannabis roots are happiest at around 24°C, respiring and growing most during the night. If you’re growing in soil, there are a couple of things you can do to keep the temperatures around your plants’ roots consistent. These include:
- Placing an intake fan under your canopy and an exhaust above your canopy to promote a healthy flow of air around your indoor grow room. A lack of air circulation can lead to hot spots in your grow room that might drive up the temperatures around your plants’ roots.
- Using thermometers to constantly measure the temperatures in your grow space.
- If you’re growing outdoors, you can use crops (like clover) or mulch and hay to cover your topsoil and insulate a plant’s roots. This works particularly well in areas with significant temperature drops.
In hydroponic systems, you’ll want to keep the temperature of your water between 19°C and 25°C. At these temperatures, dissolved oxygen levels in the water are at their highest, leading to better nutrient uptake and faster growth. There are a couple of things you can do to keep the temperature of your reservoir at its best:
- Paint your reservoir container white. White paint reflects light and heat, helping to keep your reservoir cool.
- Regularly adding ice or cool water to your reservoir to cool it down.
- Investing in a chiller. While hydroponic chiller systems are expensive, they are the most reliable option for larger setups.
3. Water
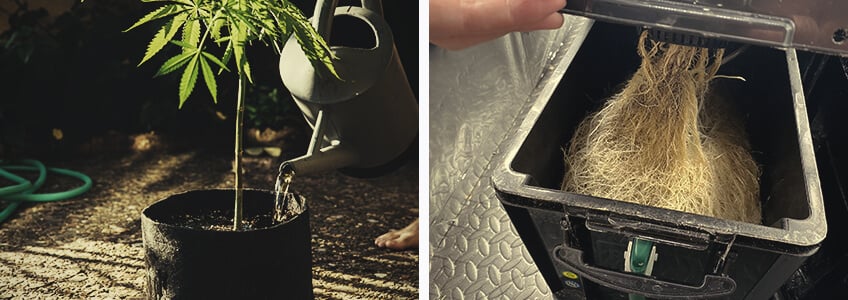
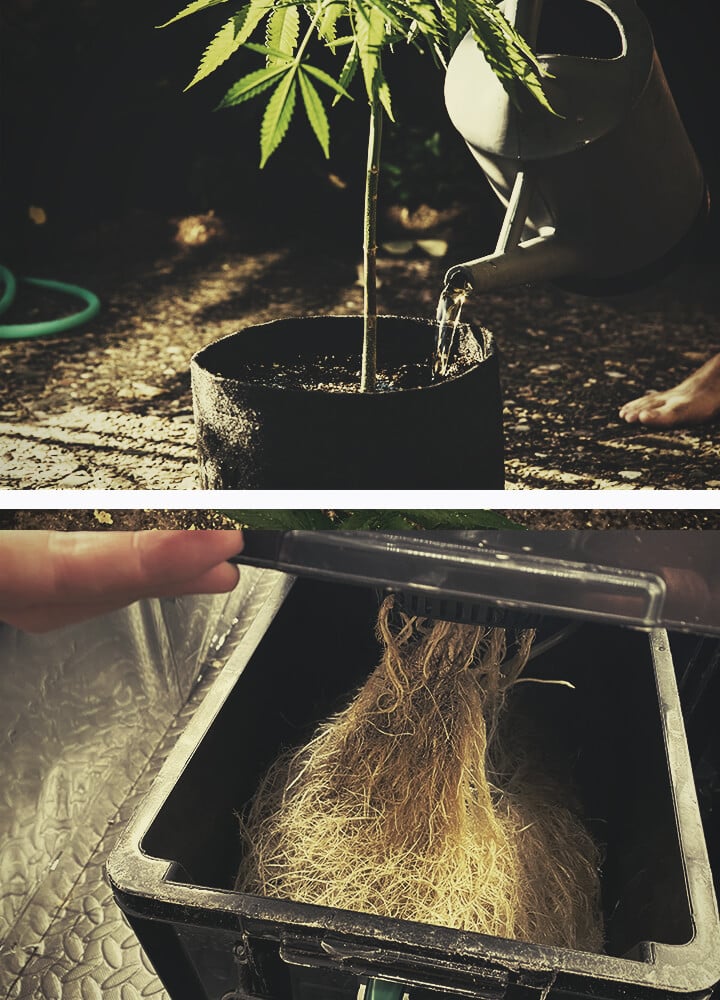
Roots grow in constant search of water and nutrients. As a plant develops stronger roots and grows bigger, you’ll want to ensure you water it correctly to continue fuelling its growth.
For soil growers, this means gradually increasing the amount of water you give your plants and your watering radius. Whenever you water your plants, you’ll want to apply some water just outside the radius of their roots. This will help guide your roots further out towards the edges of your pot to seek out more space and available nutrients.
In hydroponic setups, you’ll need to walk the fine line between keeping your plants emerged in water so their roots don’t dry out while also providing them with enough air to respire.
4. Nutrients
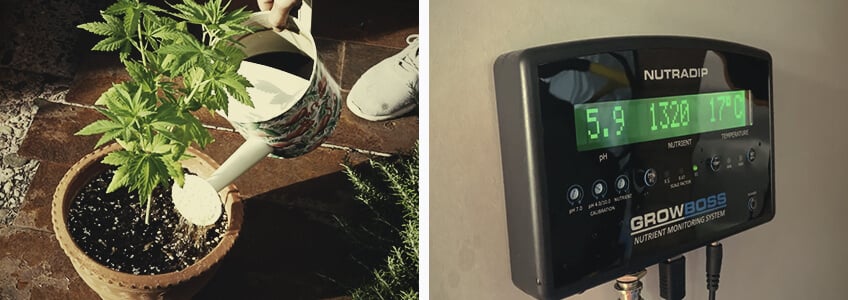
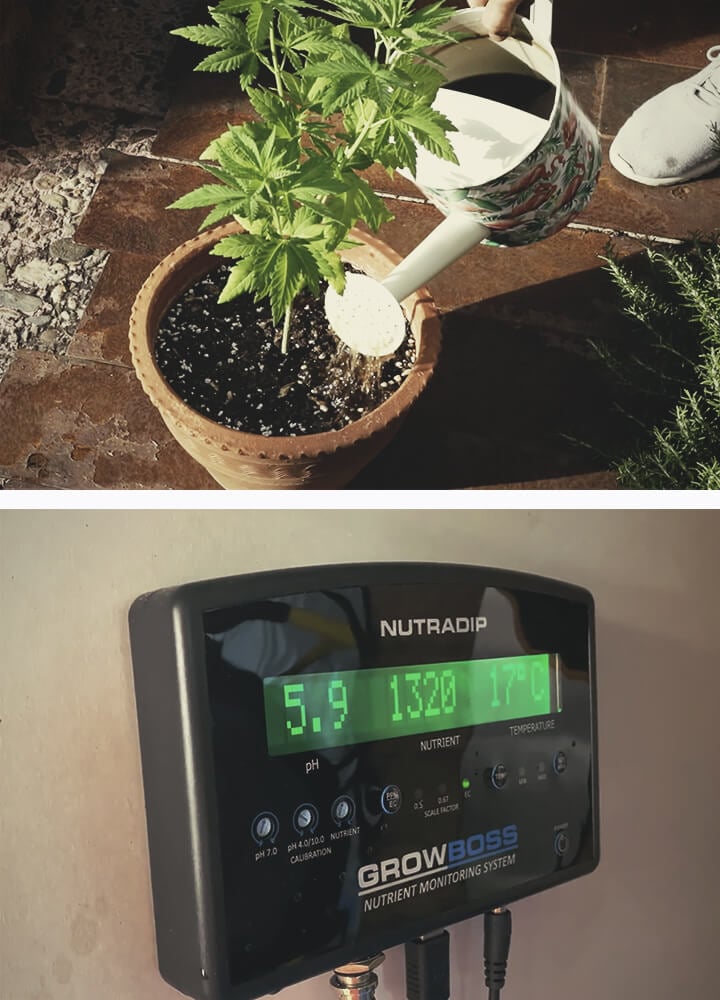
While we often think of nutrients as the fuel to power our plant's vegetative growth and bloom, they are equally important for the development of healthy roots.
Phosphorus and potassium are two of the key nutrients for root development, helping strengthen existing roots while also encouraging your plants to grow new ones. Nitrogen, on the other hand, encourages leggy green growth; if you notice that your plants are developing a lot of foliage while their roots lag behind, it may help to boost the phosphorus levels in your fertilizer.
If you’re growing in soil, we recommend working some phosphorus and potassium into your soil before planting. Bone meal and rock phosphate, for example, are great sources of phosphorus, while wood ashes, kelp, and greensand are all-natural sources of potassium that you can work into your soil to help your plants develop healthy roots early on.
In a hydroponic setup, you can use phosphorus and potassium-rich fertilizers early on in your grow to help your plants develop strong roots faster. Both in soil and hydro, vitamin b1, indole-3-butyric acid, and 1-Naphthylacetic acid can also promote rooting.
Troubleshooting Cannabis Root Problems
Below you’ll find a comprehensive summary of the most common cannabis roots problems and how to identify and treat them.
1. Over/Underwatering
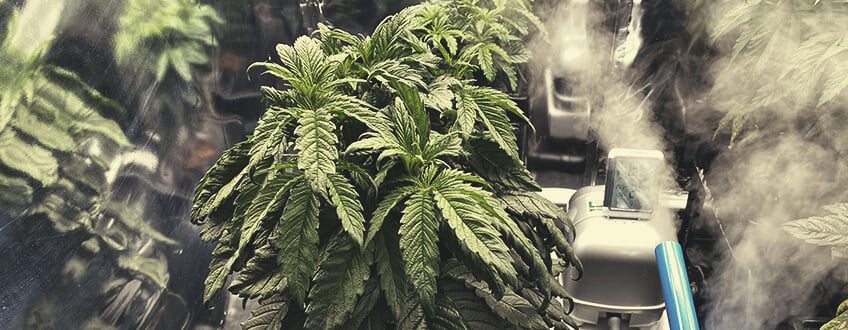
Overwatering and underwatering are very common problems among rookie cannabis gardeners. Luckily, both are easy issues to fix given you detect them early.
* Symptoms
The two telltale signs of overwatering and underwatering include drooping and wilting. Look at a plant’s soil, however, and you’ll get a clearer picture of what you’re doing wrong: if the soil is completely dry, you’re underwatering; if the soil has been wet for days and refuses to try, you’re overwatering.
* Solutions
If you’re underwatering your cannabis plants, you’ll want to start watering them more frequently. While every grower’s watering schedule will be different, the basic rule of thumbs is to only water your plants once their soil has dried out.
If your plants have been overwatered, on the other hand, you’ll want to wait for their soil to dry out completely before you water them again. Consider giving them less water each time to avoid overwatering their roots.
2. Fungus Gnats
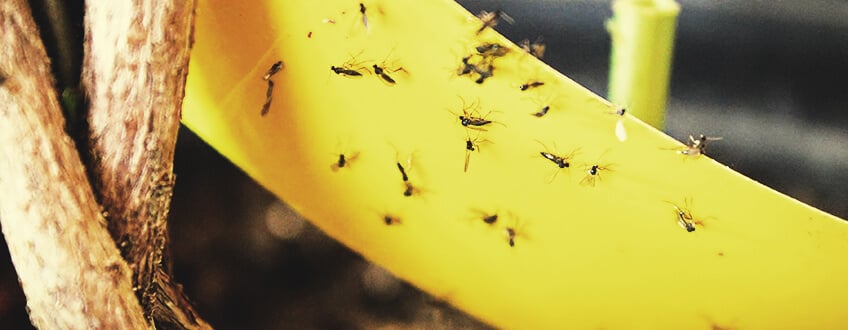
Fungus gnats are small fly-like pests that love to lay their eggs in moist potting soil. And while they are often thought of as a minor pest, they can have a pretty devastating effect on your plants if you let their numbers get big enough.
* Symptoms
You’ll usually find fungus gnats floating around your indoor plants. Adult gnats will lay their eggs on moist topsoil. Once they hatch, the larvae of the gnats burrow into the soil to feed off its organic matter. Once mature, the adult gnats emerge from the soil, and the process repeats.
While adult gnats don’t damage plants, their larvae may feed off your plant’s roots, causing symptoms such as drooping and wilting. Adult gnats can also spread the spores of fungi (such as pythium) as they lay their eggs, which is why it’s important you identify a gnat infestation quickly.
* Solutions
There are 3 main parts to dealing with fungus gnats:
- Killing adult gnats. The easiest way to do this is by using fly traps.
- Killing the larvae. First, treat any infested plants with microbial insecticides like bacillus thuringiensis. Next, let your dry out before watering it with a mix of 1 part hydrogen peroxide and 4 parts water (this will kill off the gnat larvae without damaging your plants). Reapply this solution once a week until the adult gnats no longer reappear in your grow room or garden.
- Preventing a future infestation. Proper watering and mosquito traps or dunks can help prevent fungus gnats from laying their eggs in your garden.
3. Excessive Nutrient Feed (Nutrient Burn)
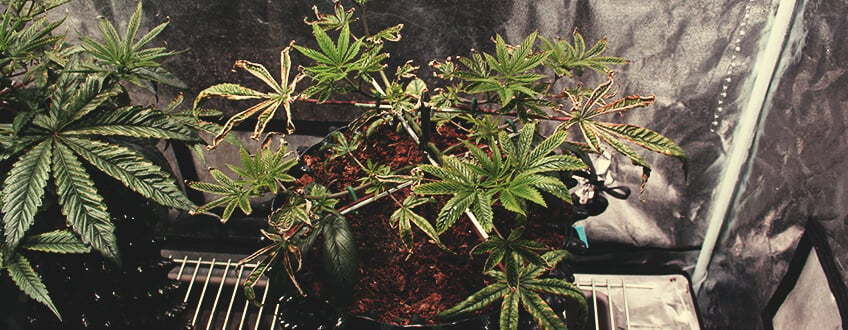
While fertilizers can help your plants develop grow faster and develop bigger buds, excessive feeding can cause some serious damage to a plant’s roots, stunting its growth and causing it stress that may drastically impact the quality and size of your yields.
* Symptoms
Nutrient burn can have several causes. Inexperienced growers, for example, sometimes get tricked into thinking that the more nutrients they give their plants the better. Among more experienced growers, however, nutrient burn can still occur, especially as a result of pH imbalances that cause unexpected nutrient buildup in a plant’s medium, exposing its roots to high concentrations of fertilizer.
Regardless of its underlying causes, nutrient burn causes the same telltale symptoms, including:
- Unnatural, deep green leaf discoloration.
- Upward-bending fan leaves.
- Yellow-brown, dry leaf tips.
* Solutions
Dealing with nutrient burn involves:
- Using pH and EC checks to identify what’s causing a plant’s nutrient burn.
- Flushing the plant’s roots with pH adjusted water for 1 week.
- Slowly dialling your nutrients back in while checking your pH and EC to ensure your plants are able to absorb their nutrients properly.
- Using the right dose of nutrients.
4. Root Rot
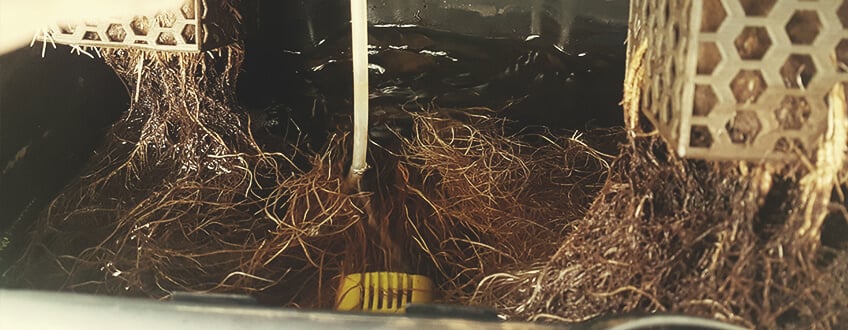
Root rot, as the name suggests, causes sick, rotting roots. It’s usually caused by a buildup of bad bacteria and fungi (like fusarium and pythium) that thrive in overwatered soil or stagnant water.
* Symptoms
Root rot causes plants to droop or wilt and develop yellow, sickly foliage. Unfortunately, these symptoms are pretty common across the board of cannabis pests and diseases, and you’ll only know for sure that a plant has root rot by looking at its roots.
Rotting roots are slimy, wet, and brown in color and sometimes have a distinctly “rotten” smell. In hydroponic setups, you might also find algae growing around a plant’s rotting roots.
As the bacteria and fungi that cause root rot attack a plant’s roots, they interfere with its ability to absorb nutrients and water. This can sometimes cause signs of a nutrient deficiency, such as yellowing leaves, stunted growth, discolored stems, and more.
* Solutions
If you’re dealing with root rot in soil-grown plants, you’ll want to transplant the affected plant into fresh soil in a sterilized container. Before doing the transplant, also mix a beneficial bacterial agent like Bacillus amyloliquefaciens or mycorrhizae into your new soil or apply it directly to the plant’s roots.
Once you’ve treated and transplanted your affected plants, monitor their health and repeat the treatment with Bacillus or Mycorrhizae if need be.
If you’re a hydro grower battling a case of root rot, you’ll want to clean and sterilize your entire system, including everything from your pots to your pumps. Next, you’ll want to fill your reservoir with clean, pH-regulated water and add Hydroguard or another bacterial agent to it. Before placing your plants back into their pots and into your hydro system, try gently washing their roots under cold tap water, remaining extra careful not to break any of them.
Now, monitor your plants’ health and repeat the bacteria treatment if need be.
5. Root Bound
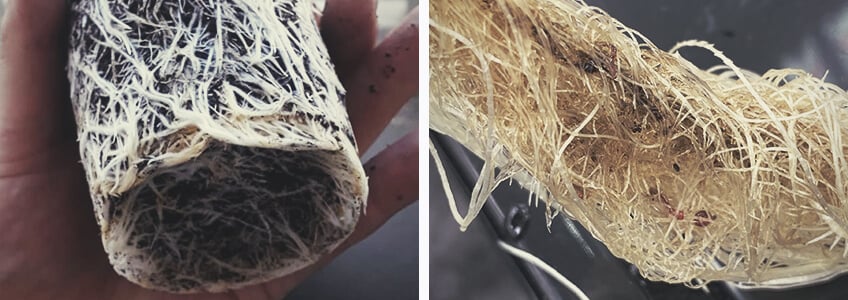
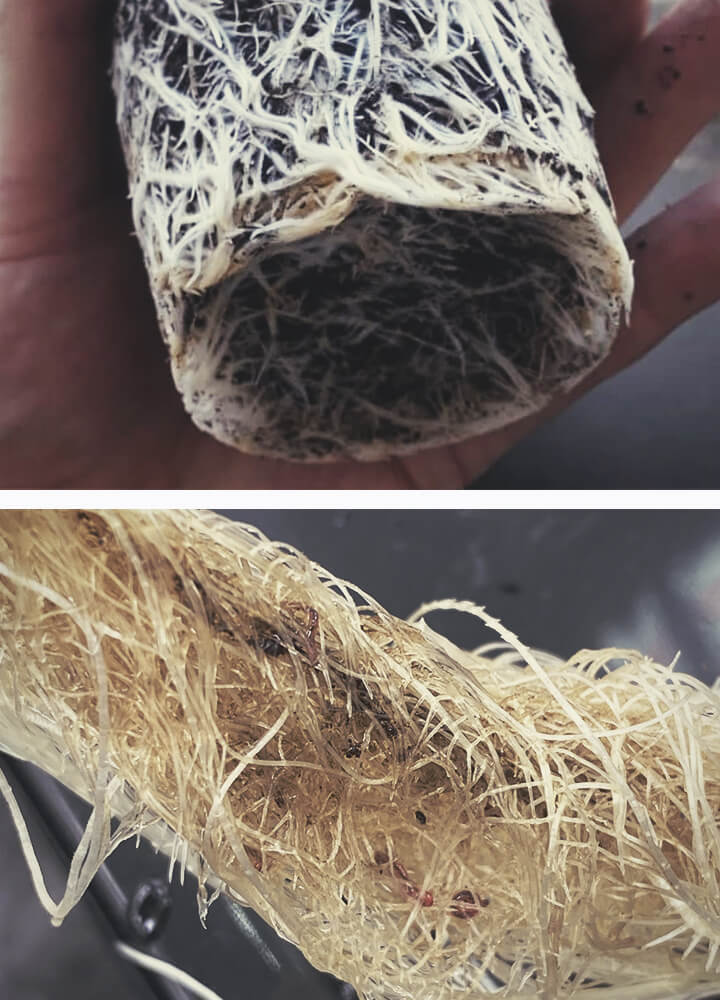
Plants become root bound when they run out space in their containers. As the roots outgrow their container in the search for more space, they can become a tangled mess. Over time, root-bound plants will stop growing and can develop nutrient deficiencies as their tangled roots struggle to take up water/nutrients and respire properly.
* Symptoms
Some commons signs of a rootbound cannabis plant include:
- Quick-drying soil. If you find you’re watering a plant every 1 or 2 days, that’s a good sign that it needs more water than its container can hold.
- Nutrient deficiencies. Rootbound plants struggle to take up nutrients and, over time, will show signs of nutrient deficiencies like yellowing leaves.
- Lots of growth in the same container. If a healthy plant has been growing in the same small-to-medium container for months, chances are it could be starting to become rootbound.
- Tipping. If a plant is too tall or wide for its container, it will become unsteady and may tip or fall over regularly. This is a telltale sign that it’s outgrown its container and may start becoming rootbound.
* Solution
To prevent a plant from becoming root bound, you’ll want to transplant it to a bigger pot before it outgrows the one it is in. Ideally, you’ll want to transplant a plant once its roots have reached the edges of its pot and before they start wrapping around the borders of its container in search of more space.
- Canopy size. When a plant's leaves cover the circumference of its pot, this is a good sign that it needs transplanting.
- Root development. Look at a plant’s roots through the drainage holes; if they’ve reached the bottom of their pot, the plant needs transplanting.
- Grow time. As you get more experienced, you’ll know when it’s time to transplant a plant-based on how long it has been growing for. You may also opt to move your plants to bigger pots during the last 2 weeks of veg to accommodate for their stretching once they enter the bloom phase.
If you’ve let your plants get rootbound by accident, you’ll need to loosen their roots before transplanting. To do this, remove as much soil from the plants’ roots as possible, then use sharp, sterilized clippers to prune and loosen the root ball.
Finally, move the plant into a bigger pot and let it veg for at least a week to recover from the stress of the transplant.
6. Poor Root Structure

Cannabis roots develop a pyramid-like structure; a plant’s taproot grows vertically down into its substrate, while its offshoots and their capillaries tend to spread out horizontally. Unfortunately, some plants struggle to develop a strong, structurally sound root system, which can affect their ability to take up nutrients and water or respire, resulting in stunted, unhealthy growth and a poor harvest.
* Symptoms
One of the main functions of roots is to firmly anchor a plant in the ground. Plants with poorly developed root systems may struggle to stay upright, especially once their branches grow heavy with flowers. Because the roots are also responsible for nutrient and water uptake, a plant with poorly developed roots may also show signs of over or underwatering, slow or stunted growth, and nutrient deficiencies, which may affect the size of its yields.
* Solution
To help your plants develop healthy root systems, it's important you support their root development as early as possible. One way to do this is by using rooting hormones when germinating your seeds or taking clones. Another, more holistic approach, is to plant your cannabis plants in a medium with a rich microbial life.
Microorganisms like Trichoderma, Endomycorrhiza, and Rhizobacteria, for example, develop healthy symbiotic relationships with a plant’s roots, helping them absorb more nutrients to fuel faster, healthier growth while simultaneously protecting them from pathogens (like pythium and fusarium). Growing in an organic super soil is one of the best ways to expose your plant’s roots to a rich mix of beneficial microorganisms.
If you’re not growing in soil, you can use bacterial and fungal agents which can be applied either to your system’s reservoir, the medium you’re growing in, or directly to your plants’ roots.
7. Hot or Cold Root Zone
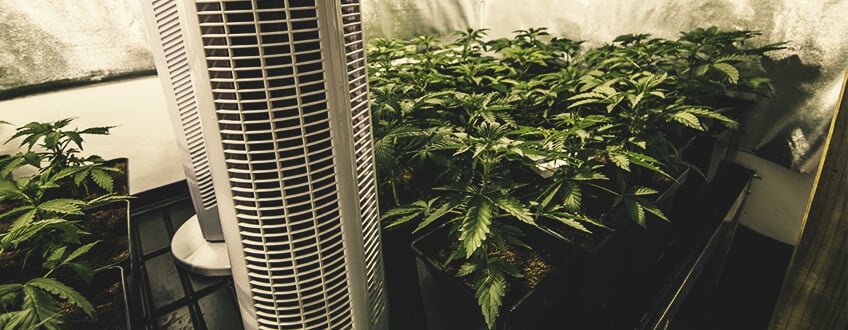
Temperature is one of the biggest factors influencing the growth of a plant’s roots. Cannabis specifically likes daytime temperatures of between 16 - 30°C. Temperatures outside this range slow the growth of the plant and may affect the potency and aroma of its flowers. Temperatures below 13°C force the plant into a mild shock.
* Symptoms
Cold or hot temperatures can shock a plant’s roots, causing drooping, wilting, stunted growth, yellowing leaves or other forms of discoloration, and changes in water consumption. Heat also attracts bugs into the growing area and can create a breeding ground for pathogens, which can attack your plant's roots and create a wide array of other problems.
Temperature issues around a plant’s roots may quickly affect a plant’s drinking and nutrient uptake, as well as nutrient deficiencies or burn.
* Solution
The best offense against cannabis root temperature issues is a good defense. Get into the habit of regularly measuring the temperatures in your grow room as well as your medium (be it soil or water).
A great way to cool down roots is by using fans beneath your canopy. Outdoors, you can also use a layer of rocks or mulch or a tops soil crop (like clover) to insulate your roots and stop temperature fluctuations.
If your root zone temperatures are too cool, on the other hand, try redirecting your fans away from your plant’s soil, using a humidifier to gently lift the temperatures beneath your canopy, and mulch to insulate the root zone.
In hydroponics, maintaining root zone temperatures is a little simpler; as long as your reservoir temperatures are within the right range (we recommend keeping them between 18 - 25°C), you shouldn’t have any issues.
8. Fusarium
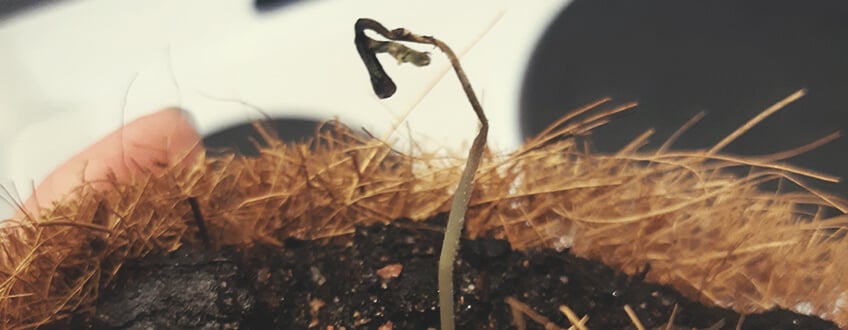
Fusarium is a dreaded fungus capable of destroying entire cannabis crops. It’s one of the most common perpetrators behind root rot and its spores have the ability to lay dormant for years, making it virtually impossible to detect until it’s already attacking your plants.
* Symptoms
Fusarium attacks a plant's roots, interrupting its ability to take up water and nutrients. When it strikes, fusarium causes drooping and wilting. You may also notice an affected plant’s soil staying wet for days as it stops taking up water. In some cases, a fusarium infection can kill off a plant in a matter of days.
* Solutions
Unfortunately, there is no cure for fusarium. Once it is in your garden, you should focus on stopping it’s spread by culling any affected plants and sterilizing your grow room.
9. Pythium
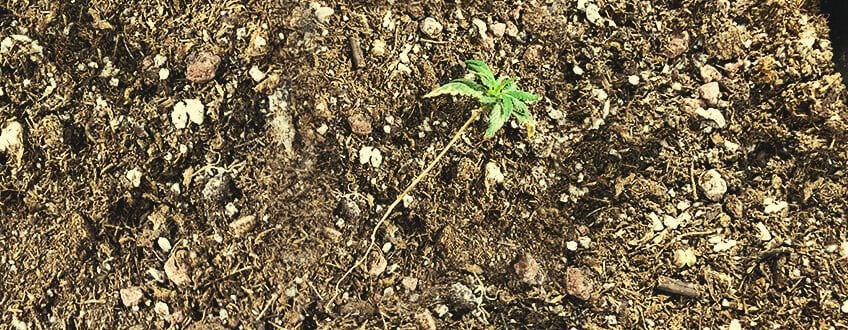
Pythium is another killer dreaded by cannabis growers the world over. It is a form of parasitic algae and another principal cause of root rot (especially in hydro). While it can attack plants at any stage during their life cycle, young seedlings are most at risk of this deadly algae.
* Symptoms
Below the ground, pythium causes a smelly, brown, gooey mass around a plant’s roots. If you’re growing in hydro, you’ll be at an advantage of spotting these symptoms. The above-ground symptoms of a pythium infection include everything from drooping and wilting to signs of nutrient issues or light burn, making it particularly hard to properly diagnose a pythium infection when growing in soil.
* Solution
Pythium can sometimes be treated using specialized root rot agents. However, it is important to realize that these treatments are expensive and don’t always guarantee results. If you’re dealing with a pythium infection in your seedlings, it is usually best to pull the plug on your grow, sterilize all your equipment, and start fresh rather than embark on the uphill battle to see your plants through to a pretty mediocre harvest.
10. Damping Off

Damping-off is one of the most common problems facing growers. It is caused by pythium, botrytis, and fusarium, and only affects seedlings and clones.
* Symptoms
Damping-off causes cannabis seedlings to topple over and wilt. It can happen within hours; you might wake up to perfectly healthy seedlings that, by the time you check on them again in the evening, are laying face down in the dirt.
* Solution
There is no treating damping off. Once a seedling or cutting has toppled over, there’s nothing you can do to save it.
If one of your seedlings starts damping off, the best you can do is remove it from your grow space as quickly as possible to stop the spread of the algae. Some growers like to sprinkle a few drops of hydrogen peroxide on the affected seedling to kill the fungus and help prevent its spread.
The Importance of Creating a Healthy Root Zone for Cannabis
The roots of a cannabis plant are responsible for taking up the nutrients, water, and oxygen your plants need in order to grow. To help your plants grow as healthy as possible and produce the best possible flowers, it’s vital you help each plant develop a strong root network during early on to fuel its production of buds later on.
To help your plants get off to a great start, make sure to check out our Easy Roots Mycorrhizae Mix. 100% organic, our Easy Roots supplement helps your plants get the best start in life, maximizing their ability to take up nutrients and water while also protecting them from some of the pathogens we mentioned in this post.
- Punja Z. K. (2021). Emerging diseases of Cannabis sativa and sustainable management. https://www.ncbi.nlm.nih.gov


