.

How To Graft Cannabis And Grow Multiple Strains On 1 Plant
Grafting is a powerful gardening technique that allows you to grow multiple cannabis strains from a single mother plant. In this article, we'll show you how it's done.
Contents:
Grafting is an ancient horticultural practice that allows for multiple plant varieties to grow from one single mother plant. And while it is common among experienced gardeners, grafting isn’t so widespread among cannabis growers. In this article, we show you how you can graft cannabis plants, and essentially, grow multiple strains from a single set of roots.
WHAT IS GRAFTING?
Grafting involves taking the upper part of one plant (known as the scion) and attaching it to another plant (known as the rootstock).
Grafting is an asexual form of propagating plants, meaning the propagated plants will preserve all the characteristics of the plant they were taken from (just like a clone preserves the same characteristics of its mother). At the same time, they’ll usually also take on some of the characteristics of the rootstock.
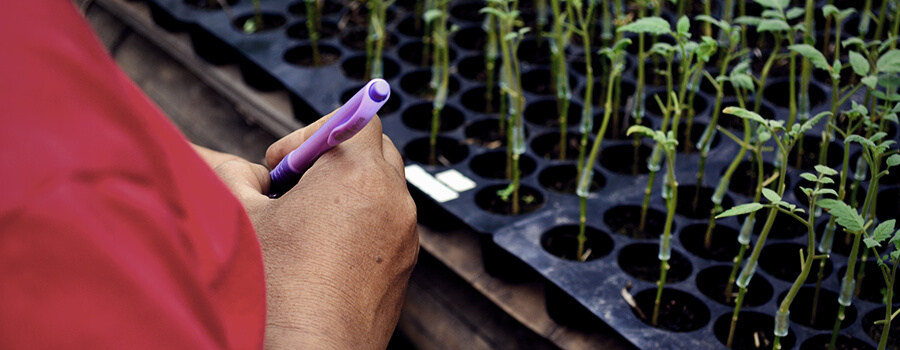
Gardeners will opt to graft plants that struggle to root properly. By grafting to a plant with a strong root system in place, you’ll be able to preserve the life of the scion, which otherwise may not have survived.
Most woody plants can be grafted. However, the process of grafting is complex, labor-intensive, and usually requires a fair bit of horticultural knowledge. Hence, it’s often reserved for more experienced gardeners.
Grafting as a process can be traced back 4,000 years to ancient China and Mesopotamia. Although it isn’t so popular among cannabis growers, cannabis plants are perfectly suited for grafting.
REPAIR DAMAGED ROOTS
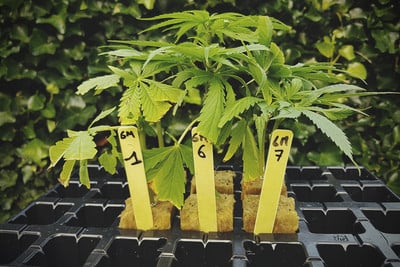
If you grow outdoors, chances are you’ve had to deal with tough growing conditions at some point or another. Storms, strong winds, harsh rains, or pest infestations can damage your plants, especially just above the soil line. Luckily, a great way to help plants recover from this kind of damage is to plant seedlings around the roots of the plant and then graft them onto the older plant, just above its injuries.
TEST NEW STRAINS
One of the big benefits of grafting cannabis is that it allows you to grow multiple strains from a single tree. This comes in handy when you’re looking to experiment with new strains that you’re not completely familiar with. Rather than committing to growing an entire plant of a new strain, you can simply take a clone or seedling and graft it onto a rootstock. From there, you can let the strain grow out until harvest time and test it before you decide whether to add it to your garden for good. Again, this is really beneficial for growers working with limited amounts of space.
HOW TO GRAFT CANNABIS
Grafting is usually left to experienced gardeners. However, there is no reason new growers can’t try grafting at home and see great results. In fact, if you’ve ever tried to clone cannabis (or any other plant for that matter), you should have no problem with grafting, as the processes are quite similar.
Here’s how to graft cannabis at home. Make sure to read these instructions through a few times before getting started. Grafting is a delicate process and you’ll want to make sure you know exactly what you’re doing before you get started.
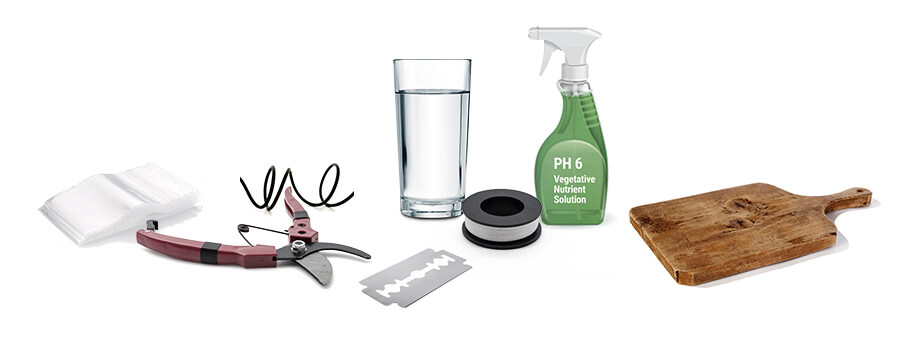
WHAT YOU’LL NEED
- Scalpel/razor blade
- Gardening shears
- Grafting or plumber’s tape
- Plastic bags with a seal (extra large ziplock bags work good)
- Gardening wire
- Glass of water
- A clean cutting board
- A spray bottle containing a (pH 6) vegetative nutrient solution
CANNABIS GRAFTING METHOD: WHIP GRAFTING
The Whip Grafting method is arguably the most popular method for grafting cannabis plants as it’s simpler and takes less time. Here’s how it works:
- Start by selecting a scion from a healthy cannabis plant, as well as a spot on a healthy rootstock where you plan to grow the new graft. Make sure the width of your scion and the rootstock are similar. This is the first part of ensuring a successful outcome. Make sure to only use vegetative plants for grafting.
- Once you’ve selected a scion and compatible part of your rootstock to attach it to, it’s time to prepare both parts of the new limb. Start by removing most of the foliage on your scion, leaving behind only a few leaves at the tip of the limb. Do the same on the rootstock, removing most of the foliage below the grafting site. Don’t cut either your donor or rootstock yet.
- Now, it’s time to cut the scion from you donor plant. Start by cutting the branch from the plant with a pair of garden shears. Quickly transfer it to a clean cutting board. Now, take your razor and make a diagonal cut along the base of the scion. The idea here is to create more surface area for the scion and rootstock to bind together properly. Once you’ve made the cut, place the scion into a glass of water while you prepare the rootstock. Make sure to act quickly; the less time your scion is exposed to air, the better.
- Now, prepare the rootstock. You should have already removed all the foliage from the graft site. So, take your garden shears and cut the branch slightly above the graft site. Then, take your razor blade or scalpel and make a diagonal cut to match the one on your scion. Remember, you want to make sure the cuts are as identical as possible to ensure your graft is successful. Quickly move on to step 5.

- Once you’ve made the cut on your rootstock, you’ll want to move quickly and attach your scion. Take the scion from the glass of water and spray both the cut on the scion and rootstock with some nutrient solution. Next, match up the cuts, paying extra attention to the tissue inside the branch. You want to match up the branches as best as possible to help the two plants bond quickly. If you notice the cuts don’t match, return your scion to the water quickly, adjust the cut on the rootstock, and try attaching them again.
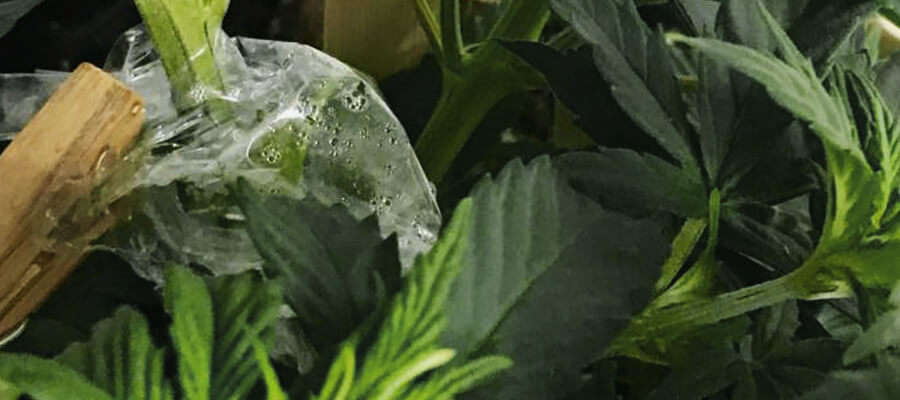
- Once you’ve got the scion and rootstock to fit, press them together firmly and tape them together using your grafting/plumber’s tape. Start with a smaller piece of tape to simply hold the branches together. Then, follow up with a larger piece of tape wrapped tightly around the cut multiple times. This will help block out both light and air from the cut and allow the scion and rootstock to bond properly, but it should be removed a couple of days after you noticed the graft has been successful.
- Next, take some gardening wire and run it in a criss-cross pattern across the graft site to further strengthen the bond of the scion and rootstock. You’ll want to start running the gardening wire slightly below the cut, then run it a bit above the graft site.
- Once your scion and rootstock are tightly bound together, spray some solution inside your plastic bag, put it over the new branch, and close the seal almost completely (make sure to leave it slightly open so the branch can breathe). This is to provide an ideal environment for propagation. Make sure the bag doesn’t come into contact with the leaves you left on the tip of your scion.
CREATING THE PERFECT ENVIRONMENT FOR GRAFTING
As you can imagine, grafting puts your rootstock and scion under a lot of stress. After all, it’s not exactly a “natural” way of propagating plants. Hence, you’ll want to make sure your environment is suited to meet the requirements of your new, fragile plants.
First of all, make sure your lights are running 24/7 until you see new vegetative growth forming on your scion. From there, you can gently bring your lights down to your preferred settings. Also, if possible, try to use gentle sources (110 watt T5s are perfect, but other soft light sources will also work).
PICKING THE RIGHT STRAINS TO GRAFT TOGETHER
Grafting can be difficult as not all species of plants are compatible with each other. Luckily, this isn’t an issue here, as all cannabis varieties stem from the same plant family, and should be able to be grafted together.
The one thing you’ll want to keep in mind when grafting cannabis strains, however, is flowering times. Make sure you graft strains with similar bloom periods. If you don’t, you might struggle with nutrient deficiencies, as those strains that flower will need different nutrients than those that are still in their vegetative phase.
Apart from that, grafting is really no big challenge. All it takes is a solid process (which we’ve outlined above), patience, and a bit of practice. So, try the method and get grafting today!


