 Weed Grow Guide by Royal Queen Seeds
- Growing weed step by step
- Marijuana growing basics
- Choosing your seeds
- How to germinate seeds
- The marijuana vegetative stage
- The marijuana flowering stage
- Harvesting marijuana
- Trimming, drying, and curing
- Choosing pots and soil
-
Growing indoors
- A Complete Overview Of Growing Cannabis Indoors
- Cannabis Cultivation Tips: How To Set Up Indoor Grow Lights
- How Many Cannabis Plants Can You Grow Per Square Metre?
- Indoor Cannabis Growing: Relative Humidity and Temperatures
- Hydroponics Cannabis Growing Guide (with diagrams)
- Cannabis Micro Growing: Growing Great Weed in Tiny Spaces
- Growing outdoors
- How to grow autoflowering marijuana
- Marijuana nutrients and pH
- Marijuana troubleshooting: Nutrients
-
Marijuana troubleshooting: Growing
- Cannabis Seed Germination — Troubleshooting Guide
- How to Deal With Pythium (Root Rot) in Cannabis Plants
- Slow Cannabis Plant Growth And What You Can Do About It
- How to Prevent and Fix Stretching in Cannabis Seedlings
- Watering Your Cannabis: How to Fix Overwatering and Underwatering
- Understanding Male, Female, And Hermaphrodite Cannabis
- Identifying and Treating Common Cannabis Ailments
- How To Revive a Sick Cannabis Plant
- How to Avoid Moldy Marijuana During Drying and Curing
- How to Prevent and Treat Dry and Crispy Cannabis Leaves
- What Cannabis Leaves Can Tell You
- Causes and Solutions for Yellow Cannabis Leaves
-
Marijuana Strains Grow Report
- HulkBerry Automatic Grow Report
- Blue Cheese Auto Grow Report
- Purple Punch Automatic Grow Report
- Triple G Automatic Grow Report
- Do-Si-Dos Automatic Grow Report
- Green Gelato Automatic Grow Report
- Haze Berry Automatic Grow Report
- Purple Queen Automatic Grow Report
- Cookies Gelato Automatic Grow Report
- Sherbet Queen Automatic Grow Report
- Sweet Skunk Automatic Grow Report
- Medusa F1 Grow Report
- Marijuana plant training
-
Marijuana growing tips
- The Cannabis Plant Anatomy
- How to preserve seeds
- How Much Sunlight Do Outdoor Cannabis Plants Need To Grow?
- How to Control and Prevent Stretching in Cannabis Plants
- My Cannabis Plants Are Growing Too Tall: What Should I Do?
- Should You Worry About Purple Or Red Cannabis Stems?
- What To Do When Your Indoor Cannabis Won’t Flower
- How To Protect Your Cannabis Plants From Heat Stress
- How To Tell If Your Female Cannabis Plant Has Been Pollinated
- Growing Medical Marijuana
- Bud Washing: How to Clean Your Weed
- Understanding Cannabis Yield per Plant
Blue Cheese Auto Grow Report
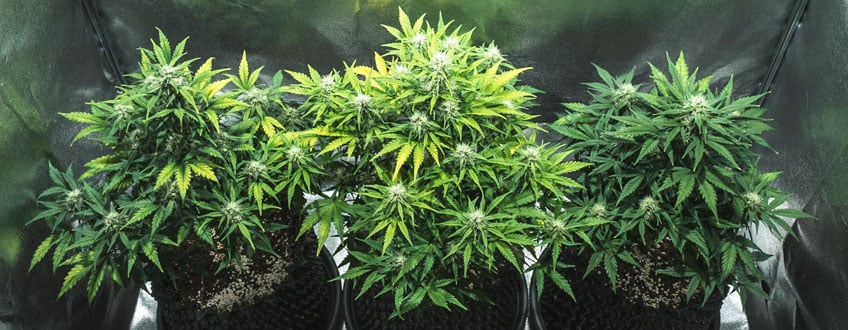
Blue Cheese Automatic provides a good yield of relaxing and aromatic buds in no time at all. If you’re curious about growing this cultivar, then you’re in luck! Below, you’ll find my Blue Cheese Automatic grow journal. I’ll take you through each week of the growing cycle and show you what we did to achieve a rewarding result. Discover the equipment, nutrients, and lighting that I used to keep my plant healthy and thriving along the way.
Contents:
Equipment List
|
• Box: Secret Jardin DS120W 120 × 60 × 178 • Lights: MIGRO 200+ • Ventilation: TT Silent-M 100 • Filter: Primaklima Filter PK 100/125 • Fan: Oscillating Koala Fan |
• Humidifier: Beurer LB 45 • Soil: BioBizz Light Mix • Pot: 11L Air Pots • Seed: Royal Queen Seeds • Nutrition: RQS Organic Nutrition |
Blue Cheese Automatic Grow Report: Seedling Stage (Week 1)
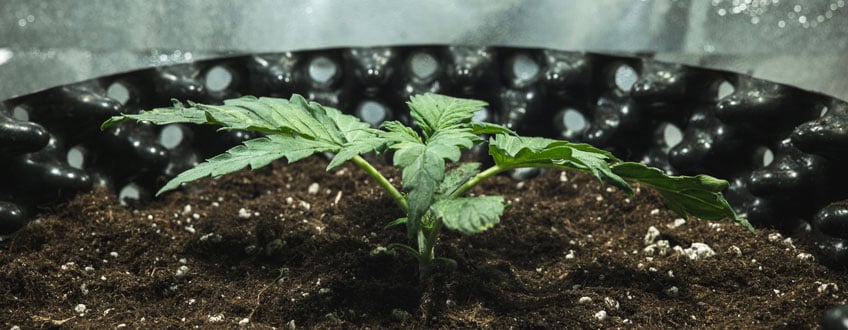
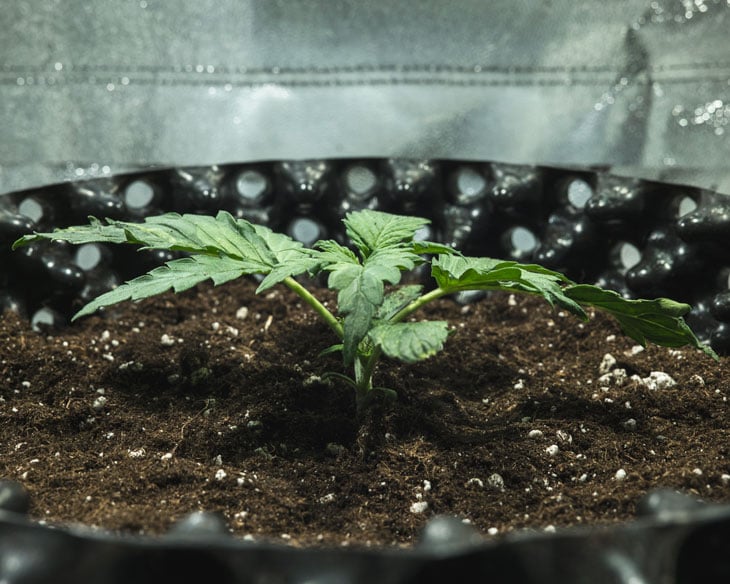
Welcome to the very beginning of my Blue Cheese Automatic grow guide! Check out what I did during the first week to ensure the healthiest seedlings possible.
| Germination | To boost germination success, I opted to use RQS Soil Plugs—a product that contains all of the micronutrients and biological inputs that a healthy seedling requires. I placed the plug into a cultivation tray and soaked it with enough water to reach full saturation without overwatering. Then, I used a wooden skewer to gently insert my seed into the hole. |
| Lighting | After setting up my grow tent, I suspended our MIGRO 200+ light from the ceiling and positioned it 13.7 inches above the cultivation tray. I left the light running for 24 hours each day as soon as I saw the first sign of our sprout emerge. |
| Growing medium | Within five days of sprouting, my seedling put on some size. I prepared a growing medium for an 11L Air Pot by starting with 10L of BioBizz Light Mix. Then, I added in the following organic amendments to boost nutrient cycling throughout the growing cycle:
|
| Environment | Using a hygrometer, I noted a temperature of 24°C and a humidity of 40%. I decided to switch on the humidifier to try and raise the humidity to 65–70%. |
| Plant status | By the end of the seedling stage, my specimen displayed healthy dark green leaves and lots of turgor. |
| Germination |
| To boost germination success, I opted to use RQS Soil Plugs—a product that contains all of the micronutrients and biological inputs that a healthy seedling requires. I placed the plug into a cultivation tray and soaked it with enough water to reach full saturation without overwatering. Then, I used a wooden skewer to gently insert my seed into the hole. |
| Lighting |
| After setting up my grow tent, I suspended our MIGRO 200+ light from the ceiling and positioned it 13.7 inches above the cultivation tray. I left the light running for 24 hours each day as soon as I saw the first sign of our sprout emerge. |
| Growing medium |
Within five days of sprouting, my seedling put on some size. I prepared a growing medium for an 11L Air Pot by starting with 10L of BioBizz Light Mix. Then, I added in the following organic amendments to boost nutrient cycling throughout the growing cycle:
After mixing thoroughly, I filled the container and saturated it with water. Then, I created a plug-sized hole in the center of the surface of the growing medium, transplanted my seedling, and watered it in. |
| Environment |
| Using a hygrometer, I noted a temperature of 24°C and a humidity of 40%. I decided to switch on the humidifier to try and raise the humidity to 65–70%. |
| Plant status |
| By the end of the seedling stage, my specimen displayed healthy dark green leaves and lots of turgor. |
Blue Cheese Automatic Grow Report: Vegetative Stage (Week 2–4)
After developing a couple of sets of true leaves, my plant departed the seedling stage and entered the vegetative phase of the growing cycle. Find out what I did to maintain a healthy and strong plant during this time.
Week 2
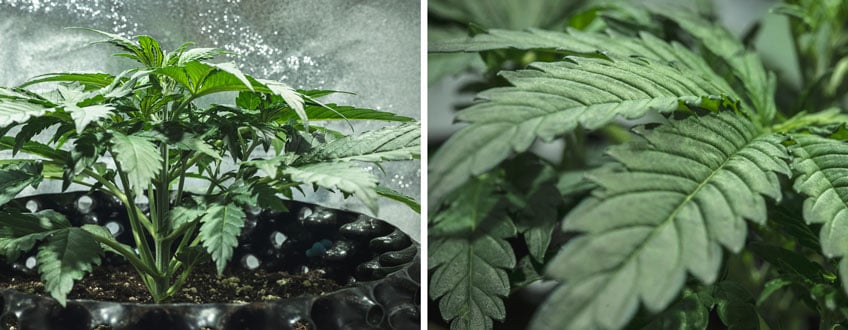
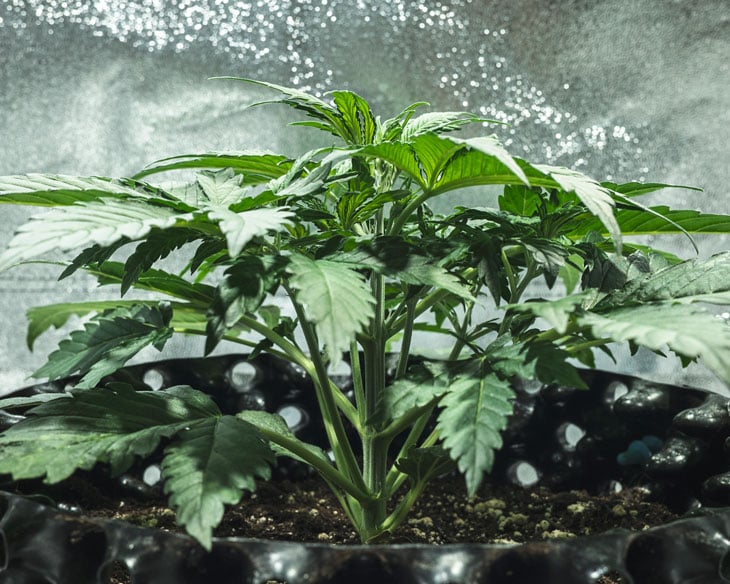
| Lighting | I maintained a 24-hour light cycle at this stage to drive photosynthesis and avoid stretching during this important part of plant development. I repositioned the light 13.7 inches above the growing canopy. |
| Nutrients | Because my growing medium contained so many essential nutrients and biologicals, I kept things simple by applying 4ml/l liquid seaweed and humic acid blend during watering on days 1 and 4 of the week. I also used a pH regulator to balance out our water before application. I applied 1.5 litres of water on days 1 and 4 of the week. |
| Environment | I maintained a steady temperature of 25.1°C. Using the humidifier from week 1 enabled me to increase the humidity slightly to 50%. |
| Plant status | By the end of the week, my plants stood at 2.7 inches and had started to develop substantial and luscious fan leaves. |
| Lighting |
| I maintained a 24-hour light cycle at this stage to drive photosynthesis and avoid stretching during this important part of plant development. I repositioned the light 13.7 inches above the growing canopy. |
| Nutrients |
| Because my growing medium contained so many essential nutrients and biologicals, I kept things simple by applying 4ml/l liquid seaweed and humic acid blend during watering on days 1 and 4 of the week. I also used a pH regulator to balance out our water before application. I applied 1.5 litres of water on days 1 and 4 of the week. |
| Environment |
| I maintained a steady temperature of 25.1°C. Using the humidifier from week 1 enabled me to increase the humidity slightly to 50%. |
| Plant status |
| By the end of the week, my plants stood at 2.7 inches and had started to develop substantial and luscious fan leaves. |
Week 3
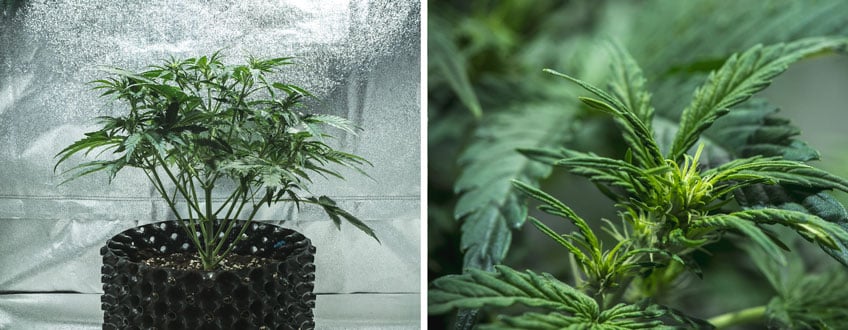
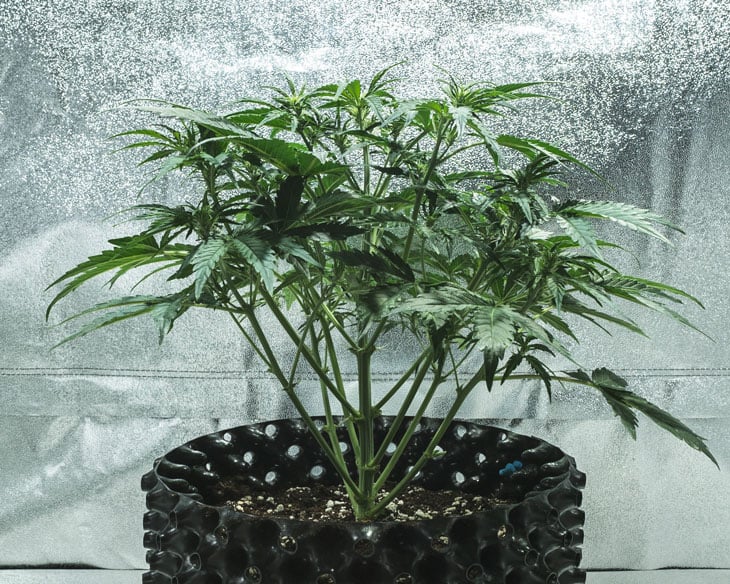
| Lighting | I maintained the light cycle of 24 hours with lights on. |
| Nutrients | Although thriving, I decided to add Easy Grow Booster Tablets to facilitate the rapid growth of our Blue Cheese Auto specimen. I prepared 1.5L of water, adjusted pH to 6.2, added one Easy Grow Booster Tablet and applied it on day 1 of the week. |
| Environment | Temperature stayed at around 24°C with humidity hovering around 45%. |
| Plant status | By the end of week three, my plant reached a height of 6.2 inches with a dense but small canopy of full-sized fan leaves. |
| Lighting |
| I maintained the light cycle of 24 hours with lights on. |
| Nutrients |
| Although thriving, I decided to add Easy Grow Booster Tablets to facilitate the rapid growth of our Blue Cheese Auto specimen. I prepared 1.5L of water, adjusted pH to 6.2, added one Easy Grow Booster Tablet and applied it on day 1 of the week. |
| Environment |
| Temperature stayed at around 24°C with humidity hovering around 45%. |
| Plant status |
| By the end of week three, my plant reached a height of 6.2 inches with a dense but small canopy of full-sized fan leaves. |
Week 4
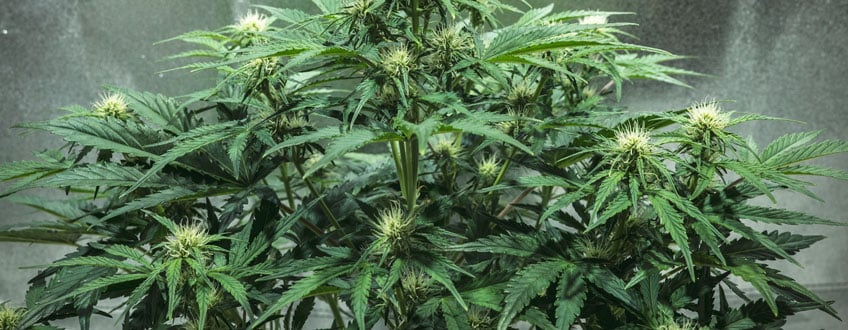
| Lighting | During the final week of veg, I decided to keep the light running for 24 hours each day, as the plant was responding so well to this regimen. |
| Nutrients | I applied the following solution on days 1 and 4 of week 4:
• 5L water • 1 Easy Grow Booster Tablets • 1m/L Easy Plus Micronutrients I watered with this solution until the growing medium became saturated, not water-logged. |
| Environment | Things continued steadily with an average temperature of 24°C and humidity of 42%. |
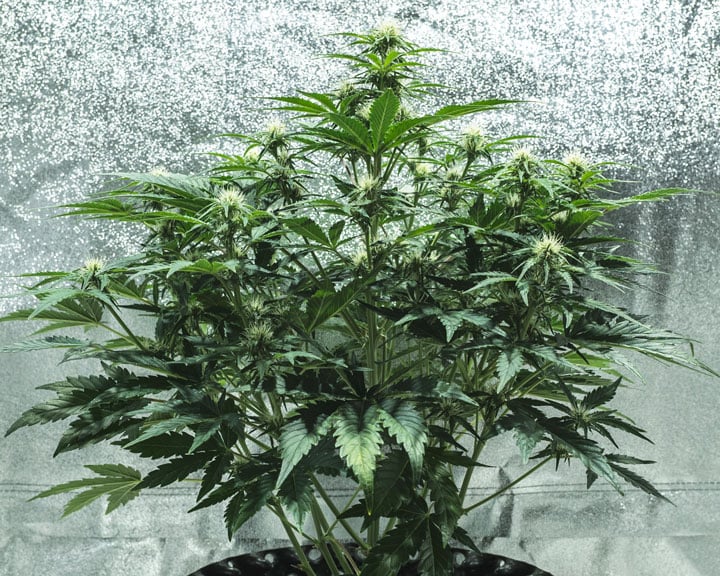
| Plant status | My plant exploded in growth during the final week of veg, reaching 12.1 inches. At this point, it had such a dense canopy of leaves that I decided to defoliate the bottom of the canopy to direct energy upwards for flowering and to improve air circulation. |
| Lighting |
| During the final week of veg, I decided to keep the light running for 24 hours each day, as the plant was responding so well to this regimen. |
| Nutrients |
| I applied the following solution on days 1 and 4 of week 4:
• 5L water • 1 Easy Grow Booster Tablets • 1m/L Easy Plus Micronutrients I watered with this solution until the growing medium became saturated, not water-logged. |
| Environment |
| Things continued steadily with an average temperature of 24°C and humidity of 42%. |
| Plant status |
| My plant exploded in growth during the final week of veg, reaching 12.1 inches. At this point, it had such a dense canopy of leaves that I decided to defoliate the bottom of the canopy to direct energy upwards for flowering and to improve air circulation. |
Blue Cheese Automatic Grow Report: Flowering Stage (Week 5–10)
Welcome to the flowering phase! My Blue Cheese Automatic plant responded extremely well to our lighting and nutrient regimen during veg. Check out how things continued throughout the rest of my Blue Cheese Automatic grow guide.
Week 5
| Lighting | I dialled down the lighting schedule to 20 hours on and 4 hours off. This gave my plant enough light exposure for optimal photosynthesis while reducing unnecessary electricity costs during the flowering phase. |
| Nutrients | Because plants require different quantities of macronutrients during the flowering stage, I switched to the following formula to support healthy bud formation:
• 1 Easy Bloom Booster Tablets • 1ml/L Easy Plus Micronutrients Easy Bloom Booster Tablets provide lower amounts of nitrogen and higher quantities of potassium and phosphorus—two key nutrients required by cannabis plants during bloom. I added this mix to 5L of water and applied it on days 1 and 4 of week 5 until the growing medium became saturated. |
| Environment | Temperatures continued to cruise at 24°C. I turned off the humidifier and let the grow box settle at a humidity of 40% to reduce the chances of fungal pathogens during flowering. |
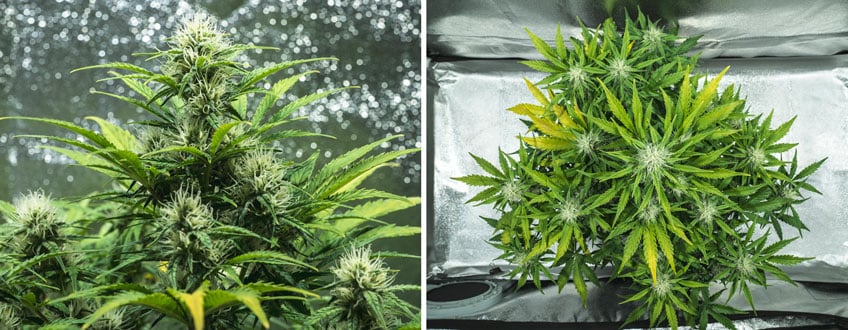
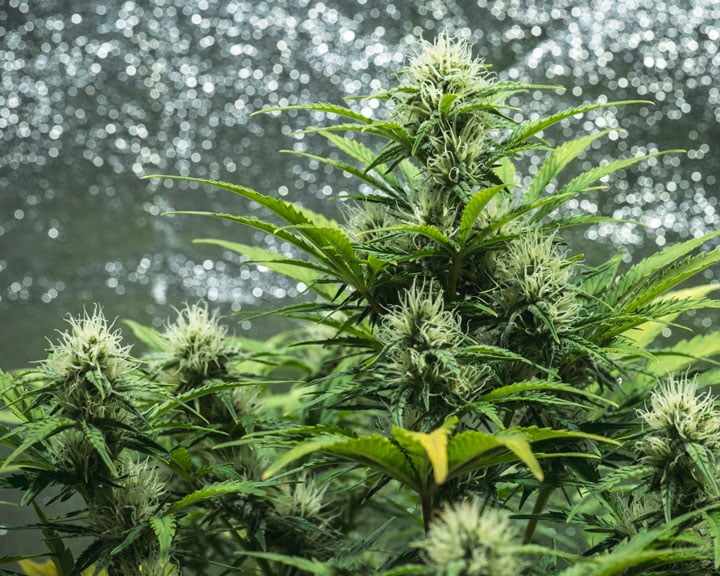
| Plant status | My plant quickly bounced back from the stress of last week’s defoliation. At this point, it had reached 16 inches and began to display the first signs of buds. |
| Lighting |
| I dialled down the lighting schedule to 20 hours on and 4 hours off. This gave my plant enough light exposure for optimal photosynthesis while reducing unnecessary electricity costs during the flowering phase. |
| Nutrients |
| Because plants require different quantities of macronutrients during the flowering stage, I switched to the following formula to support healthy bud formation:
• 1 Easy Bloom Booster Tablets • 1ml/L Easy Plus Micronutrients Easy Bloom Booster Tablets provide lower amounts of nitrogen and higher quantities of potassium and phosphorus—two key nutrients required by cannabis plants during bloom. I added this mix to 5L of water and applied it on days 1 and 4 of week 5 until the growing medium became saturated. |
| Environment |
| Temperatures continued to cruise at 24°C. I turned off the humidifier and let the grow box settle at a humidity of 40% to reduce the chances of fungal pathogens during flowering. |
| Plant status |
| My plant quickly bounced back from the stress of last week’s defoliation. At this point, it had reached 16 inches and began to display the first signs of buds. |
Week 6
| Lighting | I repositioned the light to suspend 13.7 inches about the top of the canopy and kept them running for 20 hours per day. |
| Nutrients | We applied the same nutrient formula as the previous week on days 1 and 4. |
| Environment | Temperature remained at 24°C. Average humidity dropped slightly to 38%. |
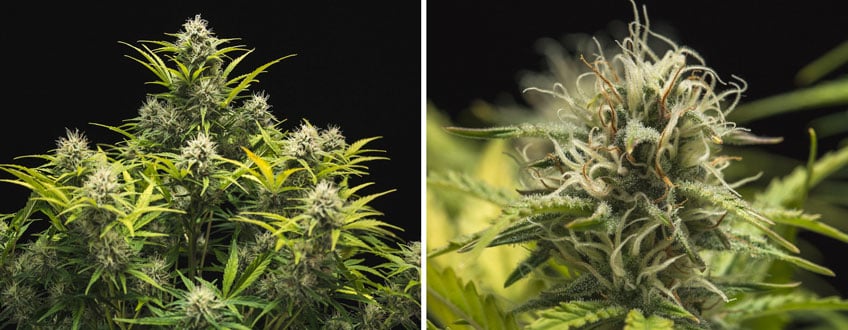
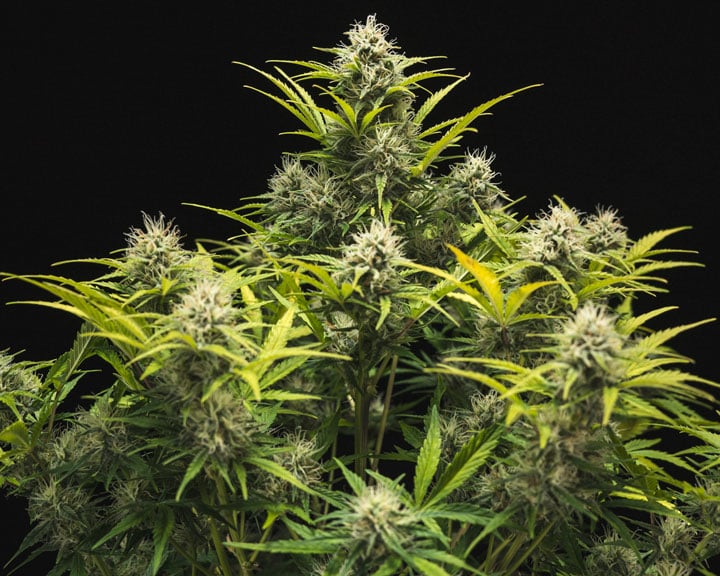
| Plant status | My plant grew a total of 1.6 inches over week 6, reaching 17.6 inches tall. The buds started to swell slightly and started to emit a weak skunky odour. |
| Lighting |
| I repositioned the light to suspend 13.7 inches about the top of the canopy and kept them running for 20 hours per day. |
| Nutrients |
| We applied the same nutrient formula as the previous week on days 1 and 4. |
| Environment |
| Temperature remained at 24°C. Average humidity dropped slightly to 38%. |
| Plant status |
| My plant grew a total of 1.6 inches over week 6, reaching 17.6 inches tall. The buds started to swell slightly and started to emit a weak skunky odour. |
Week 7
| Lighting | I kept the lights running at 20 hours on and 4 hours off. |
| Nutrients | I dropped the micronutrients from our mix as we got closer to flushing. Instead, I added 1 Easy Bloom Booster Tablet in 5L of water and administered them on days 1 and 3 until I reached the saturation point of the growing medium. |
| Environment | Temperature remained consistent at 24 and average humidity at 40%. |
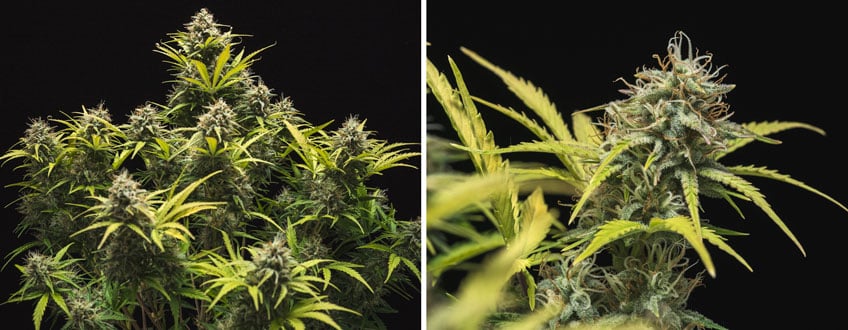
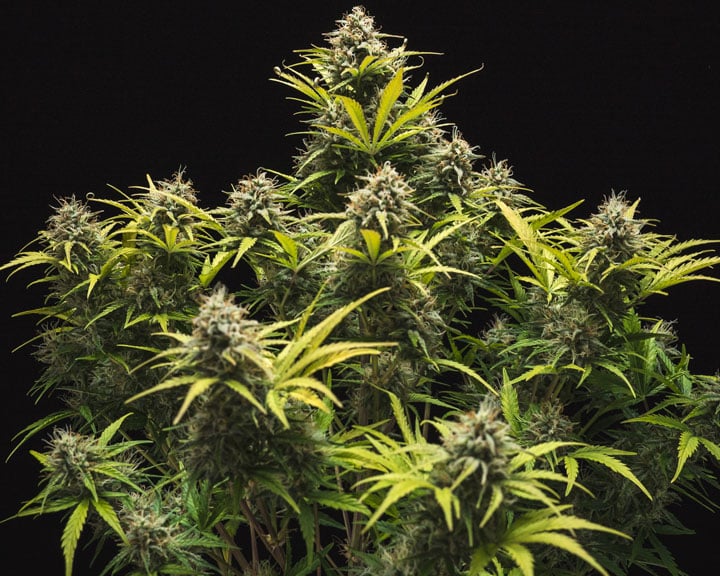
| Plant status | My container selection meant that my auto remained at the stealthy height of 17.6 inches throughout the rest of the growing cycle. Despite this small size, my plant developed plenty of bud sites which continued to put out increasingly large buds. At this point in the grow, my Blue Cheese Automatic specimen started to put out a stronger odour. |
| Lighting |
| I kept the lights running at 20 hours on and 4 hours off. |
| Nutrients |
| I dropped the micronutrients from our mix as we got closer to flushing. Instead, I added 1 Easy Bloom Booster Tablet in 5L of water and administered them on days 1 and 3 until I reached the saturation point of the growing medium. |
| Environment |
| Temperature remained consistent at 24 and average humidity at 40%. |
| Plant status |
| My container selection meant that my auto remained at the stealthy height of 17.6 inches throughout the rest of the growing cycle. Despite this small size, my plant developed plenty of bud sites which continued to put out increasingly large buds. At this point in the grow, my Blue Cheese Automatic specimen started to put out a stronger odour. |
Week 8
| Lighting | Remained the same as the previous weeks of the flowering phase. |
| Nutrients | During week 8, I administered the final feeds before starting flushing. I mixed 1 Easy Bloom Booster Tablet to 5L of water and applied on days 1 and 3 of week 8 until saturated. |
| Environment | Temperature stayed consistent at 24°C. Humidity dropped, in my favor, to 37%, reducing the odds of mold developing on the flowers. |
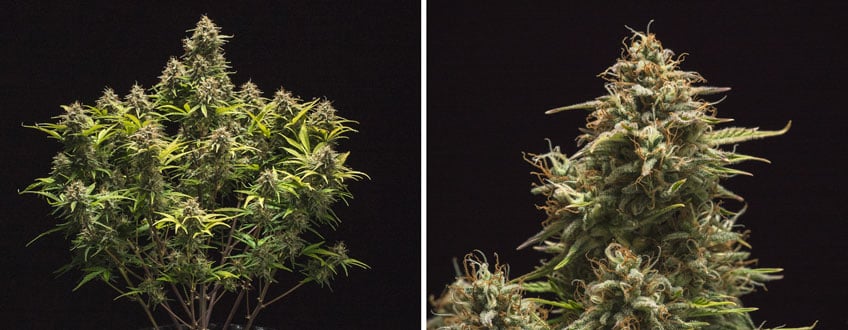
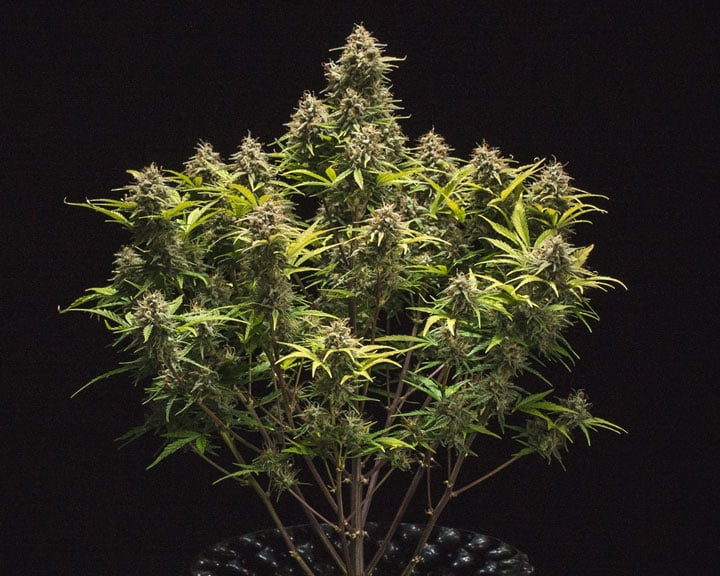
| Plant status | With no training, my plant developed a relatively even canopy packed with uniform colas. I used a loupe to take a closer look at the trichomes, which displayed a translucent appearance, indicating immature flowers. |
| Lighting |
| Remained the same as the previous weeks of the flowering phase. |
| Nutrients |
| During week 8, I administered the final feeds before starting flushing. I mixed 1 Easy Bloom Booster Tablet to 5L of water and applied on days 1 and 3 of week 8 until saturated. |
| Environment |
| Temperature stayed consistent at 24°C. Humidity dropped, in my favor, to 37%, reducing the odds of mold developing on the flowers. |
| Plant status |
| With no training, my plant developed a relatively even canopy packed with uniform colas. I used a loupe to take a closer look at the trichomes, which displayed a translucent appearance, indicating immature flowers. |
Week 9–10
| Lighting | I continued to expose our plant to 20 hours of light per day. |
| Nutrients | I ceased applying nutrients to start the flush. This process enables plants to use up their nutrient stores, resulting in more pleasant tastes. I applied 2L of water regulated to a pH of 6.1 on days 1 and 3 of weeks 9 and 10. |
| Environment | Temperatures stayed at 24°C. Humidity dropped slightly to an average of 35%. |
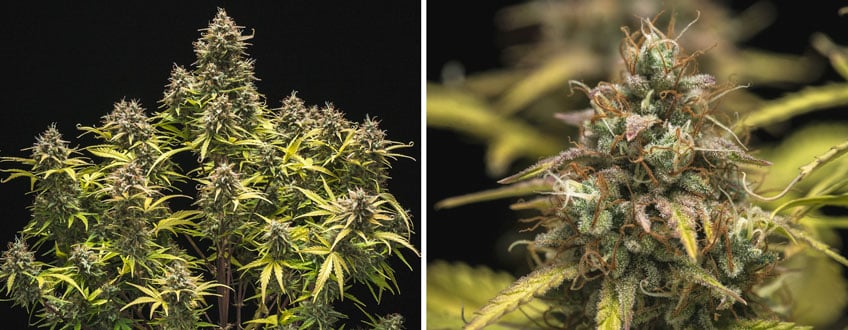
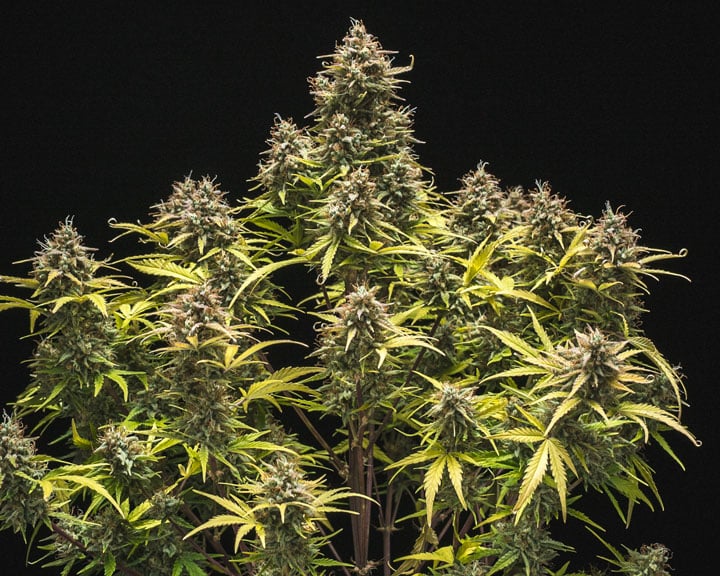
| Plant status | My plant started to show obvious signs of deficiency, something I desired during flushing. The lower leaves started to yellow, and the stems displayed a deep purple color—a sign of anthocyanin expression. Upon inspection with a loupe, I noticed the trichomes becoming cloudier by the day. |
| Lighting |
| I continued to expose our plant to 20 hours of light per day. |
| Nutrients |
| I ceased applying nutrients to start the flush. This process enables plants to use up their nutrient stores, resulting in more pleasant tastes. I applied 2L of water regulated to a pH of 6.1 on days 1 and 3 of weeks 9 and 10. |
| Environment |
| Temperatures stayed at 24°C. Humidity dropped slightly to an average of 35%. |
| Plant status |
| My plant started to show obvious signs of deficiency, something I desired during flushing. The lower leaves started to yellow, and the stems displayed a deep purple color—a sign of anthocyanin expression. Upon inspection with a loupe, I noticed the trichomes becoming cloudier by the day. |
Harvest (Week 10)
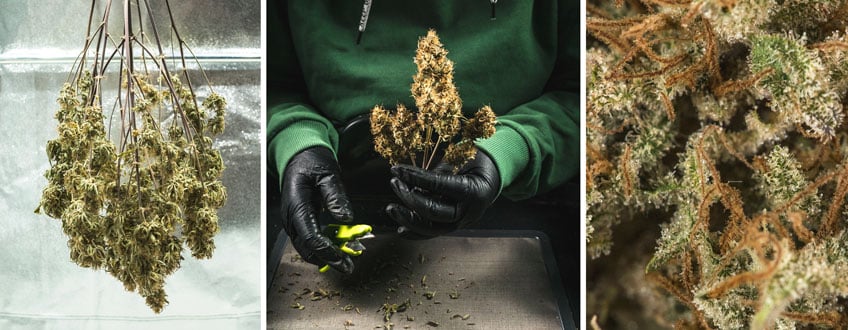
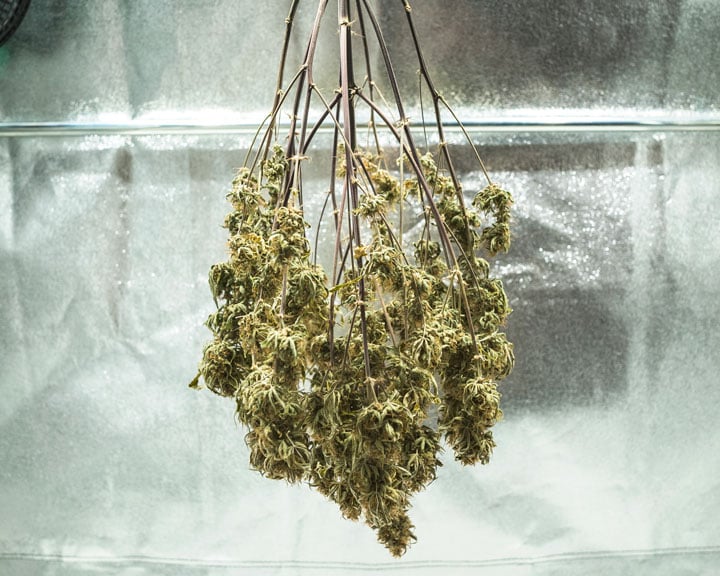
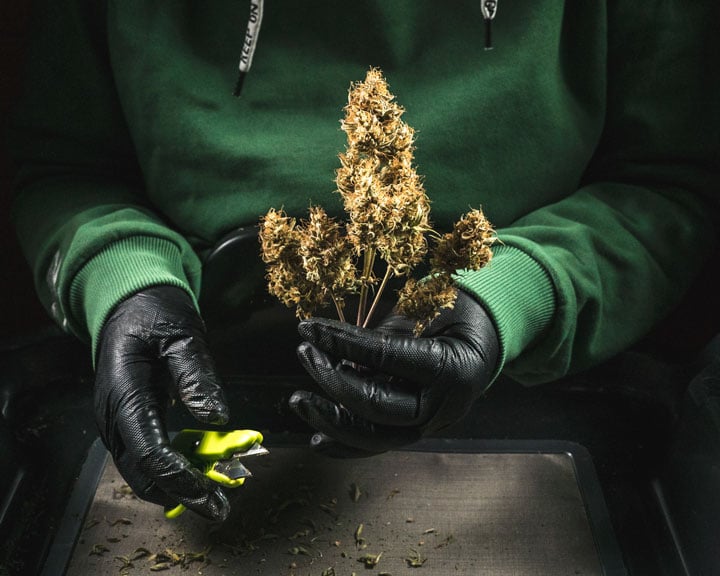
At this stage, the flowers swelled, the smell became extremely strong, and the trichomes became opaque and milky. I cut the plant as the base and hung it upside down in the grow box to dry in front of a fan before dry trimming and curing. Overall, I achieved 1.6 oz of dried buds that emitted a strong fruity aroma.
Blue Cheese Auto Characteristics
- 🧬 Genetic Attributes of Blue Cheese Automatic
- As the progeny of Blueberry, Cheese, and a cannabis ruderalis specimen, Blue Cheese Automatic features 40% indica genetics, 35% sativa, and 25% ruderalis. If you’re familiar with classic cannabis strains, you’ll recognise that this hardy auto descends from royalty. Blueberry brought high levels of myrcene and dense frosty buds to the table, whereas Cheese passed down high levels of THC and a pleasant clear-headed high. The addition of ruderalis genetics made this variety easy to grow and fast to flower.
- 🌱 Grow Characteristics of Blue Cheese Automatic
- Blue Cheese Automatic grows well just about anywhere. Indoors, she grows to a stealthy height of 40–70cm and produces up to 375g/m² under powerful lights. When grown outdoors, plants peak at a taller height of 100cm and offer a return of 60–110g/plant. Expect to harvest these flowers in as little as 10 weeks after they sprout through the soil.
- 🌈 Effects and Flavour of Blue Cheese Automatic
- These purple-green buds pack a moderate THC content of 16%. They exert a clear-headed and uplifting high that hits the sweet spot of most cannabis users without tipping them over the edge; Blue Cheese Auto makes a great choice for novices. After each hit, you’ll experience flavours of cheese, earth, fruit, and pepper lingering on your taste buds. High levels of fruity terpene myrcene synergise with THC to create a cosy body high.
Blue Cheese Auto
|
|
Blueberry x Cheese x Ruderalis |
|
|
11 to 13 oz/m² |
|
|
1 to 2 feet |
|
|
6 - 7 weeks |
|
|
THC: 16% |
|
|
Sativa 35% Indica 40% Ruderalis 25% |
|
|
2 to 4 oz/plant |
|
|
2 to 4 feet |
|
|
10 – 11 weeks after sprouting |
|
|
Clear, Uplifting |
 Grow Guide Topic Finder
- Growing weed step by step
- Marijuana growing basics
- Choosing your seeds
- How to germinate seeds
- The marijuana vegetative stage
- The marijuana flowering stage
- Harvesting marijuana
- Trimming, drying, and curing
- Choosing pots and soil
-
Growing indoors
- A Complete Overview Of Growing Cannabis Indoors
- Cannabis Cultivation Tips: How To Set Up Indoor Grow Lights
- How Many Cannabis Plants Can You Grow Per Square Metre?
- Indoor Cannabis Growing: Relative Humidity and Temperatures
- Hydroponics Cannabis Growing Guide (with diagrams)
- Cannabis Micro Growing: Growing Great Weed in Tiny Spaces
- Growing outdoors
- How to grow autoflowering marijuana
- Marijuana nutrients and pH
- Marijuana troubleshooting: Nutrients
-
Marijuana troubleshooting: Growing
- Cannabis Seed Germination — Troubleshooting Guide
- How to Deal With Pythium (Root Rot) in Cannabis Plants
- Slow Cannabis Plant Growth And What You Can Do About It
- How to Prevent and Fix Stretching in Cannabis Seedlings
- Watering Your Cannabis: How to Fix Overwatering and Underwatering
- Understanding Male, Female, And Hermaphrodite Cannabis
- Identifying and Treating Common Cannabis Ailments
- How To Revive a Sick Cannabis Plant
- How to Avoid Moldy Marijuana During Drying and Curing
- How to Prevent and Treat Dry and Crispy Cannabis Leaves
- What Cannabis Leaves Can Tell You
- Causes and Solutions for Yellow Cannabis Leaves
-
Marijuana Strains Grow Report
- HulkBerry Automatic Grow Report
- Blue Cheese Auto Grow Report
- Purple Punch Automatic Grow Report
- Triple G Automatic Grow Report
- Do-Si-Dos Automatic Grow Report
- Green Gelato Automatic Grow Report
- Haze Berry Automatic Grow Report
- Purple Queen Automatic Grow Report
- Cookies Gelato Automatic Grow Report
- Sherbet Queen Automatic Grow Report
- Sweet Skunk Automatic Grow Report
- Medusa F1 Grow Report
- Marijuana plant training
-
Marijuana growing tips
- The Cannabis Plant Anatomy
- How to preserve seeds
- How Much Sunlight Do Outdoor Cannabis Plants Need To Grow?
- How to Control and Prevent Stretching in Cannabis Plants
- My Cannabis Plants Are Growing Too Tall: What Should I Do?
- Should You Worry About Purple Or Red Cannabis Stems?
- What To Do When Your Indoor Cannabis Won’t Flower
- How To Protect Your Cannabis Plants From Heat Stress
- How To Tell If Your Female Cannabis Plant Has Been Pollinated
- Growing Medical Marijuana
- Bud Washing: How to Clean Your Weed
- Understanding Cannabis Yield per Plant


