Corkscrew Auto Grow Report
Contents:
- Corkscrew auto grow report: equipment list
- Corkscrew auto grow report: seedling stage (week 1)
- Corkscrew auto grow report: vegetative phase (week 2–4)
- Corkscrew auto grow report: flowering stage (week 5–10)
- Corkscrew auto grow journal: harvest
- Genetic attributes of corkscrew auto
- Growing characteristics of corkscrew auto
- Effects, aromas, and flavors of corkscrew auto
Are you thinking of raising some Corkscrew Automatic plants in your grow room or garden? Well then, why not check out my Corkscrew Automatic week-by-week growing journal below? You’ll find out what I did to raise a healthy, flourishing plant and achieve a sizeable yield!
Corkscrew Auto Grow Report: Equipment List
- Box: Secret Jardin DS120W 120 × 60 × 178 cm
- Lights: MIGRO ARAY 4 240 W
- Ventilation: TT Silent-M 100
- Filter: Primaklima filter PK 100/125
- Fan: Oscillating Koala Fan
- Soil: BioBizz Light·Mix
- Pot: 11 l Air-Pot
- Seed: Royal Queen Seeds
- Nutrition: RQS Organic Nutrition
Corkscrew Auto Grow Report: Seedling Stage (Week 1)
Welcome to my Corkscrew Auto growing journal! There are, of course, many different ways to grow this strain and achieve successful results. In what follows, you’ll discover the methods I used to raise a healthy seedling and lay a solid foundation for a successful growing cycle.
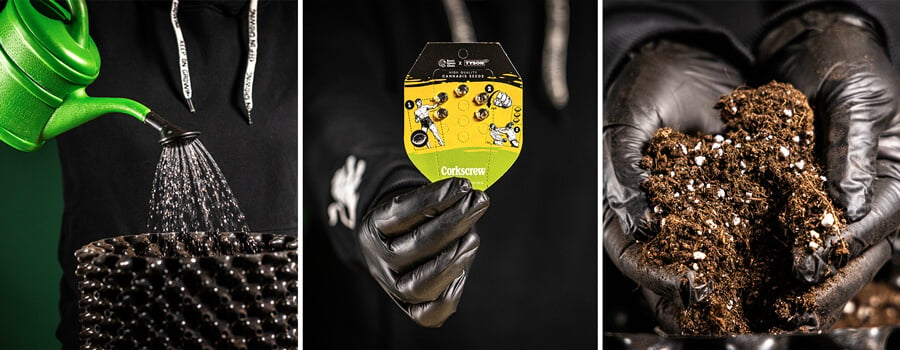
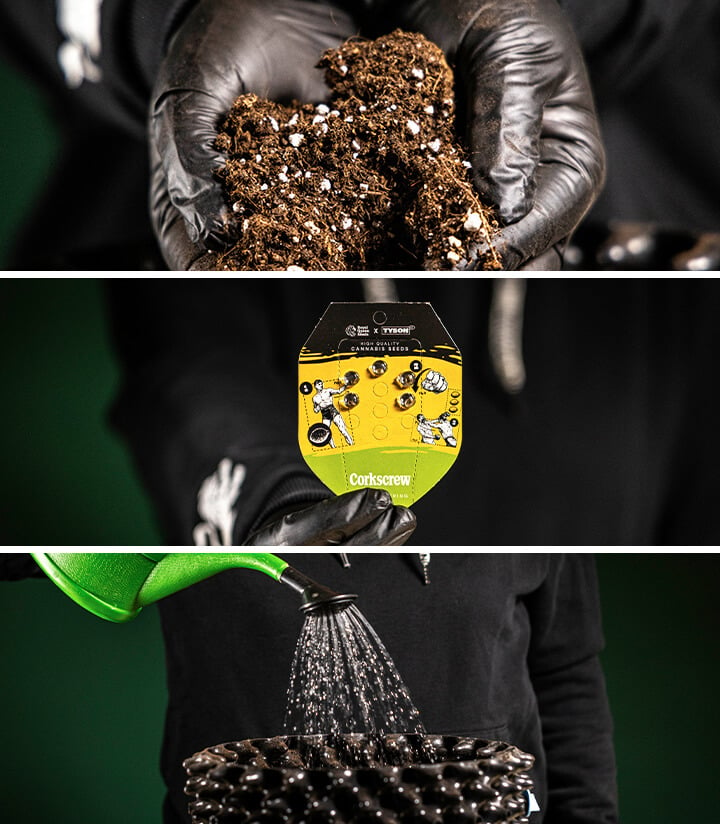
- Growing medium: First things first, I had to put a growing medium together. I grabbed an 11 l Air-Pot and added 5 l of BioBizz Light·Mix. Next, I added the following to help my plant thrive during early growth:
- RQS Easy Boost Organic Nutrition: 50 g
- RQS Seaweed: 11 g
- RQS Mycorrhiza Mix: 5 g
After adding my amendments, I mixed everything together thoroughly. Then, I added another 5 l of BioBizz Light·Mix and stirred everything together once more. Finally, I watered the growing medium to get it nicely saturated.
- Germination: With my growing medium prepared and ready to go, I turned my attention towards my seed. I created a small 2 cm-deep hole in the center of the surface of the growing medium and inserted my seed. I added a pinch of RQS Mycorrhiza Mix to ensure the taproot made contact with this bioinoculant as soon as germination occurred. I covered the seed with a thin layer of growing medium and misted the area lightly.
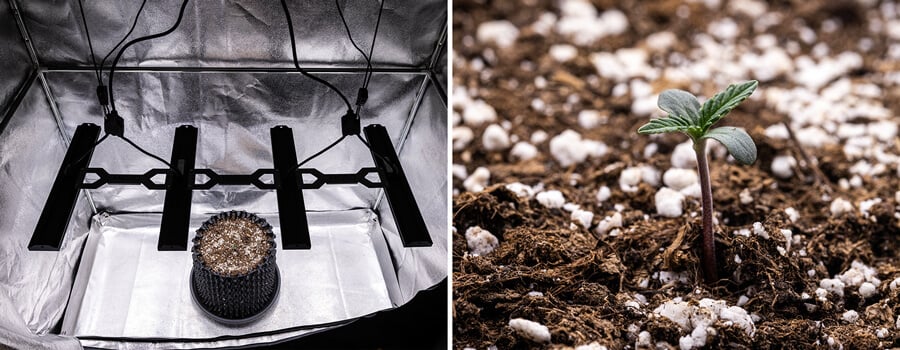
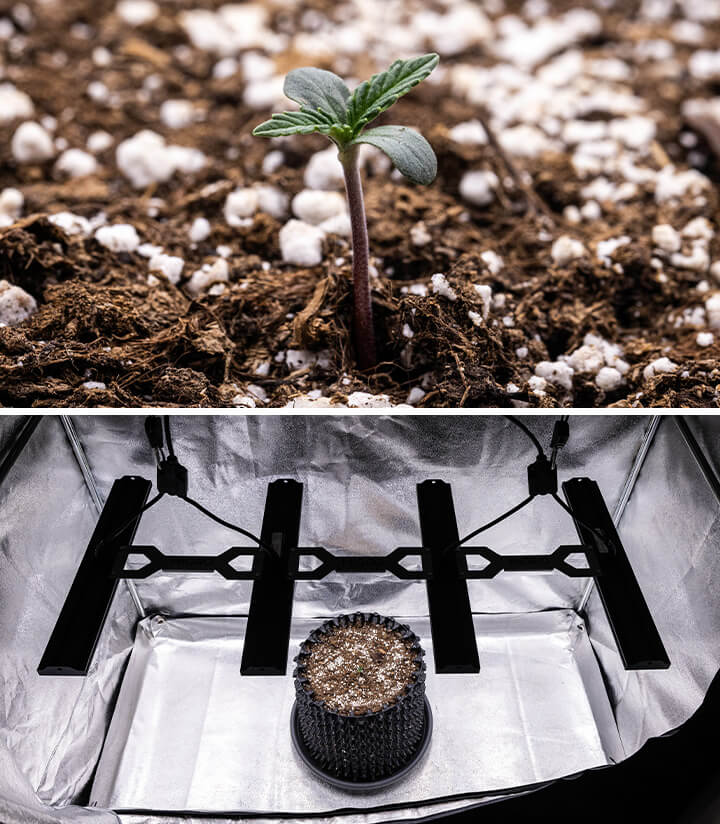
- Lighting: To meet my plant’s energy needs, I decided to opt for the MIGRO Aray 4 250 W lamp. I used ratchet straps to suspend the rig from the top of my grow box and adjusted them until the lamp hung level at a distance of 35 cm from the rim of my Air-Pot. I started running the lamp for 24 hours each day as soon as I saw the shoot breach the surface of the soil.
- Plant status: By the end of the first week, my seedling stood at a height of around 5 cm. It had already developed its first small set of true leaves. A bright green color and a robust and thick stem served as indicators of perfect health at this early stage.
Corkscrew Auto Grow Report: Vegetative Phase (Week 2–4)
Welcome to the vegetative phase of my Corkscrew Auto week-by-week growing journal! Here you’ll discover the steps I took to ensure speedy, luscious growth, and what techniques I employed to get my specimen in great shape before bloom.
Week 2
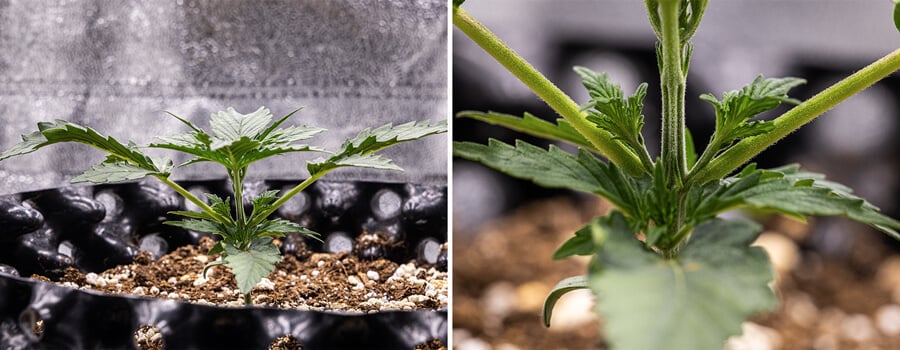
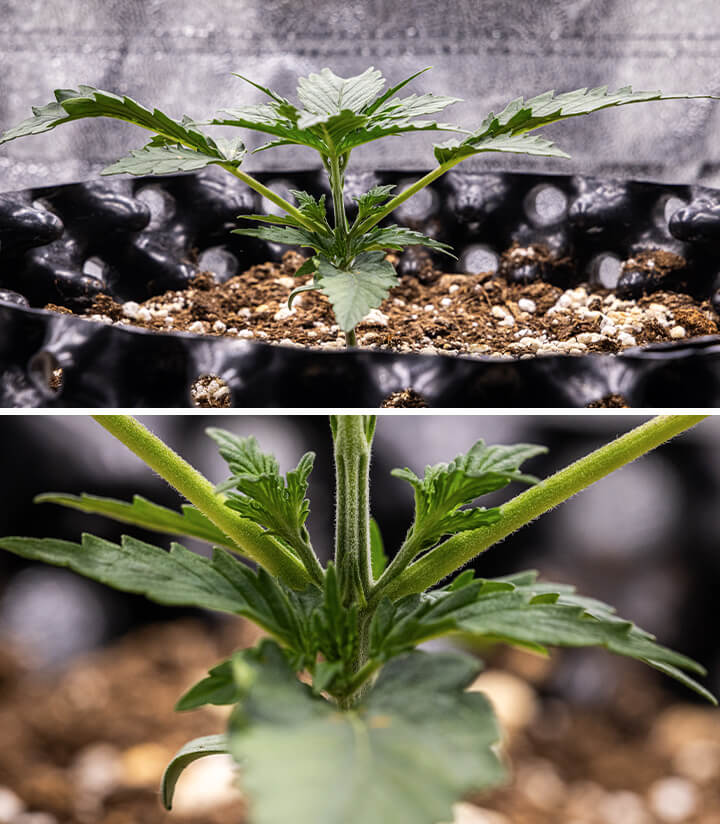
The vegetative stage got off to a good start. Overall, my plants looked healthy and packed on some good growth. However, the emergence of some brown spots on the older leaves caused me some concern.
- Lighting: I continued to run my lamp for 24 hours per day, repositioning it to hang 35 cm from the tip of my plant.
- Nutrients: As the growing medium I prepared provided most of what my plant needed nutrition-wise, I only applied 1 l of water adjusted to a pH of 6.0 on day three of the week. I applied 1 l of water again on day six, but this time with 1 ml of a CalMag supplement in an attempt to counter the brown spots on the lower leaves.
- Environment: Using my ventilation system and fan, I managed to maintain an average temperature of 28°C and a relative humidity of 50%.
- Plant status: By the end of week two, my plant reached a height of 10 cm. Despite healthy growth overall, there continued to be brown spots on the leaves. While CalMag deficiency was unlikely, I applied a supplement just in case. I also suspected a potential fungal infection as the cause.
Week 3
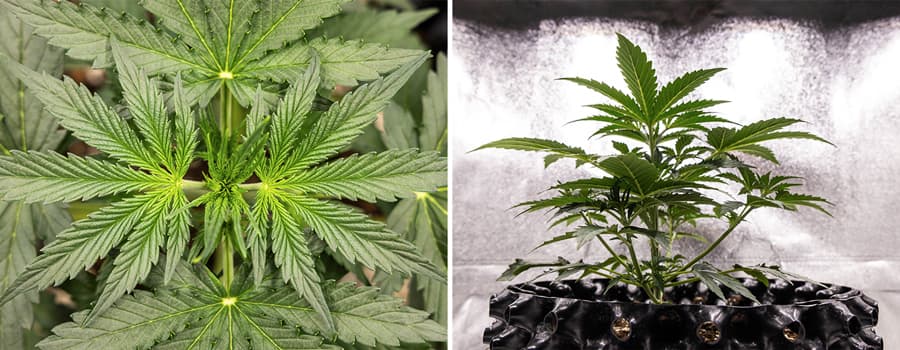
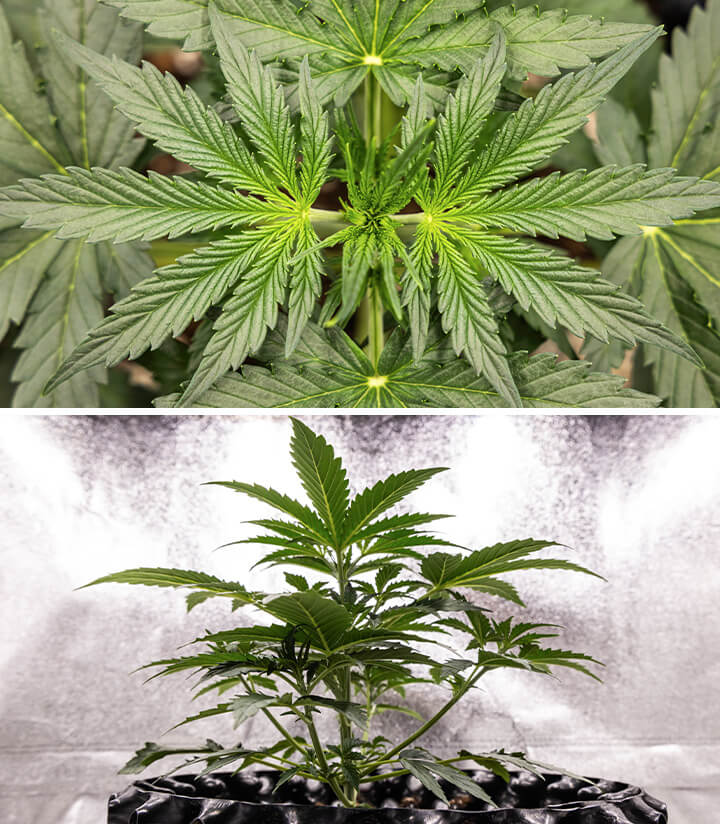
Things really started to look up during the third week of veg. My plant grew rapidly and the brown spots started to clear up.
- Lighting: I reduced the light cycle and ran my lamp for 18 hours per day. Again, I adjusted the straps to suspend my lamp 35 cm above the tip of my plant.
- Nutrients: On day three of the week, I mixed 1 ml of CalMag and 0.5 ml of Bigger Flowers from the Bio Flowering Booster into 1 l of pH-adjusted water and fed my plant. I repeated the exact same procedure on day six of the week.
- Environment: I recorded an average daytime temperature of 28°C and a relative humidity of 50%.
- Plant status: Thankfully, the brown spot issue began to wane and all new leafy growth emerged healthy with a dark green appearance. By the end of week three, my plant had grown to a height of 19 cm.
Week 4
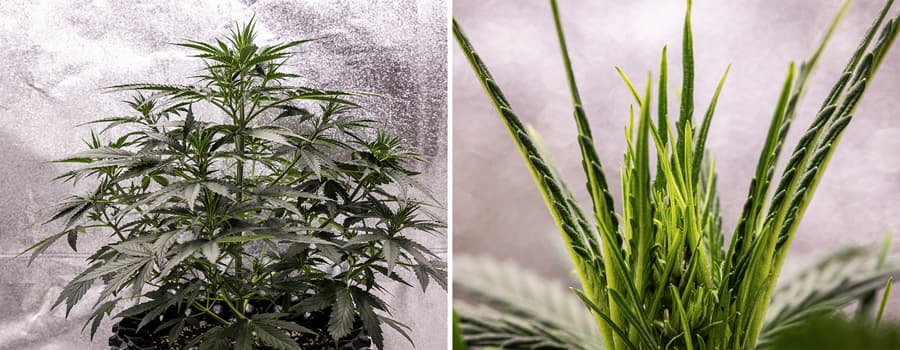
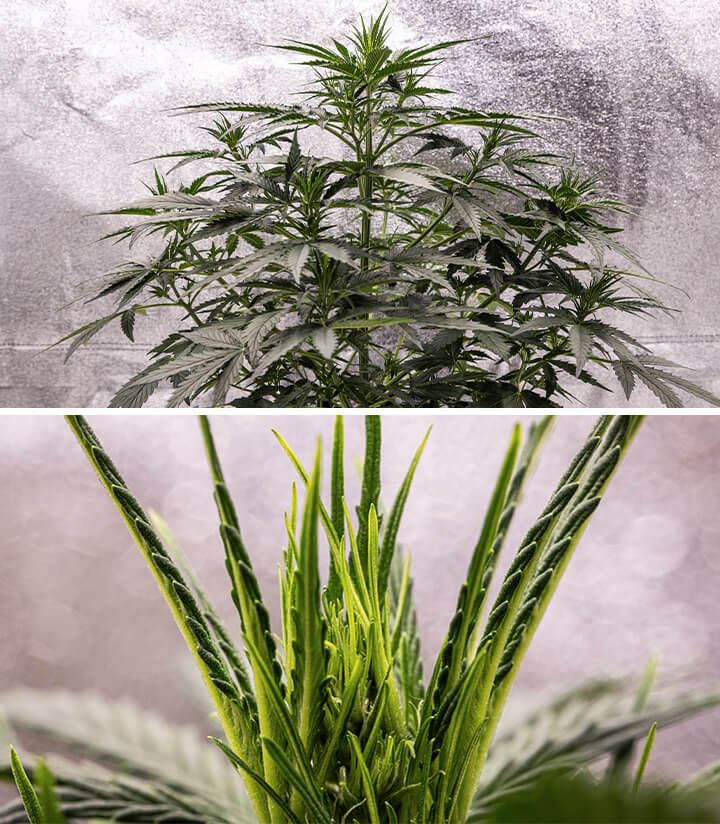
Just like that, we’ve reached the end of the vegetative phase! Things went smoothly overall, with a small bump in the road in the form of small, mysterious brown spots. By this point, pre-flowers had started to emerge, indicating the beginning of bloom!
- Lighting: I continued running my lamp for 18 hours each day and readjusted it to hang 35 cm above the tip of my plant.
- Nutrients: On day three of the week, I added half an Easy Grow Booster Tablet to 2.5 l of water and fed my plant. On day six, I added 2 ml of CalMag, 1 ml of Bigger Flowers, and 1 ml of Thicker Flowers to 2.5 l of water and fed my plant once again.
- Environment: I recorded an average temperature of 30°C and a relative humidity of 50%.
- Plant status: My plant looked incredible at the end of veg. It had plenty of pre-flowers ready to erupt into dense, sticky buds. I defoliated lightly at the end of the week, making sure to remove any leaves that blocked direct light from hitting any bud sites. By the time flowering started, my plant had reached a height of 36 cm.
Corkscrew Auto Grow Report: Flowering Stage (Week 5–10)
We’re almost there! Things are about to get exciting as my Corkscrew Auto grow report enters the bloom phase. Below, you’ll see how I switched up my nutrient strategy and what I did to ensure big, potent buds.
Week 5
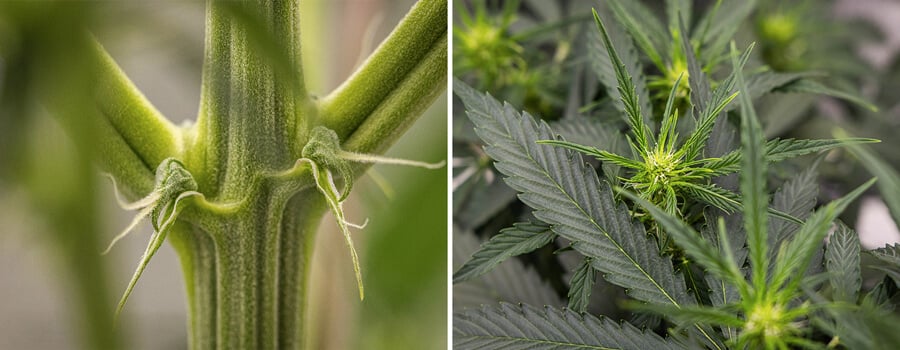
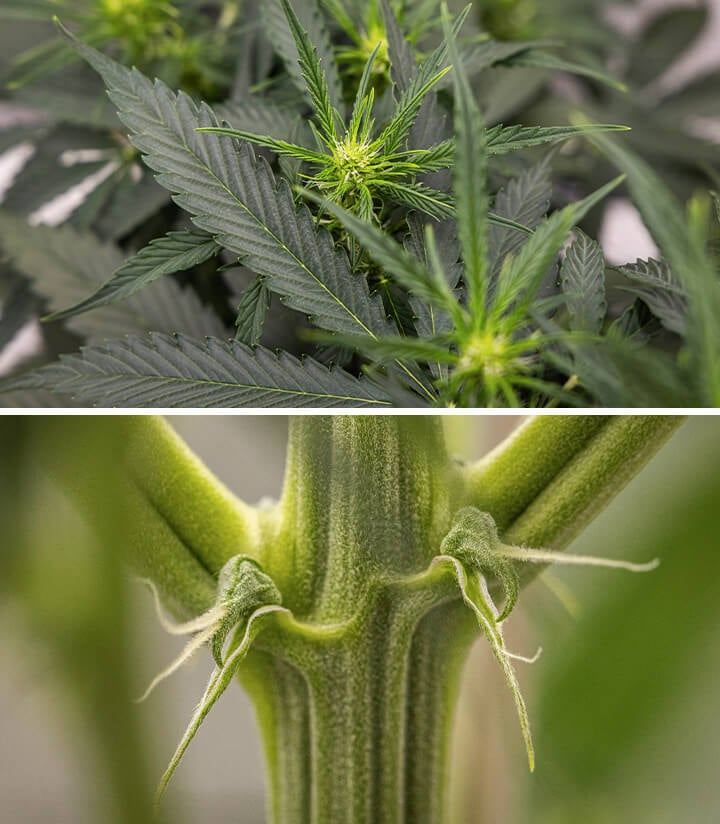
Things got off to a great start this week. I detected a slight aroma starting to permeate my growing space and watched in awe as the buds began to swell.
- Lighting: I continued to run my lamp for 18 hours each day. I tightened the ratchet straps so my lamp hung 35 cm from the tip of my plant.
- Nutrients: On day three of the week, I added 2 ml of CalMag and 2 ml of Bigger Flowers to 2.5 l of pH-adjusted water and fed my plant. I repeated this procedure on day six of the week, with the addition of 1.5 ml of Thicker Flowers.
- Environment: I recorded an average temperature of 30°C and a relative humidity of 55%.
- Plant status: My plant stretched to a height of 55 cm during the first week of bloom. All of the pre-flowers had developed into clusters of pistillate flowers. My plant looked healthy and happy overall.
Week 6
My plant continued to stretch during the second week of bloom, and her buds continued to mature.
- Lighting: I continued running my lamp for 18 hours per day, readjusting the straps to ensure a distance of 35 cm between the tip of my plant and the lamp.
- Nutrients: On day three of the week, I added 2 ml of CalMag and 1 ml of Bigger Flowers to 2.5 l of pH-adjusted water and fed my plant. I repeated the exact same procedure on day six.
- Environment: I recorded an average temperature of 30°C and a relative humidity of 60%.
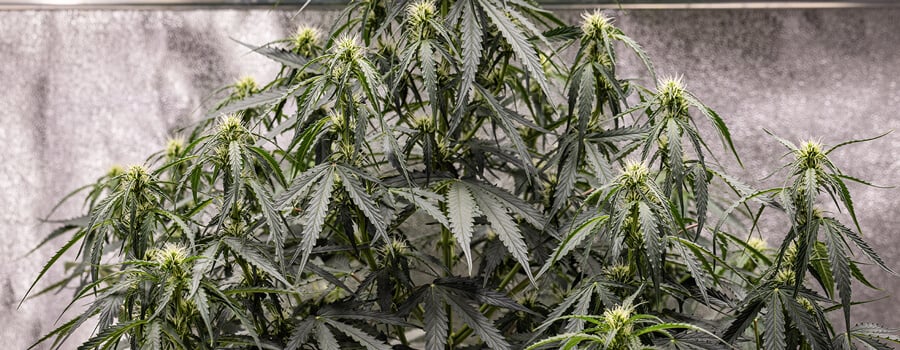
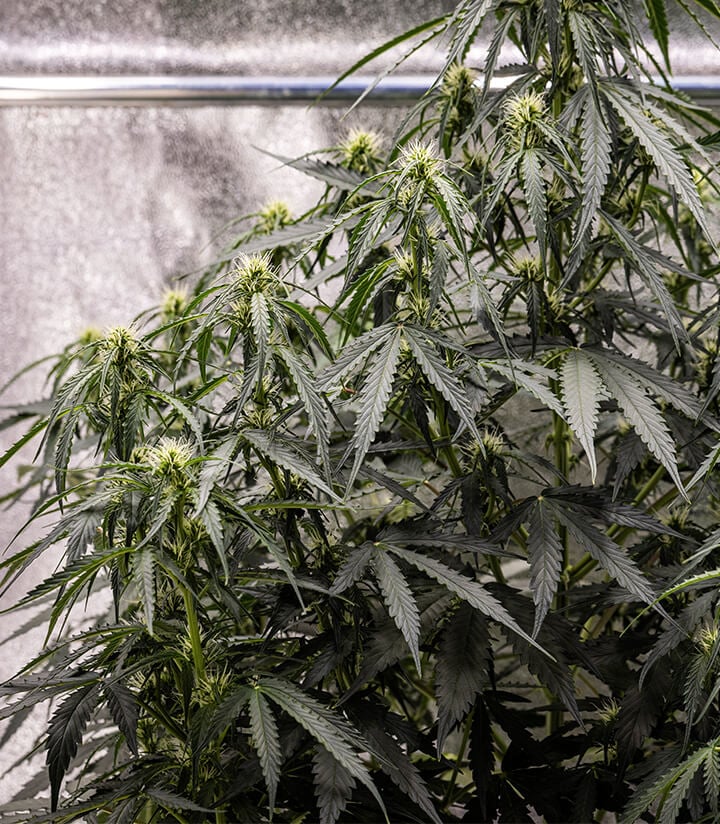
- Plant status: My plant reached a height of 73 cm by the end of the week. The buds continued to develop, with many brilliant white pistils and plenty of trichomes on each flower.
Week 7
We’re about halfway through Corkscrew Auto’s brief flowering stage!
- Lighting: I continued running my lamp for 18 hours per day and readjusted it to hang 35 cm above the tip of my plant.
- Nutrients: On day three of the week, I mixed 3 ml of CalMag, 1.5 ml of Bigger Flowers, and 1.5 ml of Thicker Flowers into 3 l of pH-adjusted water and fed my plant. I applied the exact same formula on day six of the week.
- Environment: I once again recorded an average temperature of 30°C. I toyed around with the idea of placing an air conditioner in the growing space to bring down the high temps, fueled by the summer heat outdoors, but simply didn’t have one to hand. Maybe next time! Humidity clocked in at 55%.
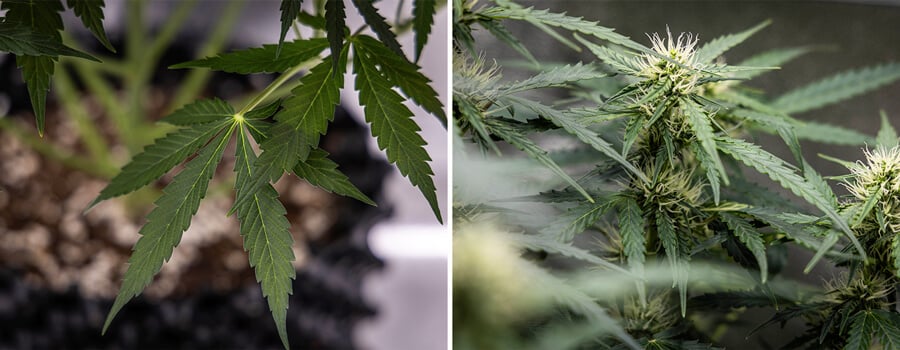
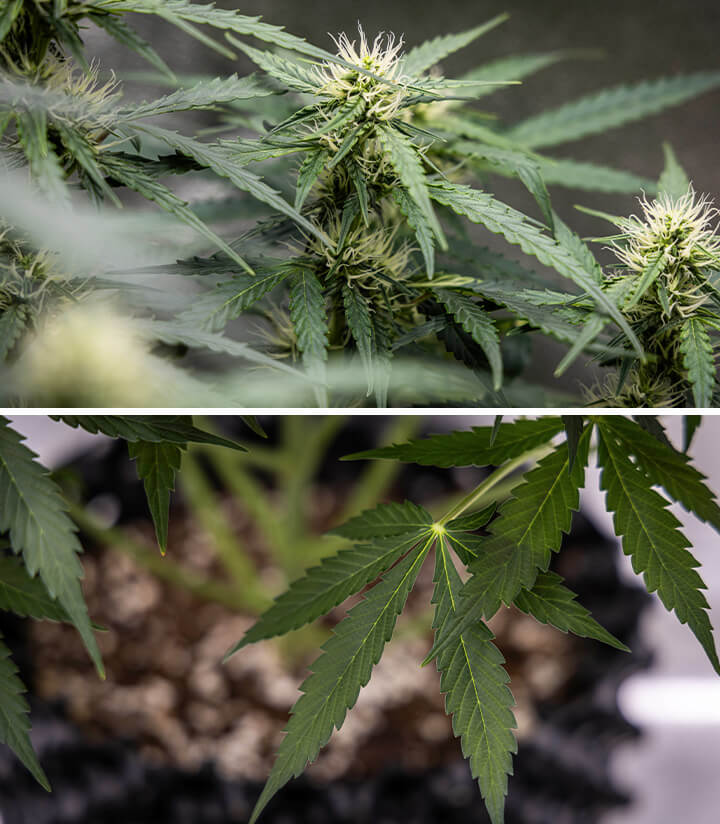
- Plant status: Stretching slowed down and my plant topped out at 80 cm by the end of the week. The smell in the growing room became noticeably stronger.
Weeks 8 & 9
We’re nearing the end of the flowering stage! Weeks eight and nine marked the final feeds before the pre-harvest flush.
- Lighting: I continued running my lamp for 18 hours per day and readjusted the straps to make it hang 35 cm above the tip of my plant.
- Nutrients: I applied 3 l of water mixed with 3 ml of CalMag, 1.5 ml of Bigger Flowers, and 1.5 ml of Thicker Flowers on days three and six of both weeks.
- Environment: Temperatures climbed even higher to 31°C and humidity clocked in at 55%.
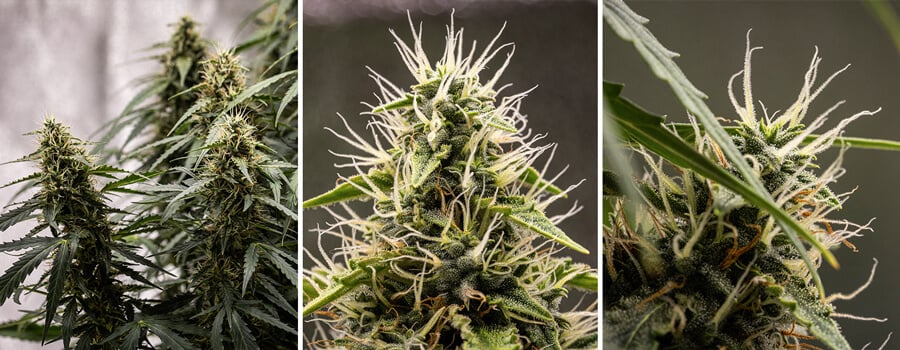
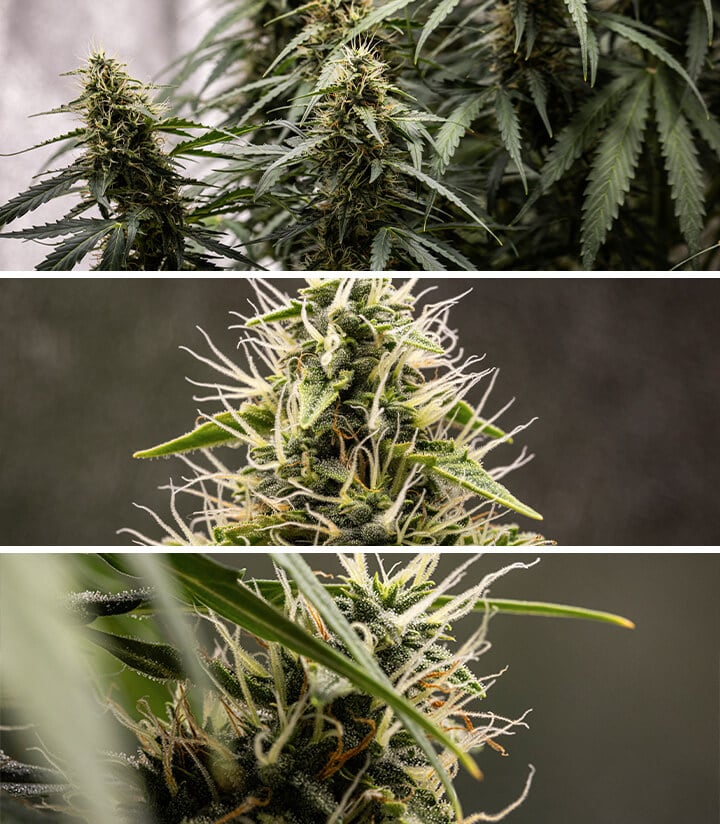
- Plant status: My plant grew just 1 cm, maxing out at 81 cm total. Some of the older leaves started to turn yellow, and the buds started to show signs of maturity in the forms of amber pistils and milkier trichomes.
Week 10
We’ve made it to the final week of my Corkscrew Auto week-by-week growing journal! This week was hands-off as I simply flushed my plant.
- Lighting: I continued running my lamp for 18 hours per day, readjusting it to hang 35 cm above the tip of my plant.
- Nutrients: I withheld all nutrients and applied 3 l of pH-adjusted water on day three and day six of the week.
- Environment: I recorded an average temperature of 30°C and a relative humidity of 45%.
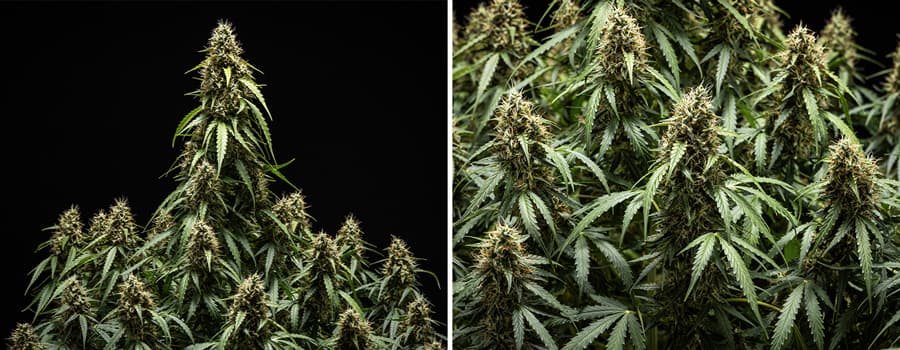
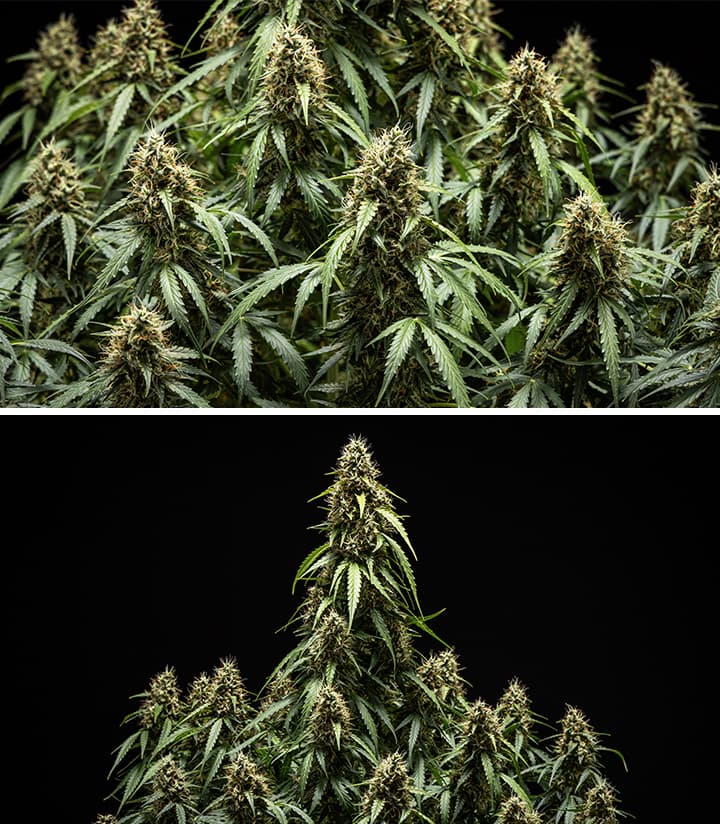
- Plant status: At the end of week 10, my plant looked mature and ready to harvest. Find out how much it yielded below!
Corkscrew Auto Grow Journal: Harvest
I cut my plant at the base just above the soil and hung it upside down to dry. I turned off my lamp and kept my fans running. After drying for seven days, I trimmed my buds and placed them on the scales. I managed to obtain a yield of 450 g/m². I placed my buds into curing jars to finish processing them over the next six weeks.
Genetic Attributes of Corkscrew Auto
Corkscrew Auto derives from a breeding carried out by Mike Tyson and his Tyson 2.0 team, and made available in seed form thanks to RQS. By crossing parent strains Cherry Pie Auto and Tangie, the original breeders created a progeny with 55% sativa genetics, 40% indica, and 5% ruderalis.
Growing Characteristics of Corkscrew Auto
Corkscrew Auto bursts from seed to harvest in a matter of weeks. Indoor plants remain at a compact height of 70–100 cm, whereas outdoor plants can peak at 150 cm when given enough space. Expect indoor returns of up to 500 g/m² and yields of 90–175 g/plant outdoors.
Effects, Aromas, and Flavors of Corkscrew Auto
Corkscrew Auto buds are packed with terpenes that provide notes of candy, citrus, and pineapple. As these flavors begin to fade, you’ll feel a mellow, focused, and uplifting high set in, fueled by a THC content of 19%.
Corkscrew Auto
|
|
Cherry Pie Auto x Tangie |
|
|
16 to 19 oz/m² |
|
|
2 to 3 feet |
|
|
8 - 10 weeks |
|
|
THC: 19% |
|
|
Sativa 55% Indica 40% Ruderalis 5% |
|
|
3 to 6 oz/plant |
|
|
4 to 5 feet |
|
|
12 - 13 after sprouting |
|
|
Focus , Uplifting |


